Note
Access to this page requires authorization. You can try signing in or changing directories.
Access to this page requires authorization. You can try changing directories.
Note
The Time Series Insights service will be retired on 7 July 2024. Consider migrating existing environments to alternative solutions as soon as possible.
Caution
This is a Gen1 article.
This article explains how to create and configure an event hub in Azure Event Hubs. It also describes how to run a sample application to push events to Azure Time Series Insights from Event Hubs. If you have an existing event hub with events in JSON format, skip this tutorial and view your environment in Azure Time Series Insights.
Configure an event hub
To learn how to create an event hub, read the Event Hubs documentation.
In the search box, search for Event Hubs. In the returned list, select Event Hubs.
Select your event hub.
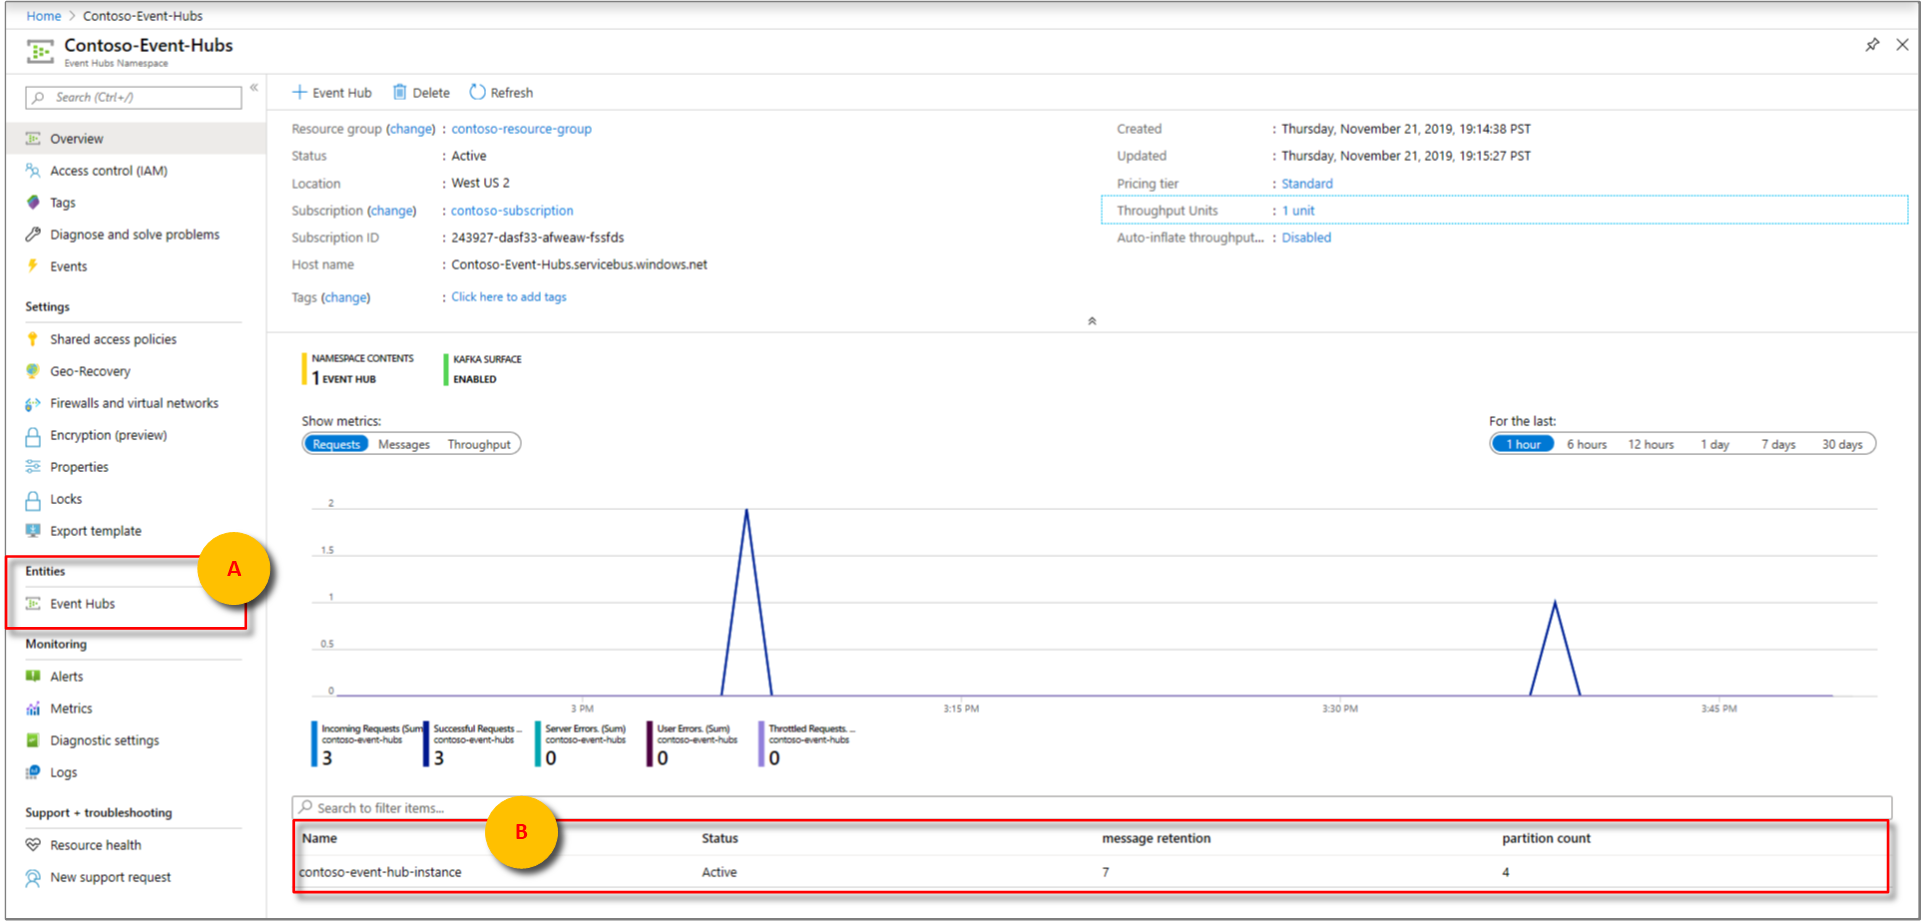
When you create an event hub, you're creating an event hub namespace. If you haven't yet created an event hub within the namespace, on the menu, under Entities, create an event hub.
After you create an event hub, select it in the list of event hubs.
On the menu, under Entities, select Event Hubs.
Select the name of the event hub to configure it.
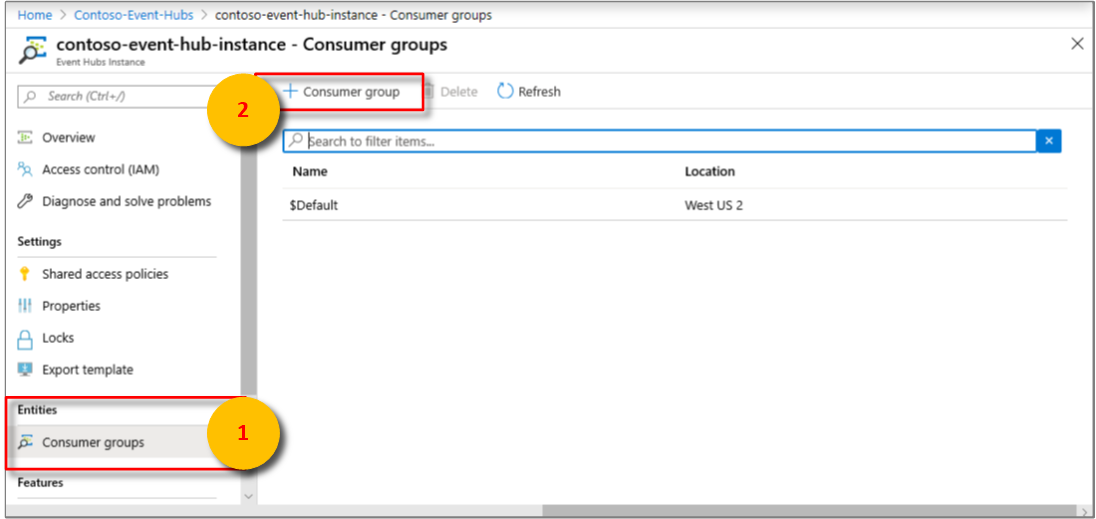
Under Overview, select Consumer groups, and then select Consumer Group.
Make sure you create a consumer group that's used exclusively by your Azure Time Series Insights event source.
Important
Make sure this consumer group isn't used by any other service, such as an Azure Stream Analytics job or another Azure Time Series Insights environment. If the consumer group is used by the other services, read operations are negatively affected both for this environment and for other services. If you use $Default as the consumer group, other readers might potentially reuse your consumer group.
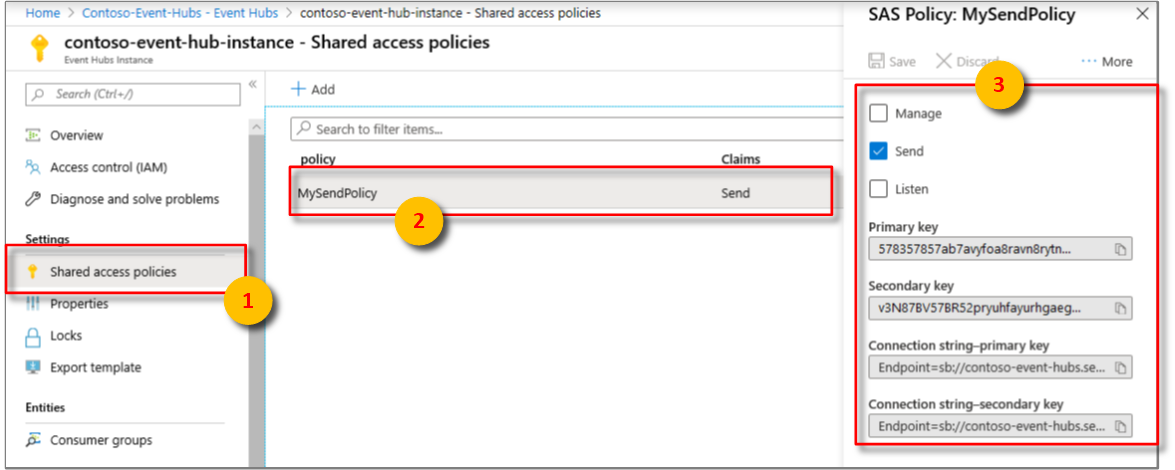
On the menu, under Settings, select Shared access policies, and then select Add.
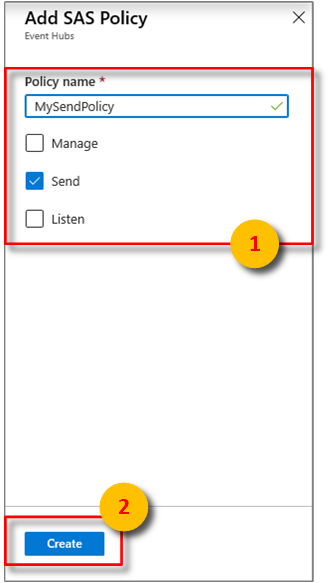
In the Add new shared access policy pane, create a shared access named MySendPolicy. You use this shared access policy to send events in the C# examples later in this article.
Under Claim, select the Send check box.
Add an Azure Time Series Insights instance
In Azure Time Series Insights Gen2, you can add contextual data to incoming telemetry using the Time Series Model (TSM). In TSM, your tags or signals are referred to as instances, and you can store contextual data in instance fields. The data is joined at query time by using a Time Series ID. The Time Series ID for the sample windmills project that we use later in this article is id. To learn more about storing data in instance fields read the Time Series Model overview.
Create an Azure Time Series Insights event source
If you haven't created an event source, complete the steps to create an event source.
Set a value for
timeSeriesId. To learn more about Time Series ID, read Time Series Models.
Push events to windmills sample
In the search bar, search for Event Hubs. In the returned list, select Event Hubs.
Select your event hub instance.
Go to Shared Access Policies > MySendPolicy. Copy the value for Connection string-primary key.
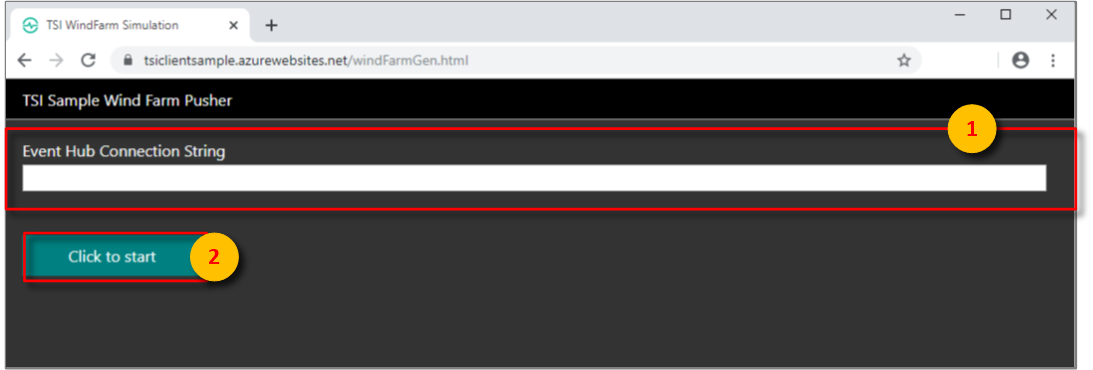
Navigate to the TSI Sample Wind Farm Pusher. The site creates and runs simulated windmill devices.
In the Event Hub Connection String box on the webpage, paste the connection string that you copied in the windmill input field.
Select Click to start.
Tip
The windmill simulator also creates JSON you can use as a payload with the Azure Time Series Insights GA Query APIs.
Note
The simulator will continue to send data until the browser tab is closed.
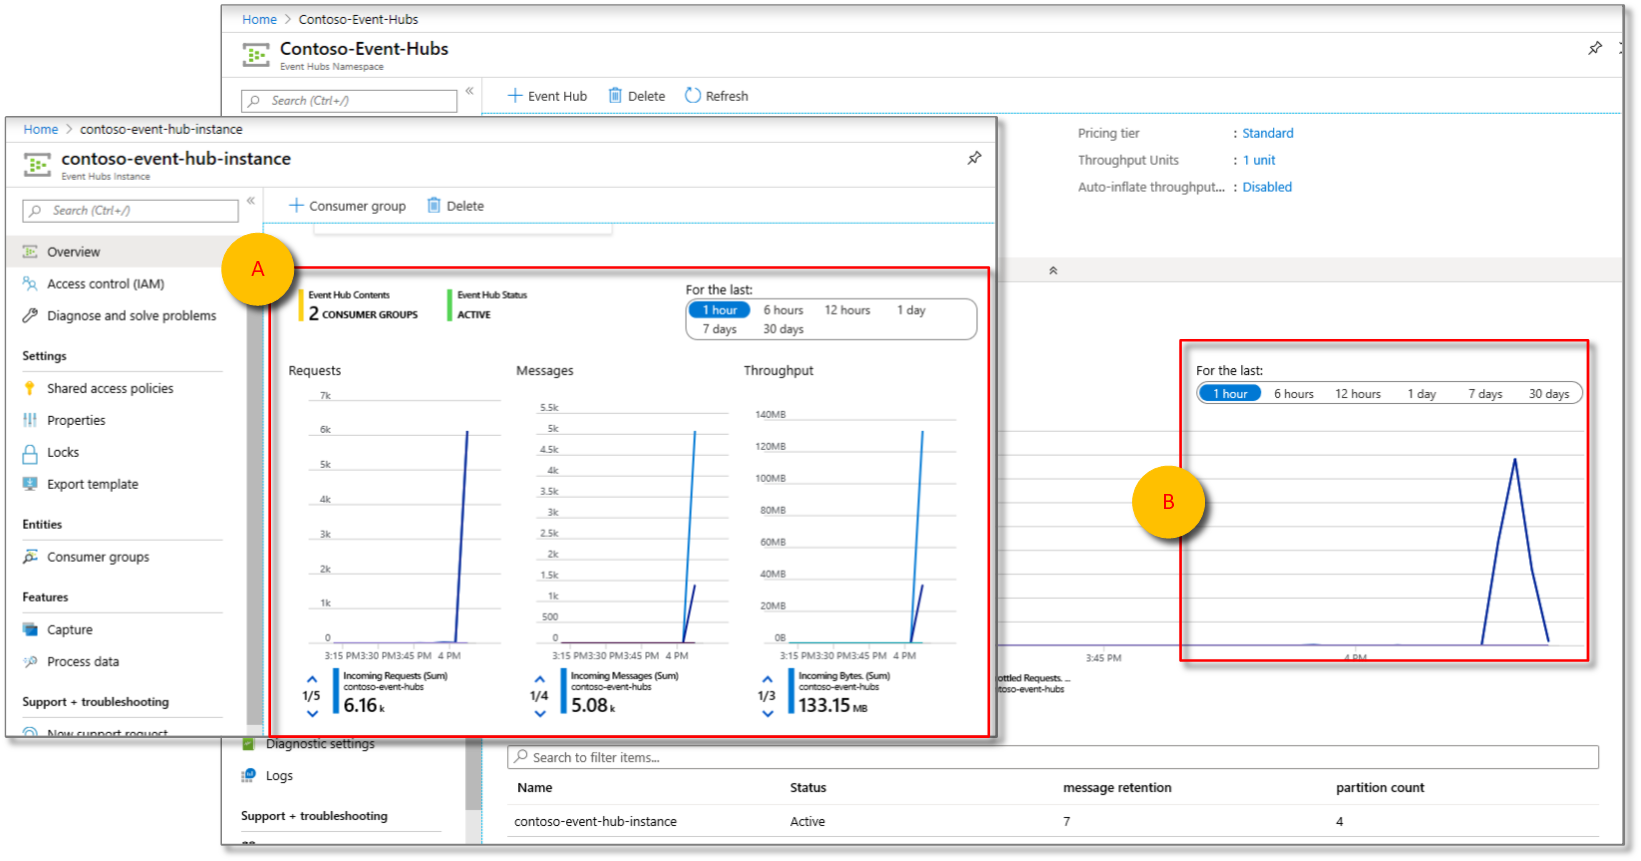
Go back to your event hub in the Azure portal. On the Overview page, the new events received by the event hub are displayed.
Supported JSON shapes
Example one
Input: A simple JSON object.
{ "id":"device1", "timestamp":"2016-01-08T01:08:00Z" }Output: One event.
id timestamp device1 2016-01-08T01:08:00Z
Example two
Input: A JSON array with two JSON objects. Each JSON object is converted to an event.
[ { "id":"device1", "timestamp":"2016-01-08T01:08:00Z" }, { "id":"device2", "timestamp":"2016-01-17T01:17:00Z" } ]Output: Two events.
id timestamp device1 2016-01-08T01:08:00Z device2 2016-01-08T01:17:00Z
Example three
Input: A JSON object with a nested JSON array that contains two JSON objects.
{ "location":"chinaeast2", "events":[ { "id":"device1", "timestamp":"2016-01-08T01:08:00Z" }, { "id":"device2", "timestamp":"2016-01-17T01:17:00Z" } ] }Output: Two events. The property location is copied over to each event.
location events.id events.timestamp chinaeast2 device1 2016-01-08T01:08:00Z chinaeast2 device2 2016-01-08T01:17:00Z
Example four
Input: A JSON object with a nested JSON array that contains two JSON objects. This input demonstrates that global properties can be represented by the complex JSON object.
{ "location":"chinaeast2", "manufacturer":{ "name":"manufacturer1", "location":"chinaeast2" }, "events":[ { "id":"device1", "timestamp":"2016-01-08T01:08:00Z", "data":{ "type":"pressure", "units":"psi", "value":108.09 } }, { "id":"device2", "timestamp":"2016-01-17T01:17:00Z", "data":{ "type":"vibration", "units":"abs G", "value":217.09 } } ] }Output: Two events.
location manufacturer.name manufacturer.location events.id events.timestamp events.data.type events.data.units events.data.value chinaeast2 manufacturer1 chinaeast2 device1 2016-01-08T01:08:00Z pressure psi 108.09 chinaeast2 manufacturer1 chinaeast2 device2 2016-01-08T01:17:00Z vibration abs G 217.09
Next steps
- Read more about IoT Hub device messages
