Monitor and analyze jobs in studio
You can use Azure Machine Learning studio to monitor, organize, and track your jobs for training and experimentation. Your machine learning (ML) job history is an important part of an explainable and repeatable ML development process.
This article explains how to:
- Add a job display name.
- Create a custom view.
- Add a job description.
- Tag and find jobs.
- Run search over your job history.
- Cancel or fail jobs.
- Monitor job status by email notification.
- Monitor your job resources (preview).
Tip
- For information on using the Azure Machine Learning SDK v1 or CLI v1, see Monitor and analyze jobs in studio (v1).
- To learn how to monitor training jobs from the CLI or SDK v2, see Track ML experiments and models with MLflow (v2).
- To learn how to monitor the Azure Machine Learning service and associated Azure services, see Monitor Azure Machine Learning.
- To learn how to monitor models deployed to online endpoints, see Monitor online endpoints.
Prerequisites
You need the following items:
- To use Azure Machine Learning, you must have an Azure subscription. If you don't have an Azure subscription, create a trial subscription before you begin. Try the trial subscription.
- You must have an Azure Machine Learning workspace. A workspace is created in Install, set up, and use the CLI (v2).
Job display name
The job display name is an optional and customizable name that you can provide for your job. To edit the job display name:
Navigate to the Jobs list.
Select the job to edit.

Select the Edit button to edit the job display name.

Custom view
To view your jobs in the studio:
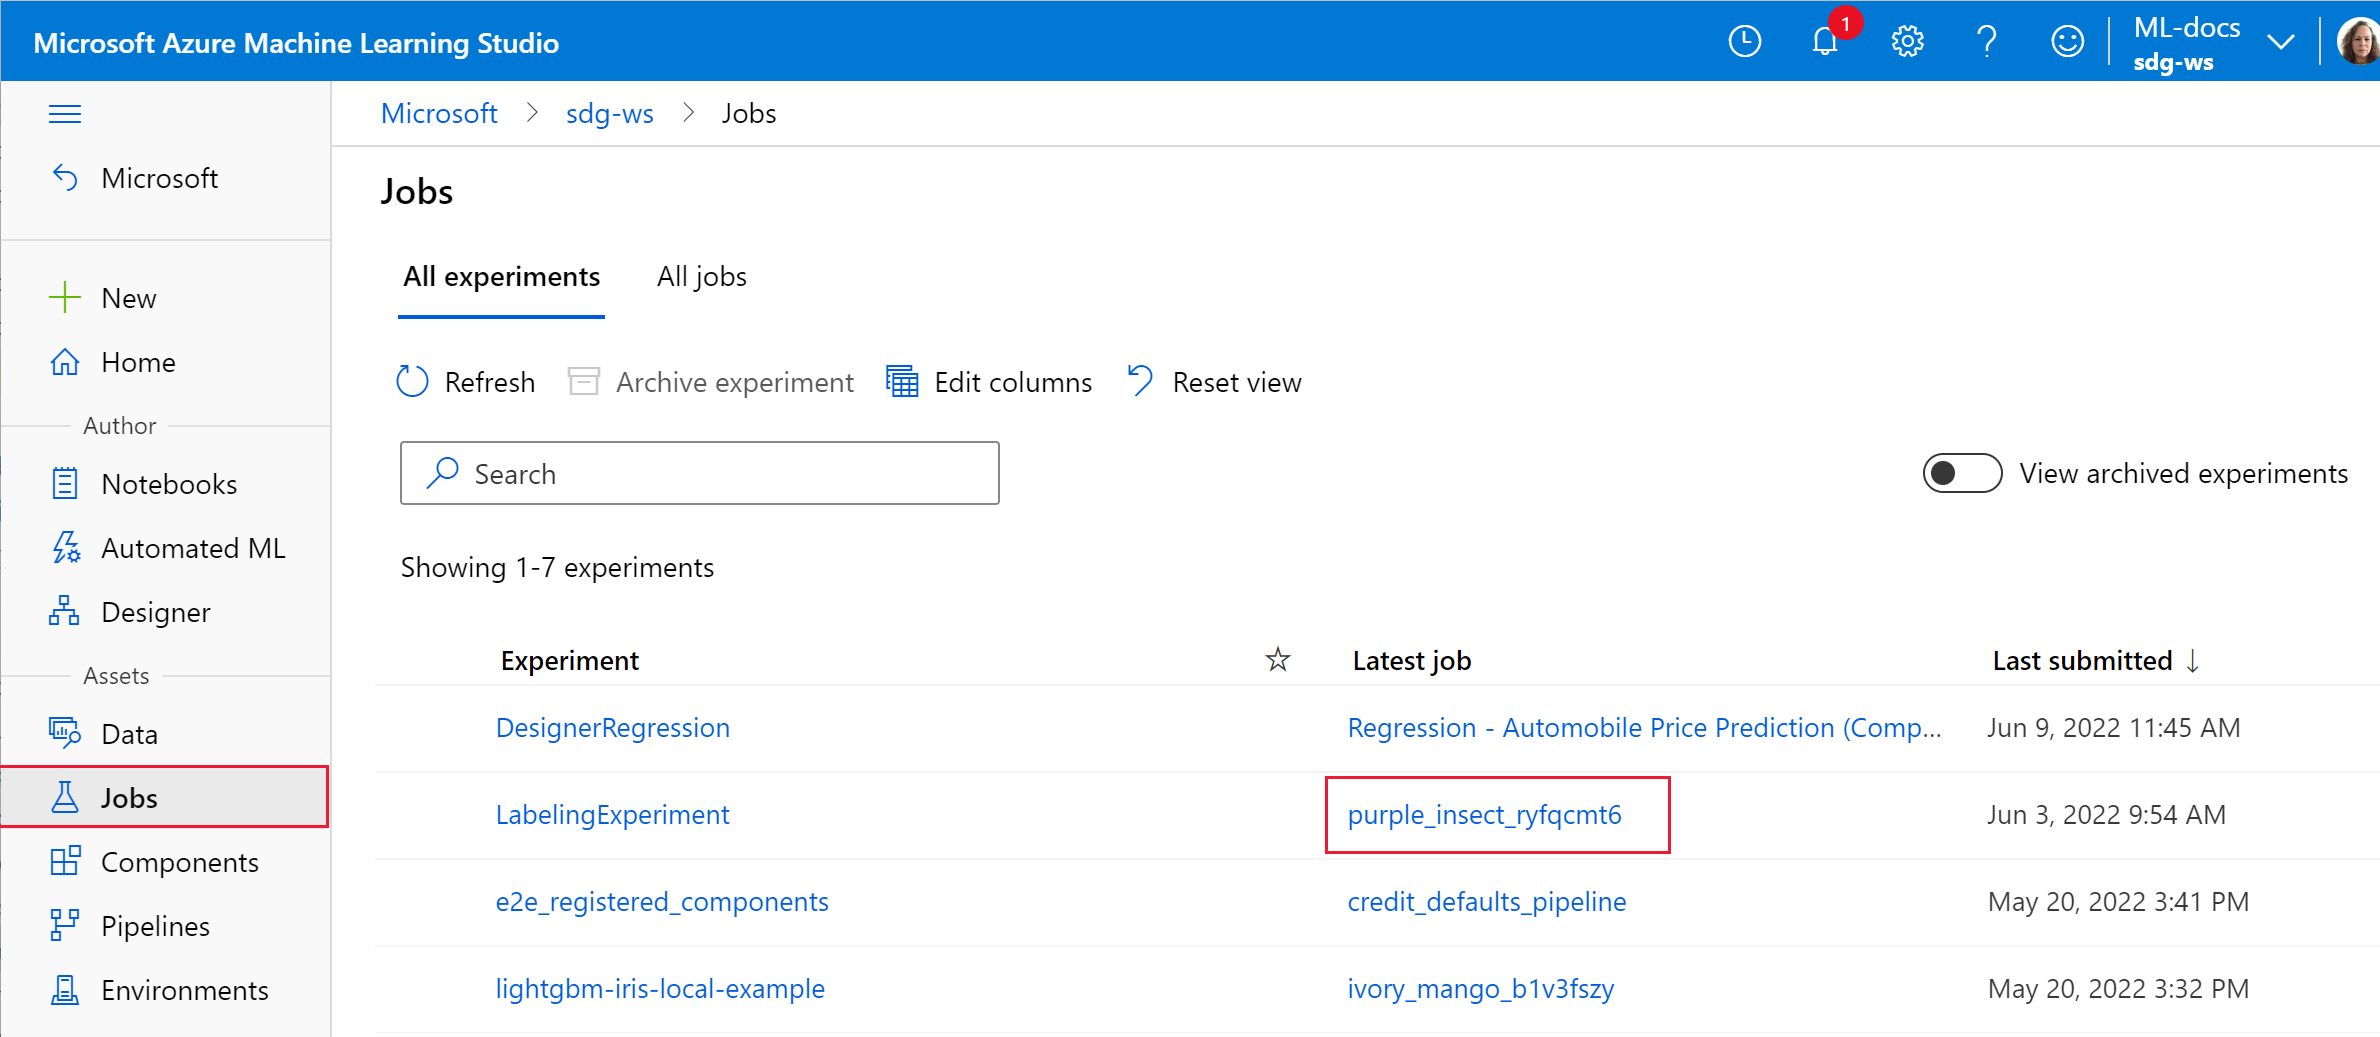
Navigate to the Jobs tab.
Select either All experiments to view all the jobs in an experiment, or select All jobs to view all the jobs submitted in the Workspace.
On the All jobs page, you can filter the jobs list by tags, experiments, compute target, and more to better organize and scope your work.
Make customizations to the page by selecting jobs to compare, adding charts, or applying filters. These changes can be saved as a Custom view so you can easily return to your work. Users with workspace permissions can edit or view the custom view. Also, share the custom view with team members for enhanced collaboration by selecting Share view.

To view the job logs, select a specific job and in the Outputs + logs tab, you can find diagnostic and error logs for your job.
Job description
You can add a job description to provide more context and information to the job. You can also search on these descriptions from the jobs list and add the job description as a column in the jobs list.
Navigate to the details page for your job and select the edit or pencil icon to add, edit, or delete descriptions for your job. To persist the changes to the jobs list, save the changes to your existing custom view or a new custom view. Markdown format is supported for job descriptions, which allows images to be embedded and deep linking as shown.

Tag and find jobs
In Azure Machine Learning, you can use properties and tags to help organize and query your jobs for important information.
Edit tags
You can add, edit, or delete job tags from the studio. Navigate to the details page for your job and select the edit or pencil icon to add, edit, or delete tags for your jobs. You can also search and filter on these tags from the jobs list page.

Query properties and tags
You can query jobs within an experiment to return a list of jobs that match specific properties and tags.
To search for specific jobs, navigate to the All jobs list. From there, you have two options:
- Use the Add filter button and select filter on tags to filter your jobs by tag that was assigned to the job(s).
- Use the search bar to quickly find jobs by searching on the job metadata like job status, descriptions, experiment names, and submitter name.
Cancel or fail jobs
If you notice a mistake or if your job is taking too long to finish, you can cancel the job.
To cancel a job in the studio:
Go to the running pipeline in either the Jobs or Pipelines section.
Select the pipeline job number you want to cancel.
In the toolbar, select Cancel.
Monitor job status by email notification
You can use diagnostic settings to trigger email notifications. To learn how to create diagnostic settings, see Create diagnostic settings in Azure Monitor.
To learn how to create and manage log alerts using Azure Monitor, see Create or edit a log search alert rule.