Evaluate Azure Stack HCI
Important
This guide is for evaluation purposes only. It SHOULD NOT be used for a production environment.
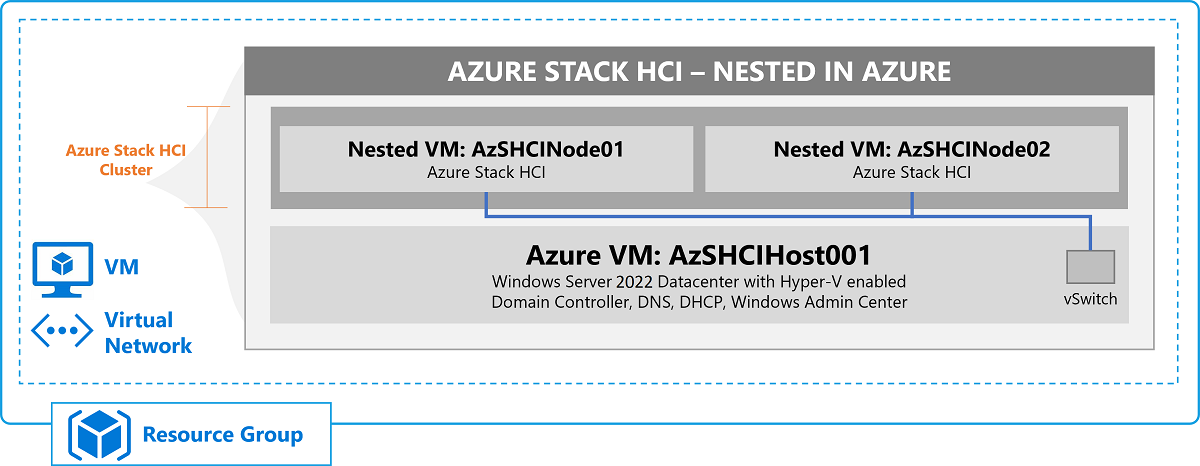
This guide shows you how to quickly deploy and evaluate a virtualized Azure Stack HCI cluster with no hardware investment. In this guide, you deploy a Windows Server 2022 DC Azure virtual machine (VM), which uses Hyper-V nested-virtualization to host the following VMs:
- One VM running Windows Server 2019 DC. This VM serves as the management VM and hosts Windows Admin Center and an Active Directory domain controller
- Two VMs running Azure Stack HCI 21H2. These are the servers that form the Azure Stack HCI cluster and host the Software-Defined Networking (SDN) infrastructure
Prerequisites
Before beginning, make sure you have:
- An Azure subscription capable of deploying Azure VMs with at least 16 virtual CPUs.
- An Azure account capable of accessing:
- your Azure subscription using Azure RBAC membership in:
- either the "Owner" role (you're already a member if you created the subscription)
- or the "User Access Administrator" and "Contributor" roles
- your Microsoft Entra tenant using Microsoft Entra RBAC membership in:
- the "Cloud application administrator" role
- your Azure subscription using Azure RBAC membership in:
- A basic understanding of how to use the Azure portal, in particular creating and connecting to a VM.
Deploy the Azure VM
First you deploy an Azure VM to simulate a physical server. The VM is configured, with Windows Server, Hyper-V, networking components, and storage. Later you deploy nested VMs for the two Azure Stack HCI nodes, and an additional VM to host a Windows domain controller and Windows Admin Center.
Select the Deploy to Azure button to sign in to the Azure portal, and proceed with the Azure VM deployment:
Tip
Hold down CTRL while selecting the button to open the Azure portal in a new browser tab.
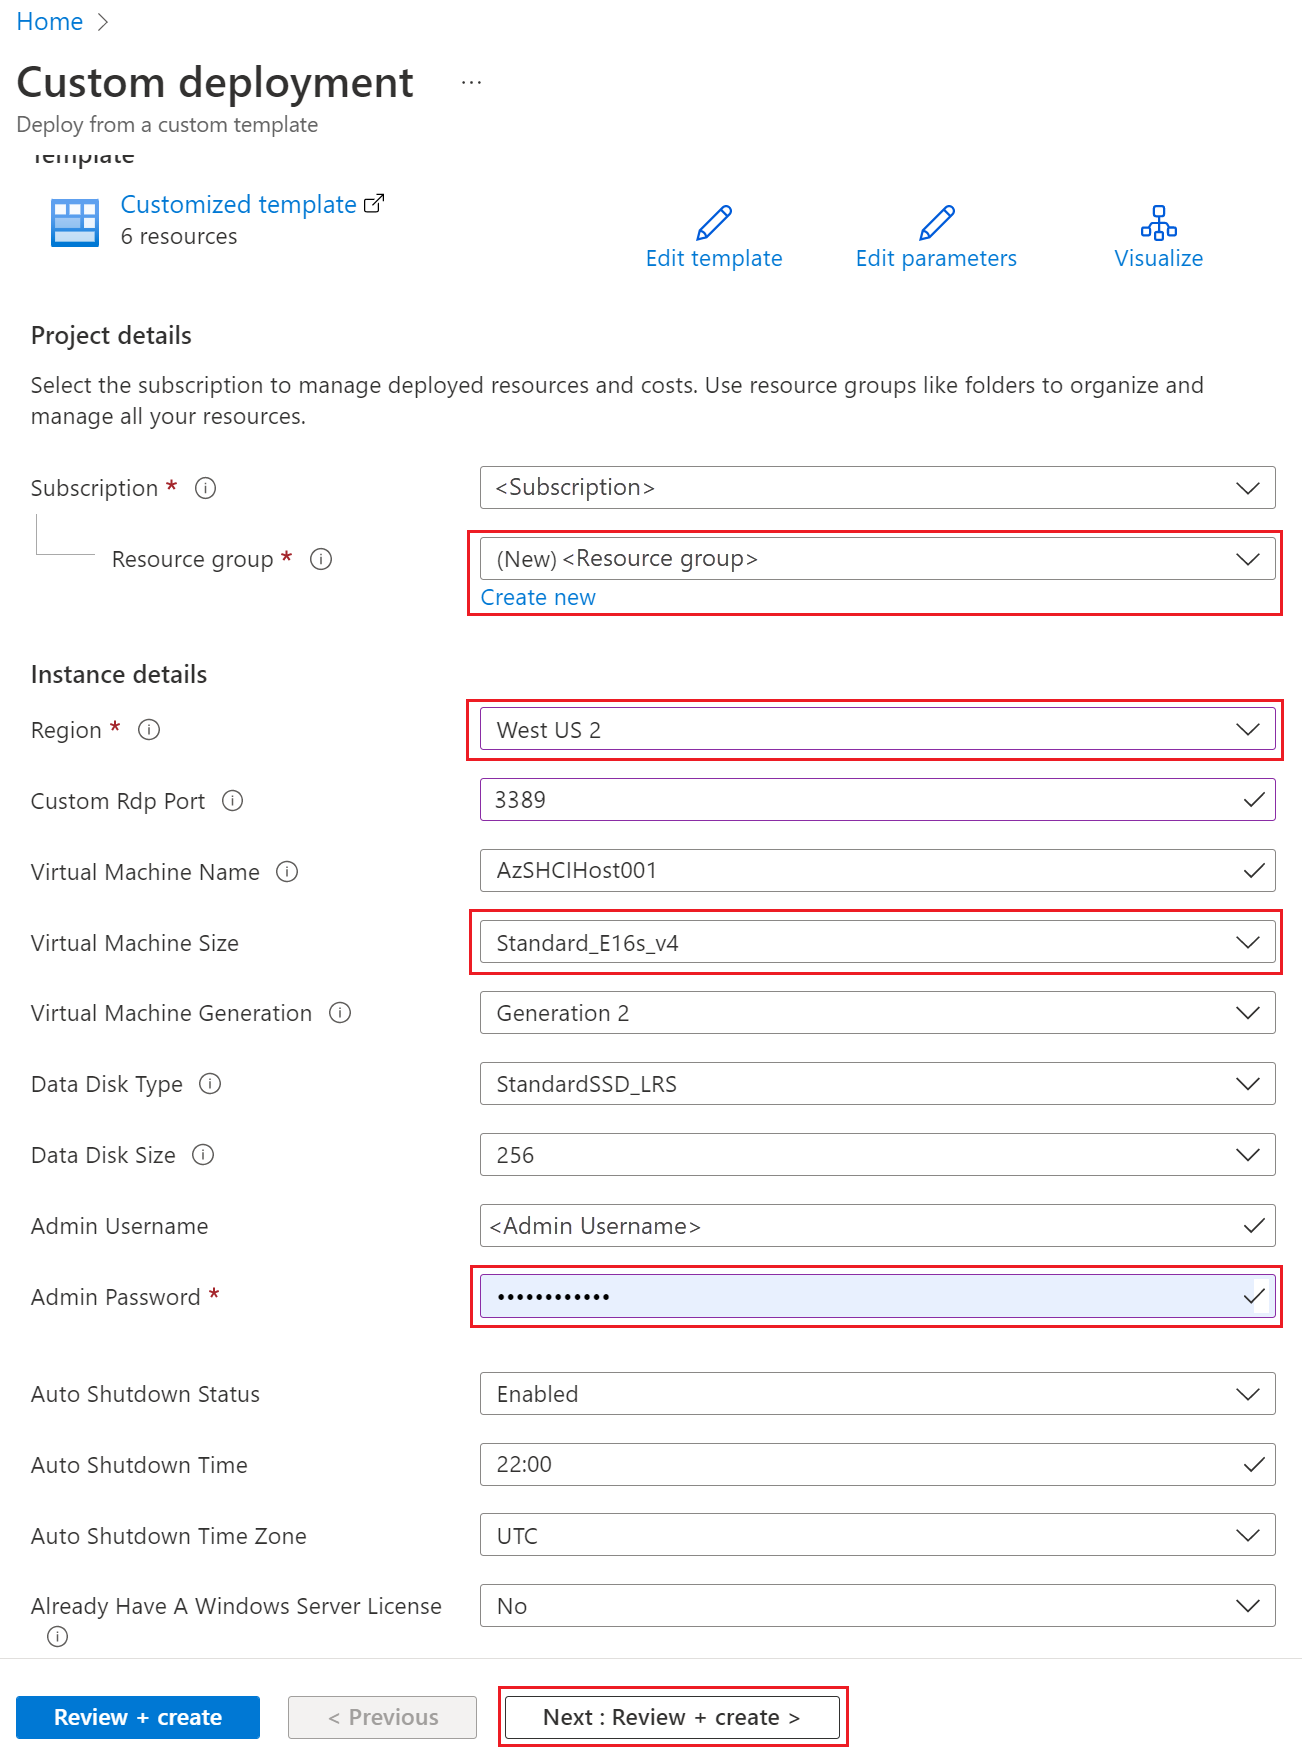
In the Azure portal, you're presented with the Custom deployment form:
- Under Resource group, select Create new, for example "HciEval".
- Select an Azure Region for your VM and verify that "Standard_E16s_v4" is selected for Virtual Machine Size
- Specify an Admin Password.
- If you have Software Assurance Azure Hybrid Benefit for Windows Server, select "Yes" for Already Have a Windows Server License.
- Select Next: Review + create >.
Important
A VM with at least 16 cores, 64-GB memory, nested virtualization, and Premium Storage is required. Temp storage isn't required.
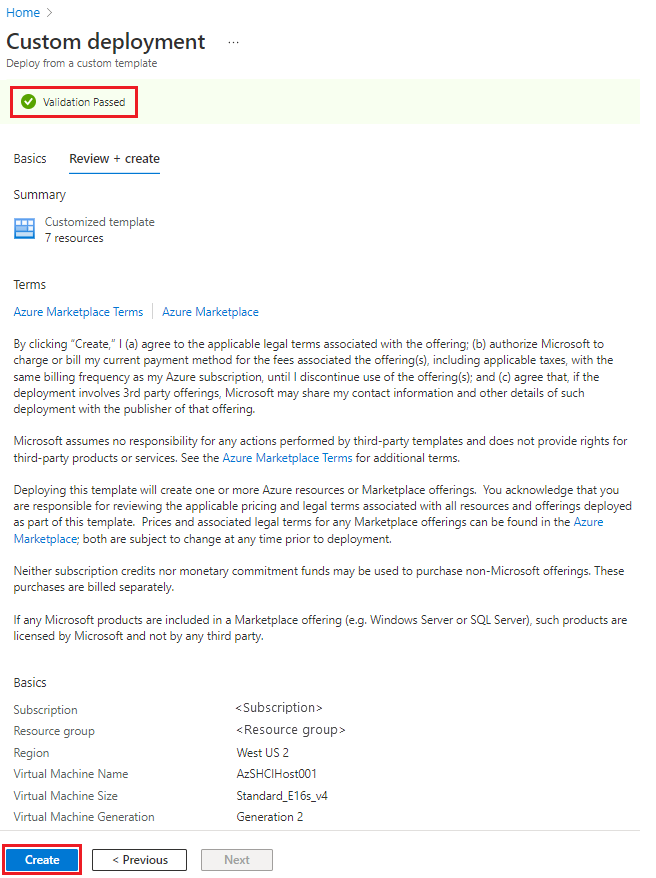
On the Review + create tab, you should see a "Validation passed" message at the top. Select the Create button to continue with deployment.
Note
If validation fails with The requested size for resource <resource> is currently not available in location <region> zones, return to the Basics tab and select a region that supports the Esv4-series VM size.
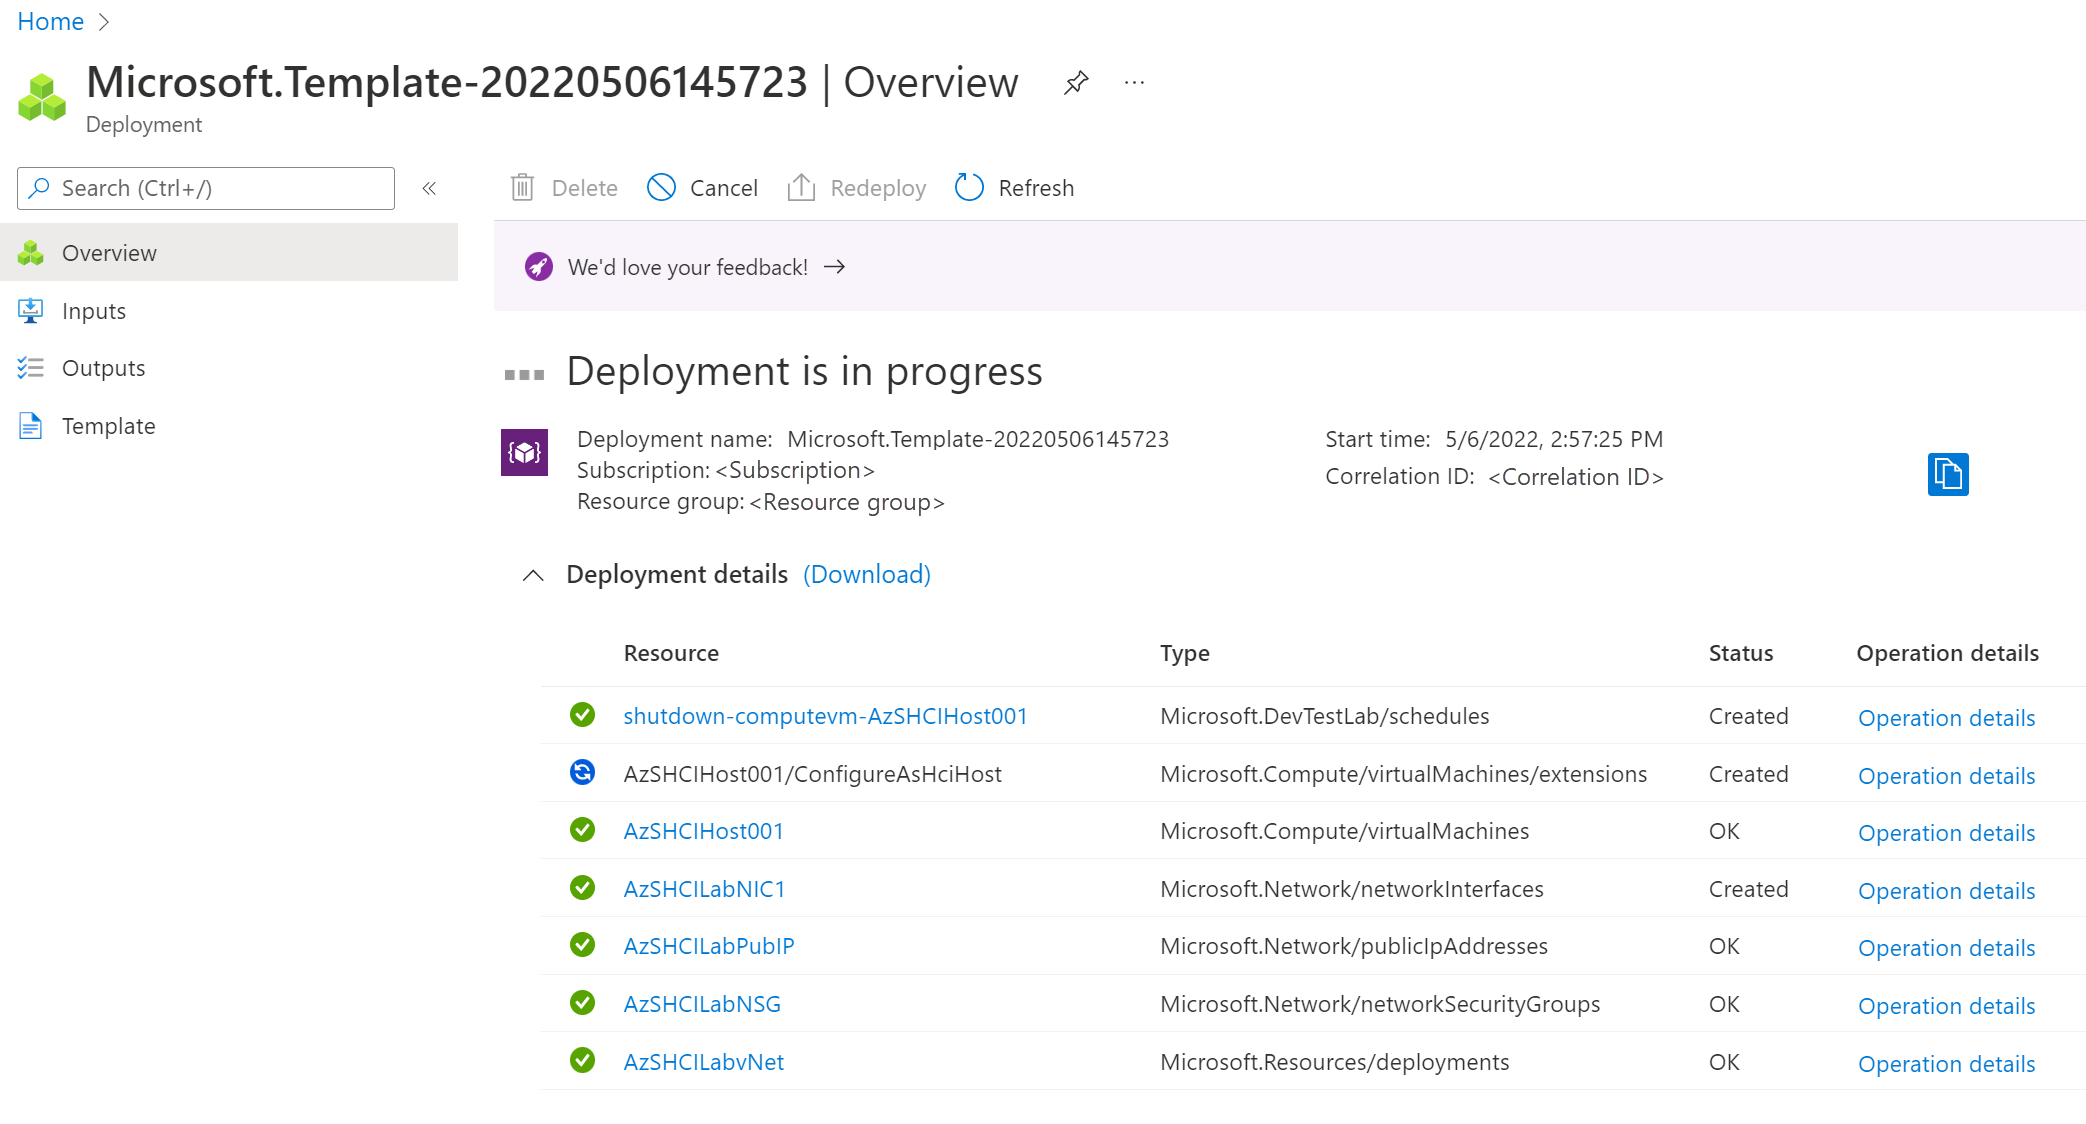
Next you should see a Deployment is in progress" page. Deployment typically takes around 45 minutes.
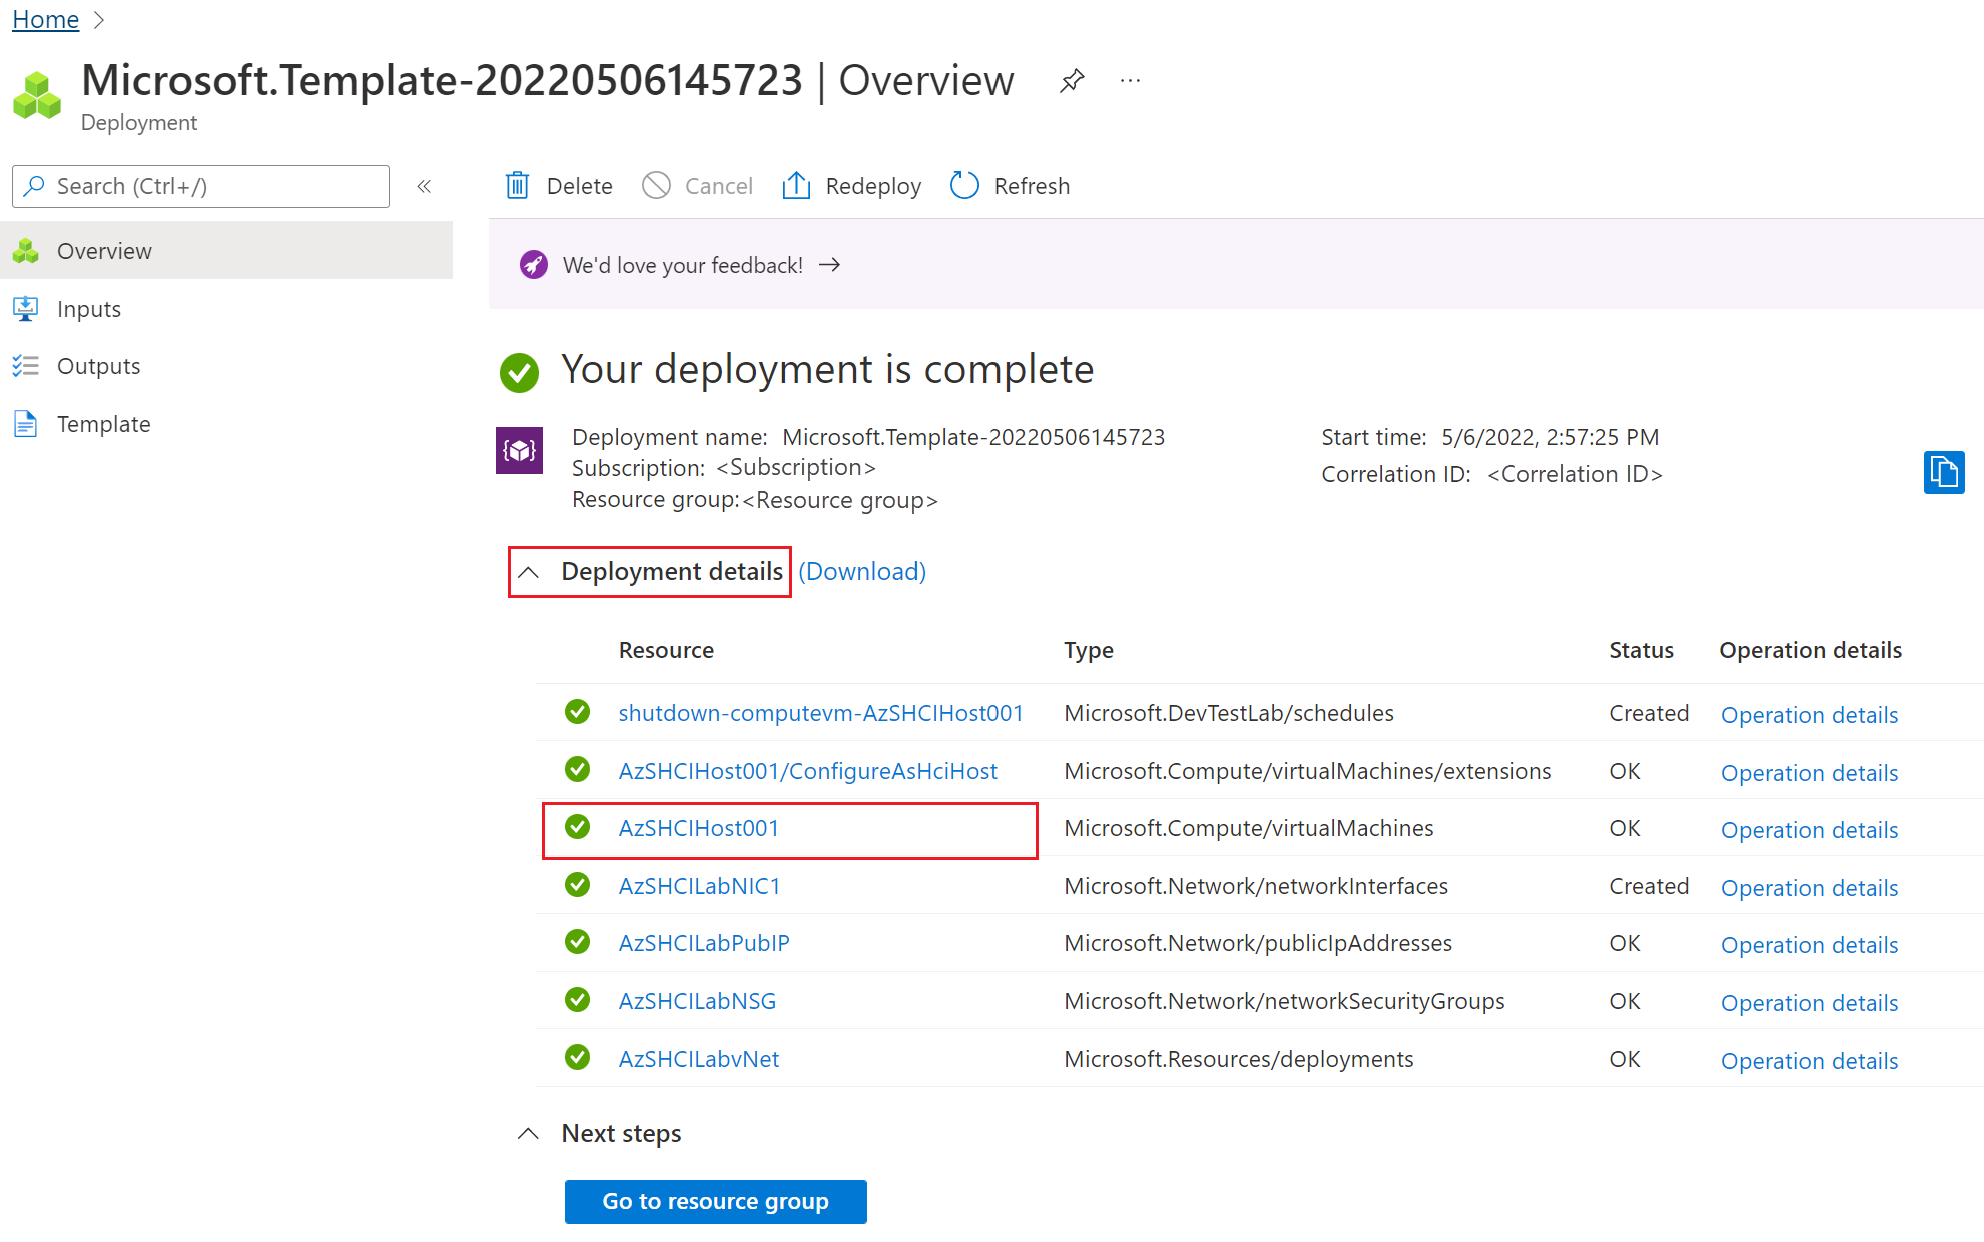
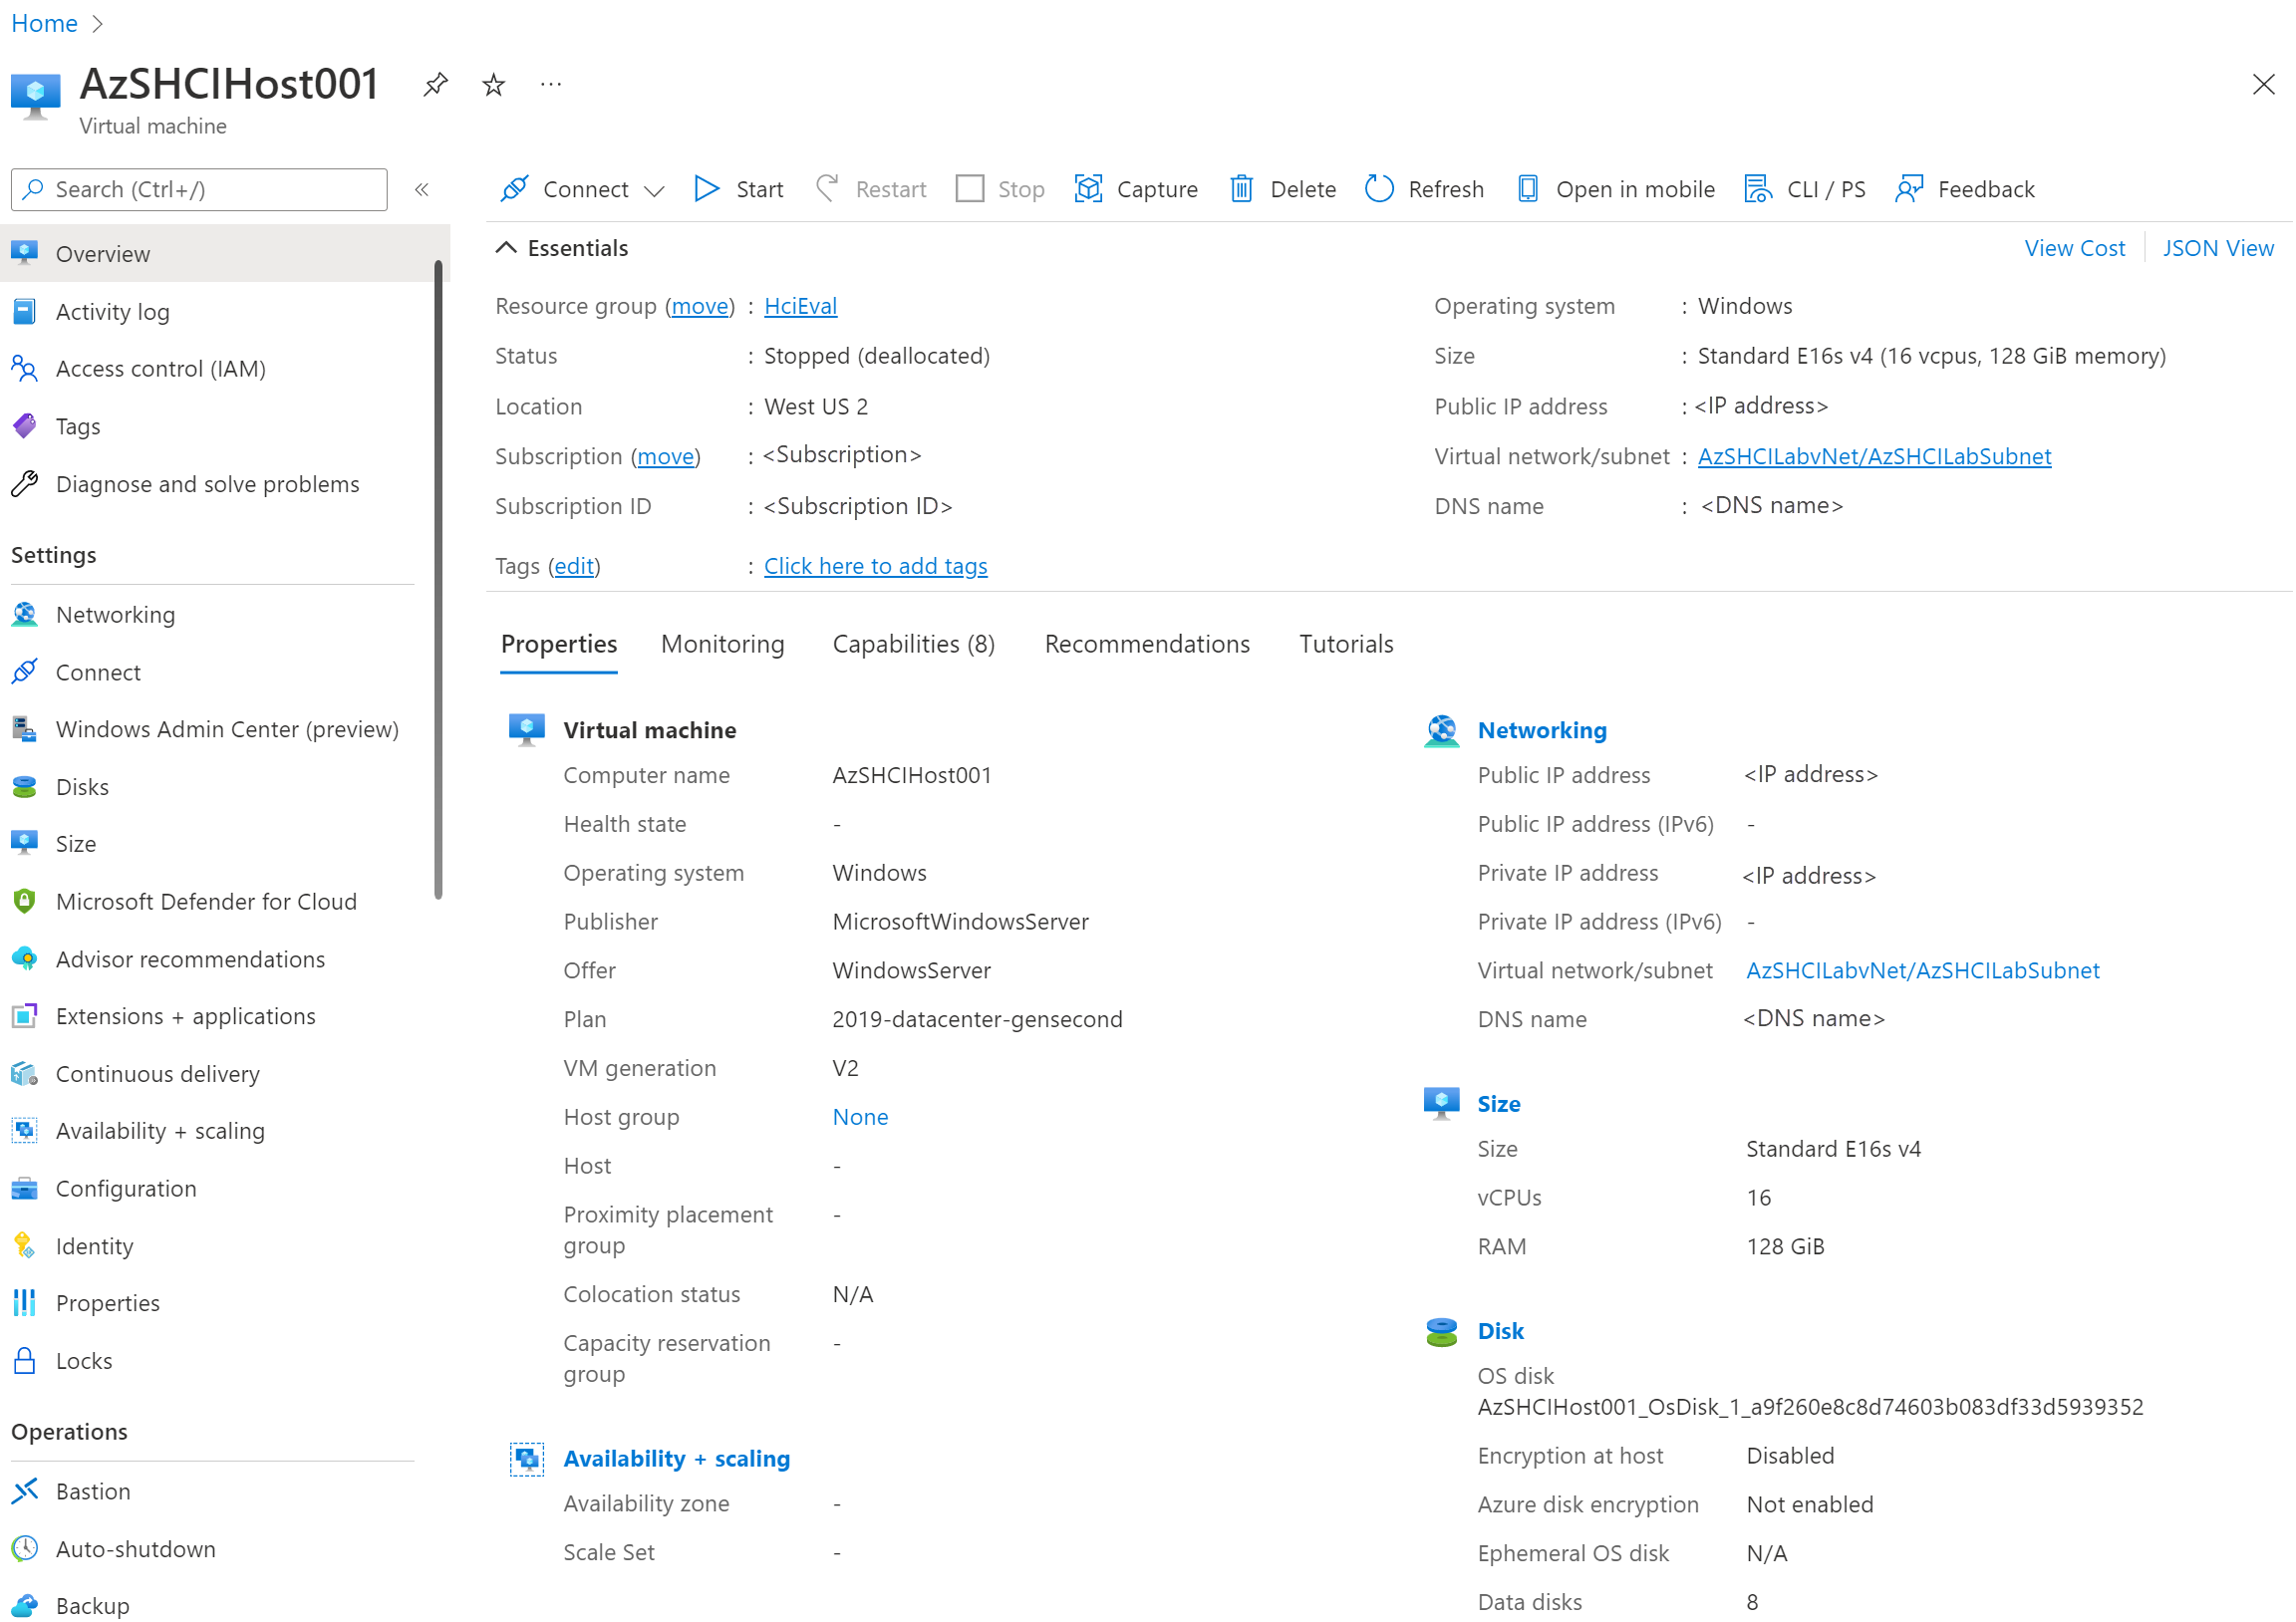
Finally, you should see a Your deployment is complete page. Expand the Deployment details section, and select the "AzSHCIHost001" resource to see your Azure VM.
Select the Next button at the bottom of this page.
Remote into the Azure VM
Now you use Windows Remote Desktop to remote into your new Azure VM:
Return to the "AzSHCIHost001" VM portal page from the previous section, and select the Connect link at the top of the page, then select RDP:
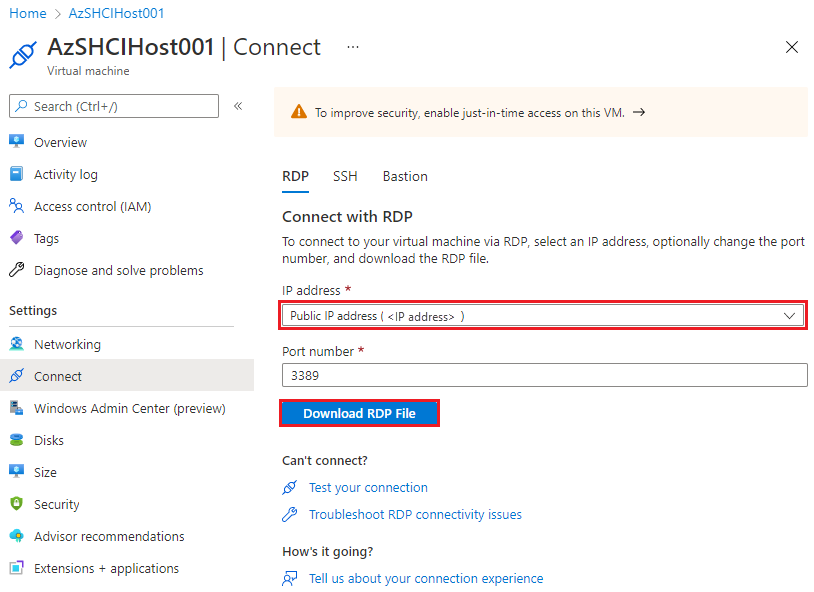
Under IP address select the VM's public IP address, then select the Download RDP File button on the Connect / RDP page:
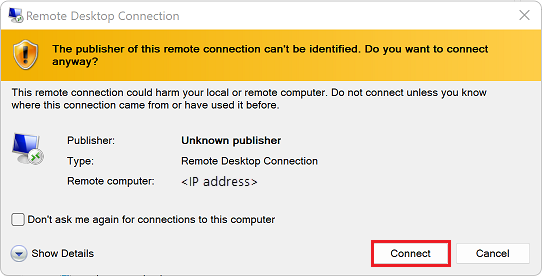
After the .RDP file downloads in your browser, open it, and select Connect on the publisher warning dialog:
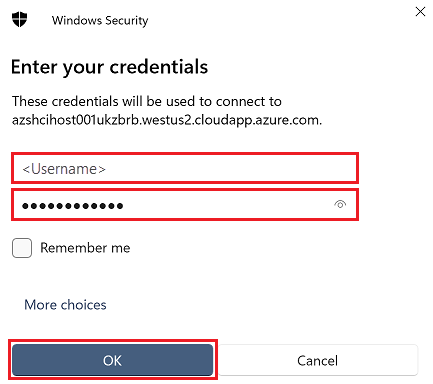
Enter the VM administrator account (preceded with a backslash "\") and the password you specified in the previous Deploy the Azure VM section, then select OK:
Tip
You may need to select More choices then Use a different account in order to enter user name and password credentials.
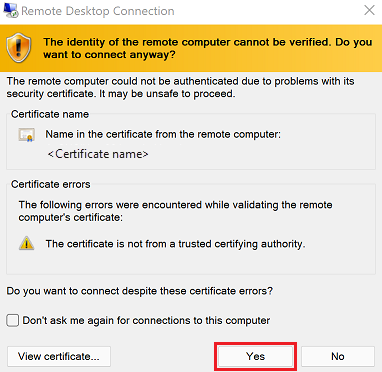
Select the Yes button on the RDP certificate warning dialog:
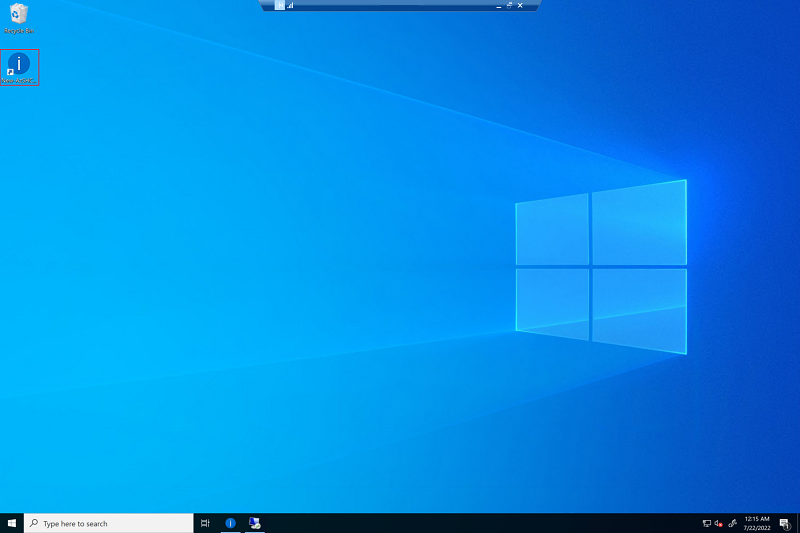
Once you connect to the Azure VM, you see the Windows Server desktop.
Select the Next button at the bottom of this page.
Deploy the Azure Stack HCI cluster
After you remote into the Azure VM, finalize your deployment by running a PowerShell script to provision the Azure Stack HCI and management VMs and create the Azure Stack HCI cluster. The VMs are hosted on the Azure VM using nested virtualization:
Minimize or close the Server Manager app. On the desktop, you should see a New-AzSHCISandbox shortcut icon which opens a PowerShell console to run the script:
Note
Desired State Configuration may still be running in the background, configuring files and deployment scripts. Once complete, the New-AzSHCISandbox shortcut icon appears on the desktop.
To keep the PowerShell console window open after the script finishes, see the following Tip. When ready, double-click the New-AzSHCISandbox shortcut to run the cluster deployment script.
Tip
To keep the PowerShell console window open after the script finishes, right-click the shortcut icon and select Properties, then copy the following command and replace the Target property. This can be useful if you encounter errors during deployment.
PowerShell -NoExit C:\AzHCI_Sandbox\AzSHCISandbox-main\New-AzSHCISandbox.ps1The PowerShell script typically runs for about 1 hour and 50 minutes. When complete, you should see a "Successfully deployed the Azure Stack HCI Sandbox" message:
Select the Next button at the bottom of this page.
Remote into the management VM
The script that ran in the previous section created another shortcut on the Azure VM desktop. You'll use that shortcut to remote into the management VM and sign in to Windows Admin Center:
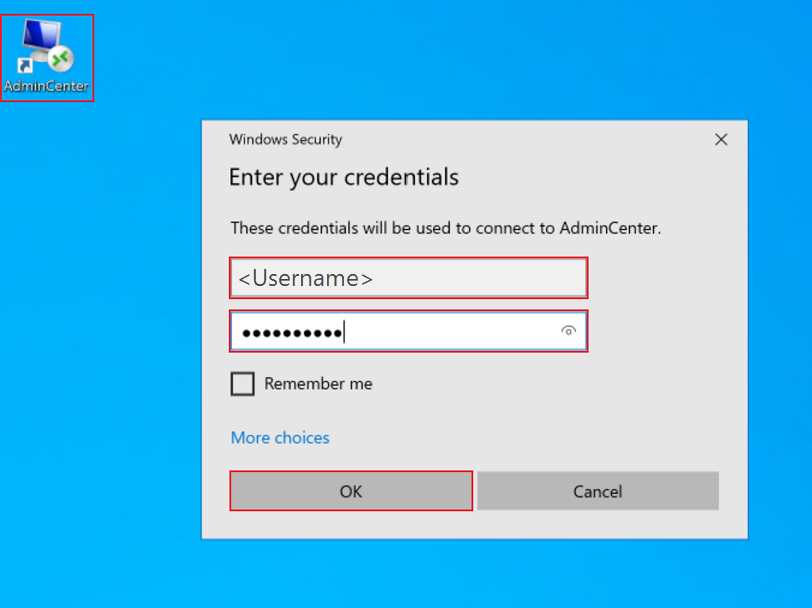
Double-click the AdminCenter icon on the Azure VM desktop, enter user "Contoso\Administrator" and password "Password01", then select OK:
Note
If you get a "Remote Desktop can't find the computer "AdminCenter"" error, you may need to wait a few more minutes for the management VM to complete startup.
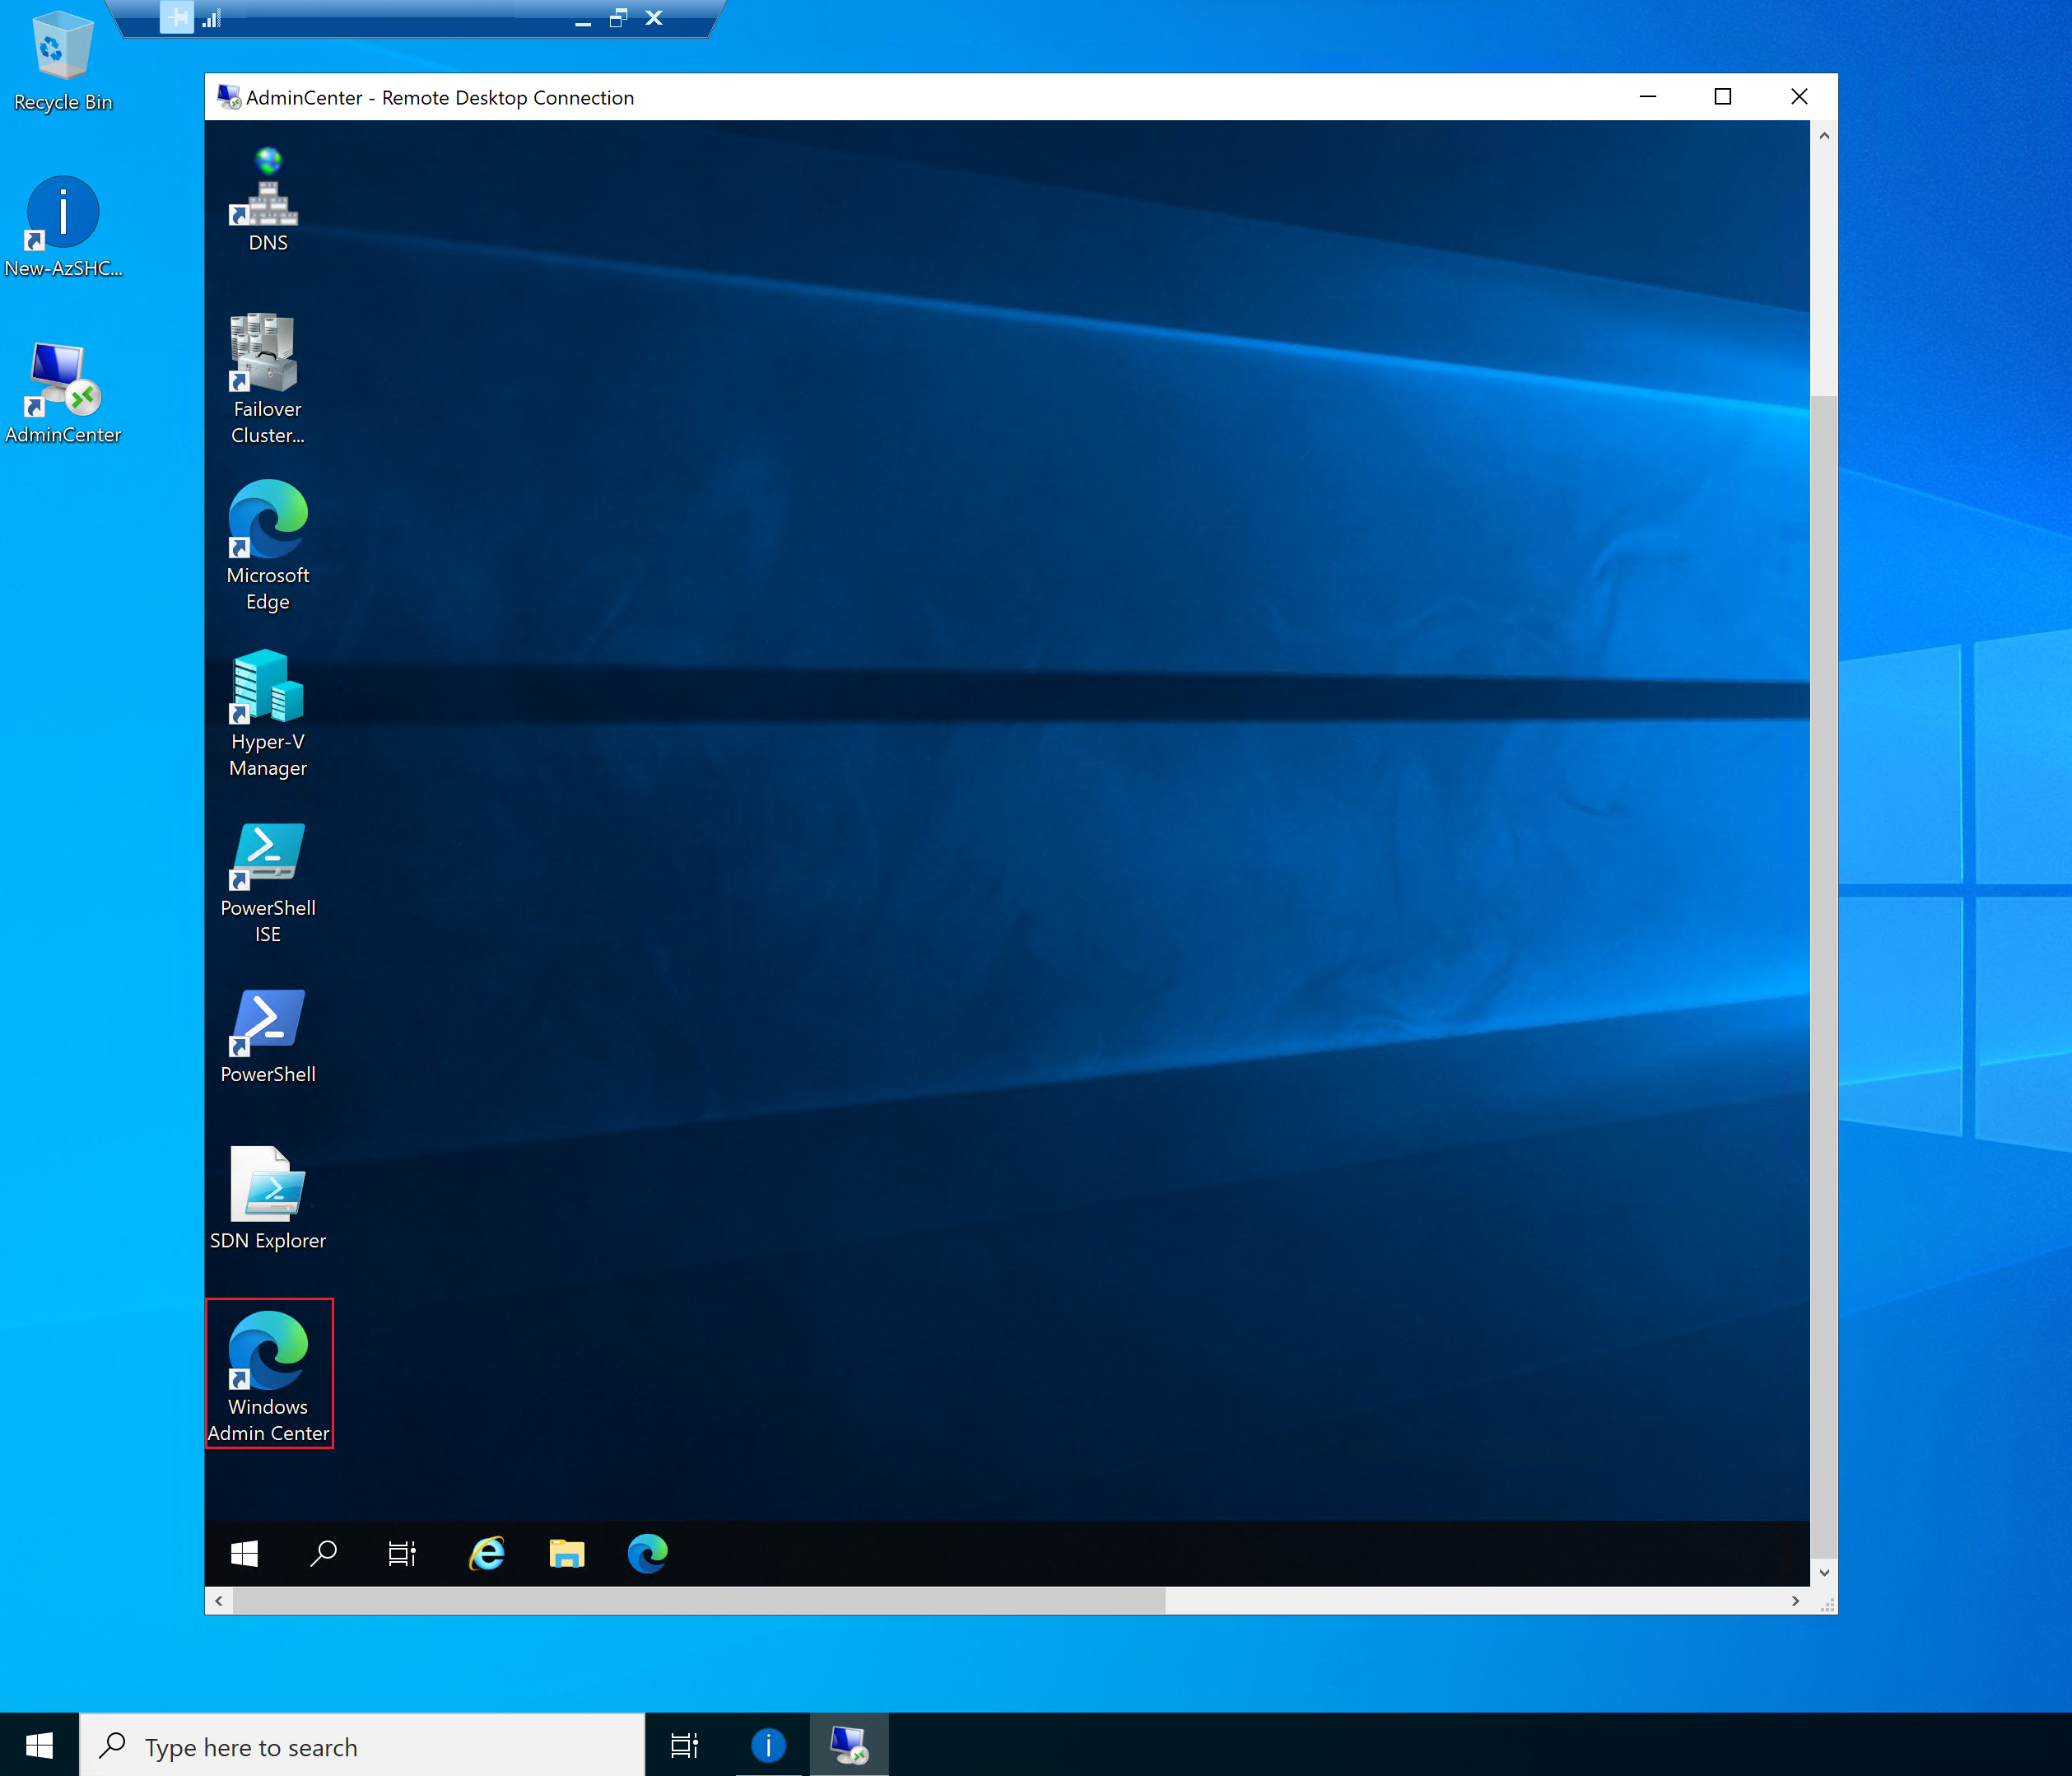
After connecting to the management VM, double-click the Windows Admin Center shortcut on the desktop:
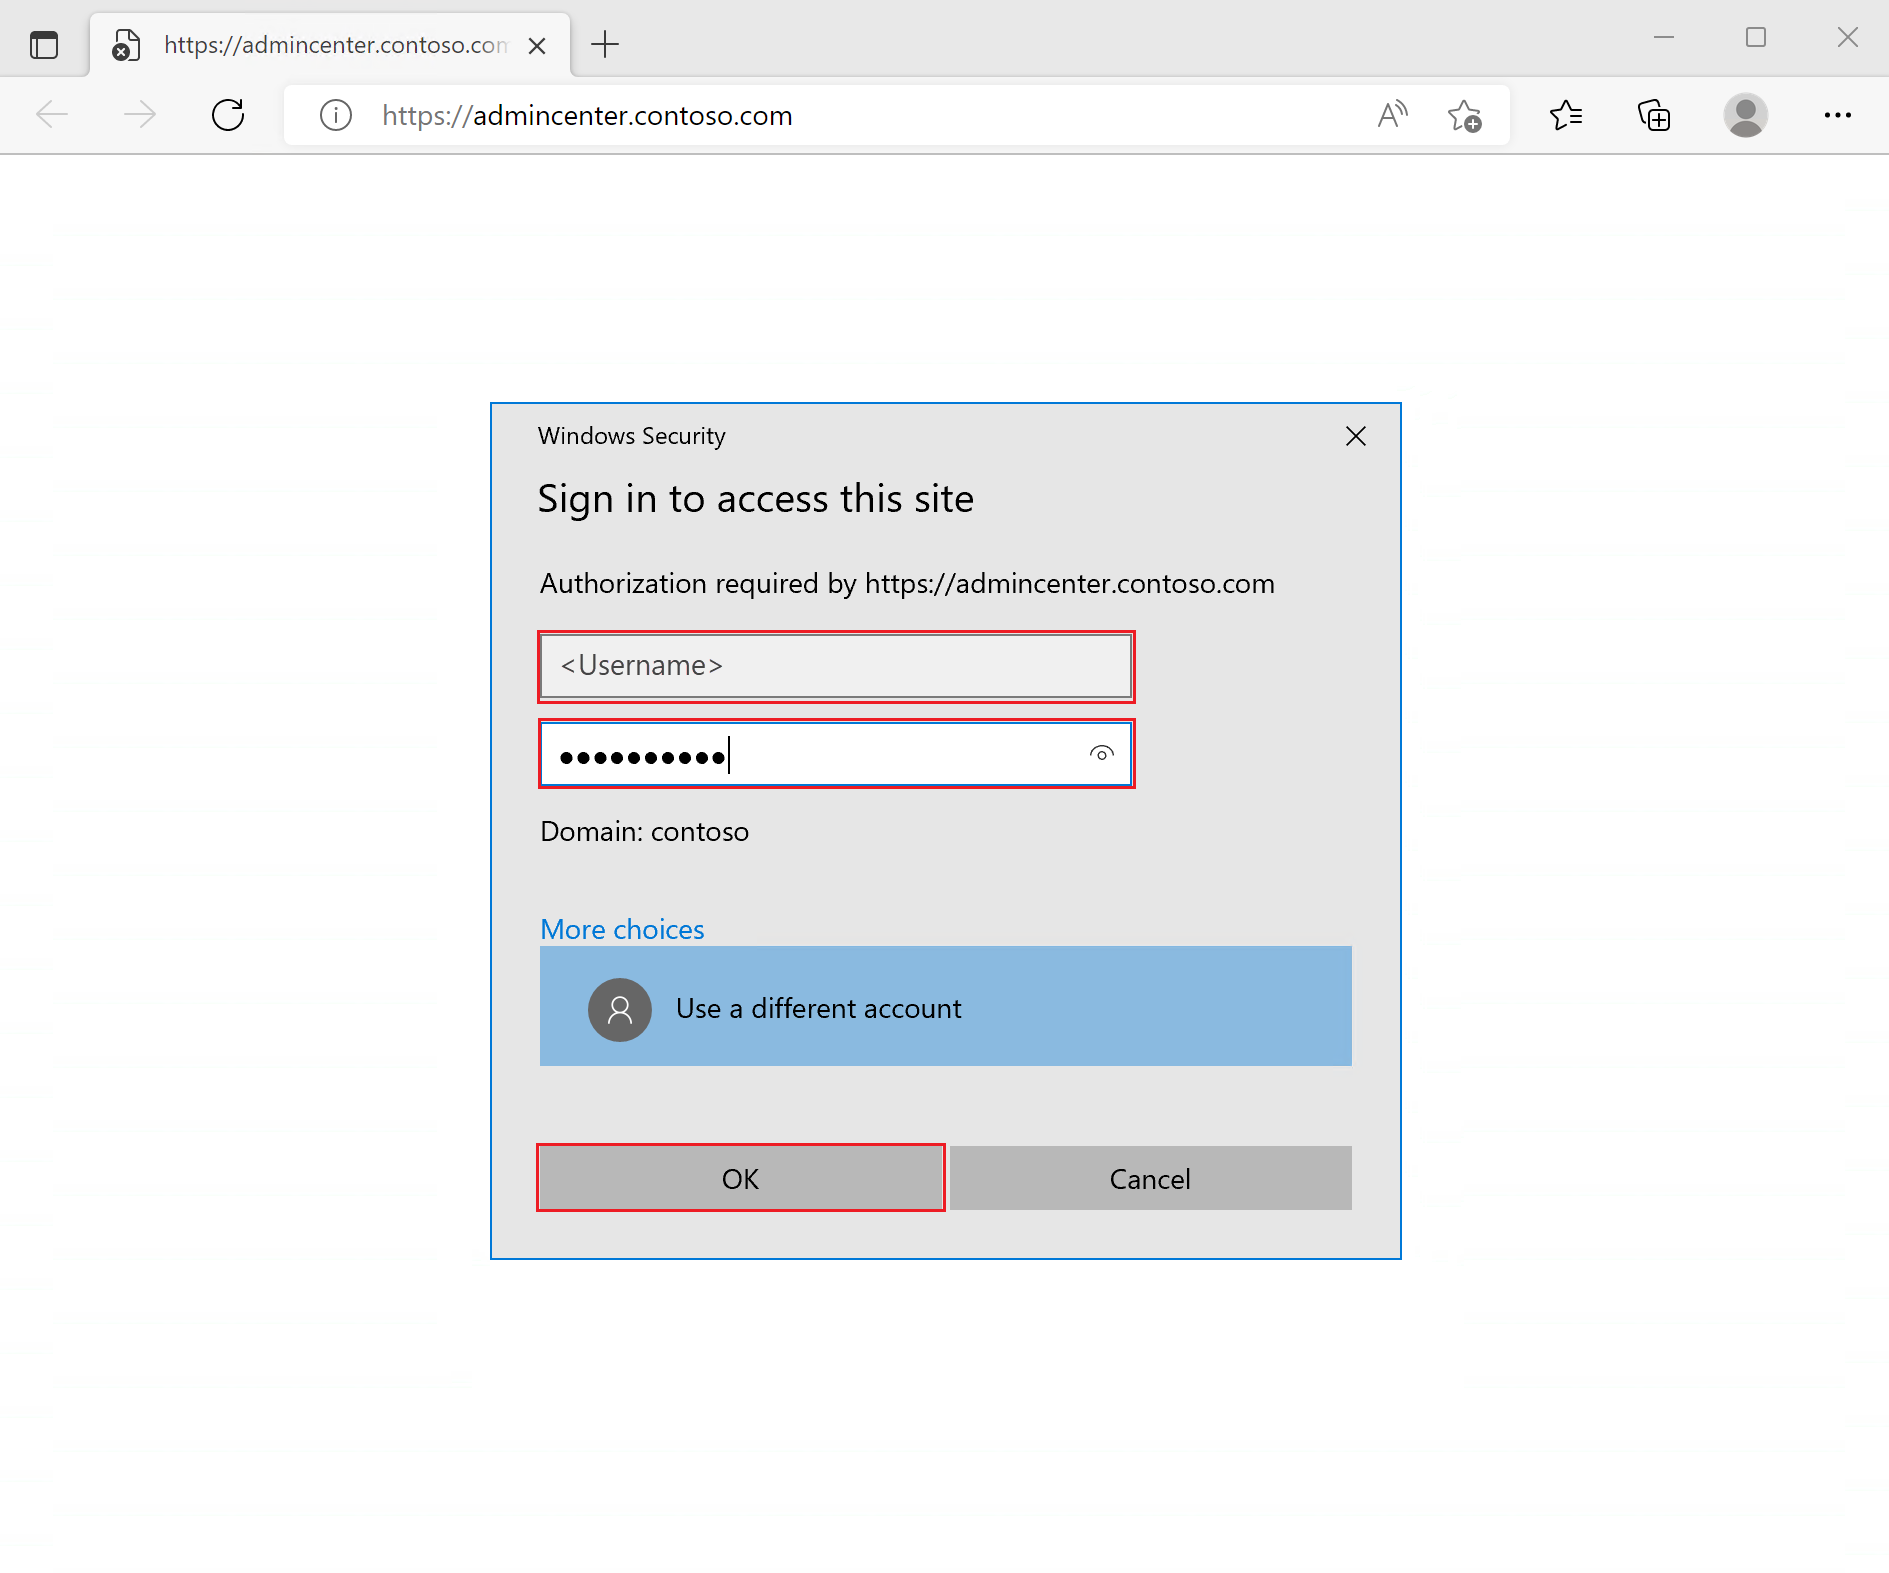
Sign in to the Windows Admin Center browser app by entering the "Contoso\Administrator" and "Password01" domain credentials again, then select OK:
Tip
You may need to select More choices then Use a different account in order to enter user name and password credentials.
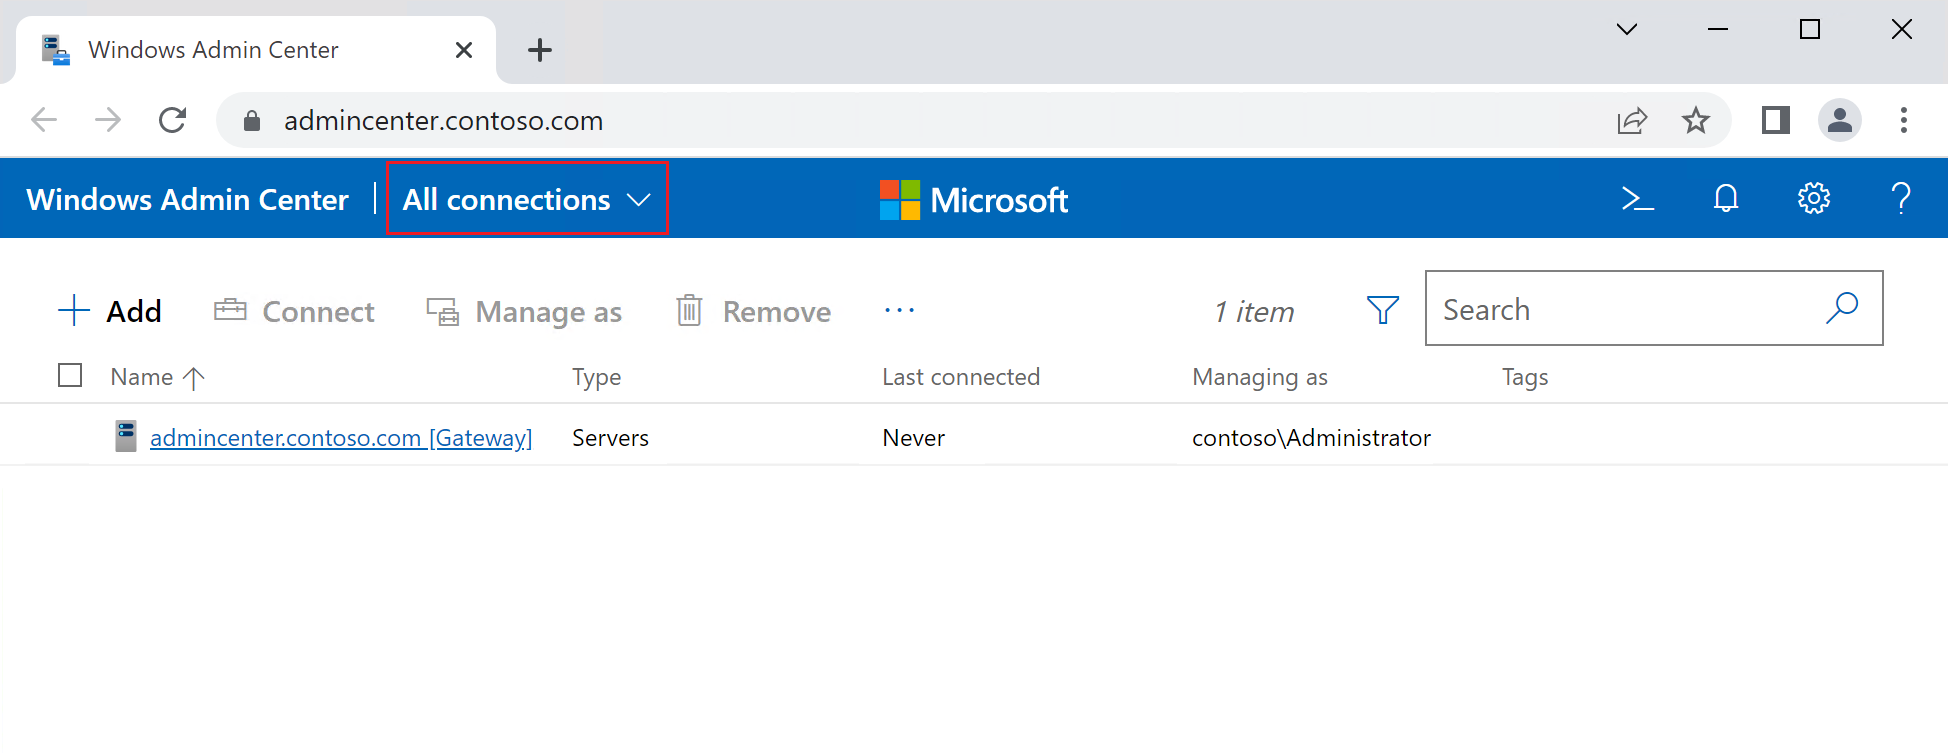
Close the "What's new" dialog and you should see the All connections view in Windows Admin Center:
Select the Next button at the bottom of this page.
Add the cluster to Windows Admin Center
Now you add your new cluster to Windows Admin Center Cluster Manager and make sure the extensions are updated:
Select the view drop-down, then select Cluster Manager to begin the process of adding your new cluster to Windows Admin Center:
In the Cluster Manager view:
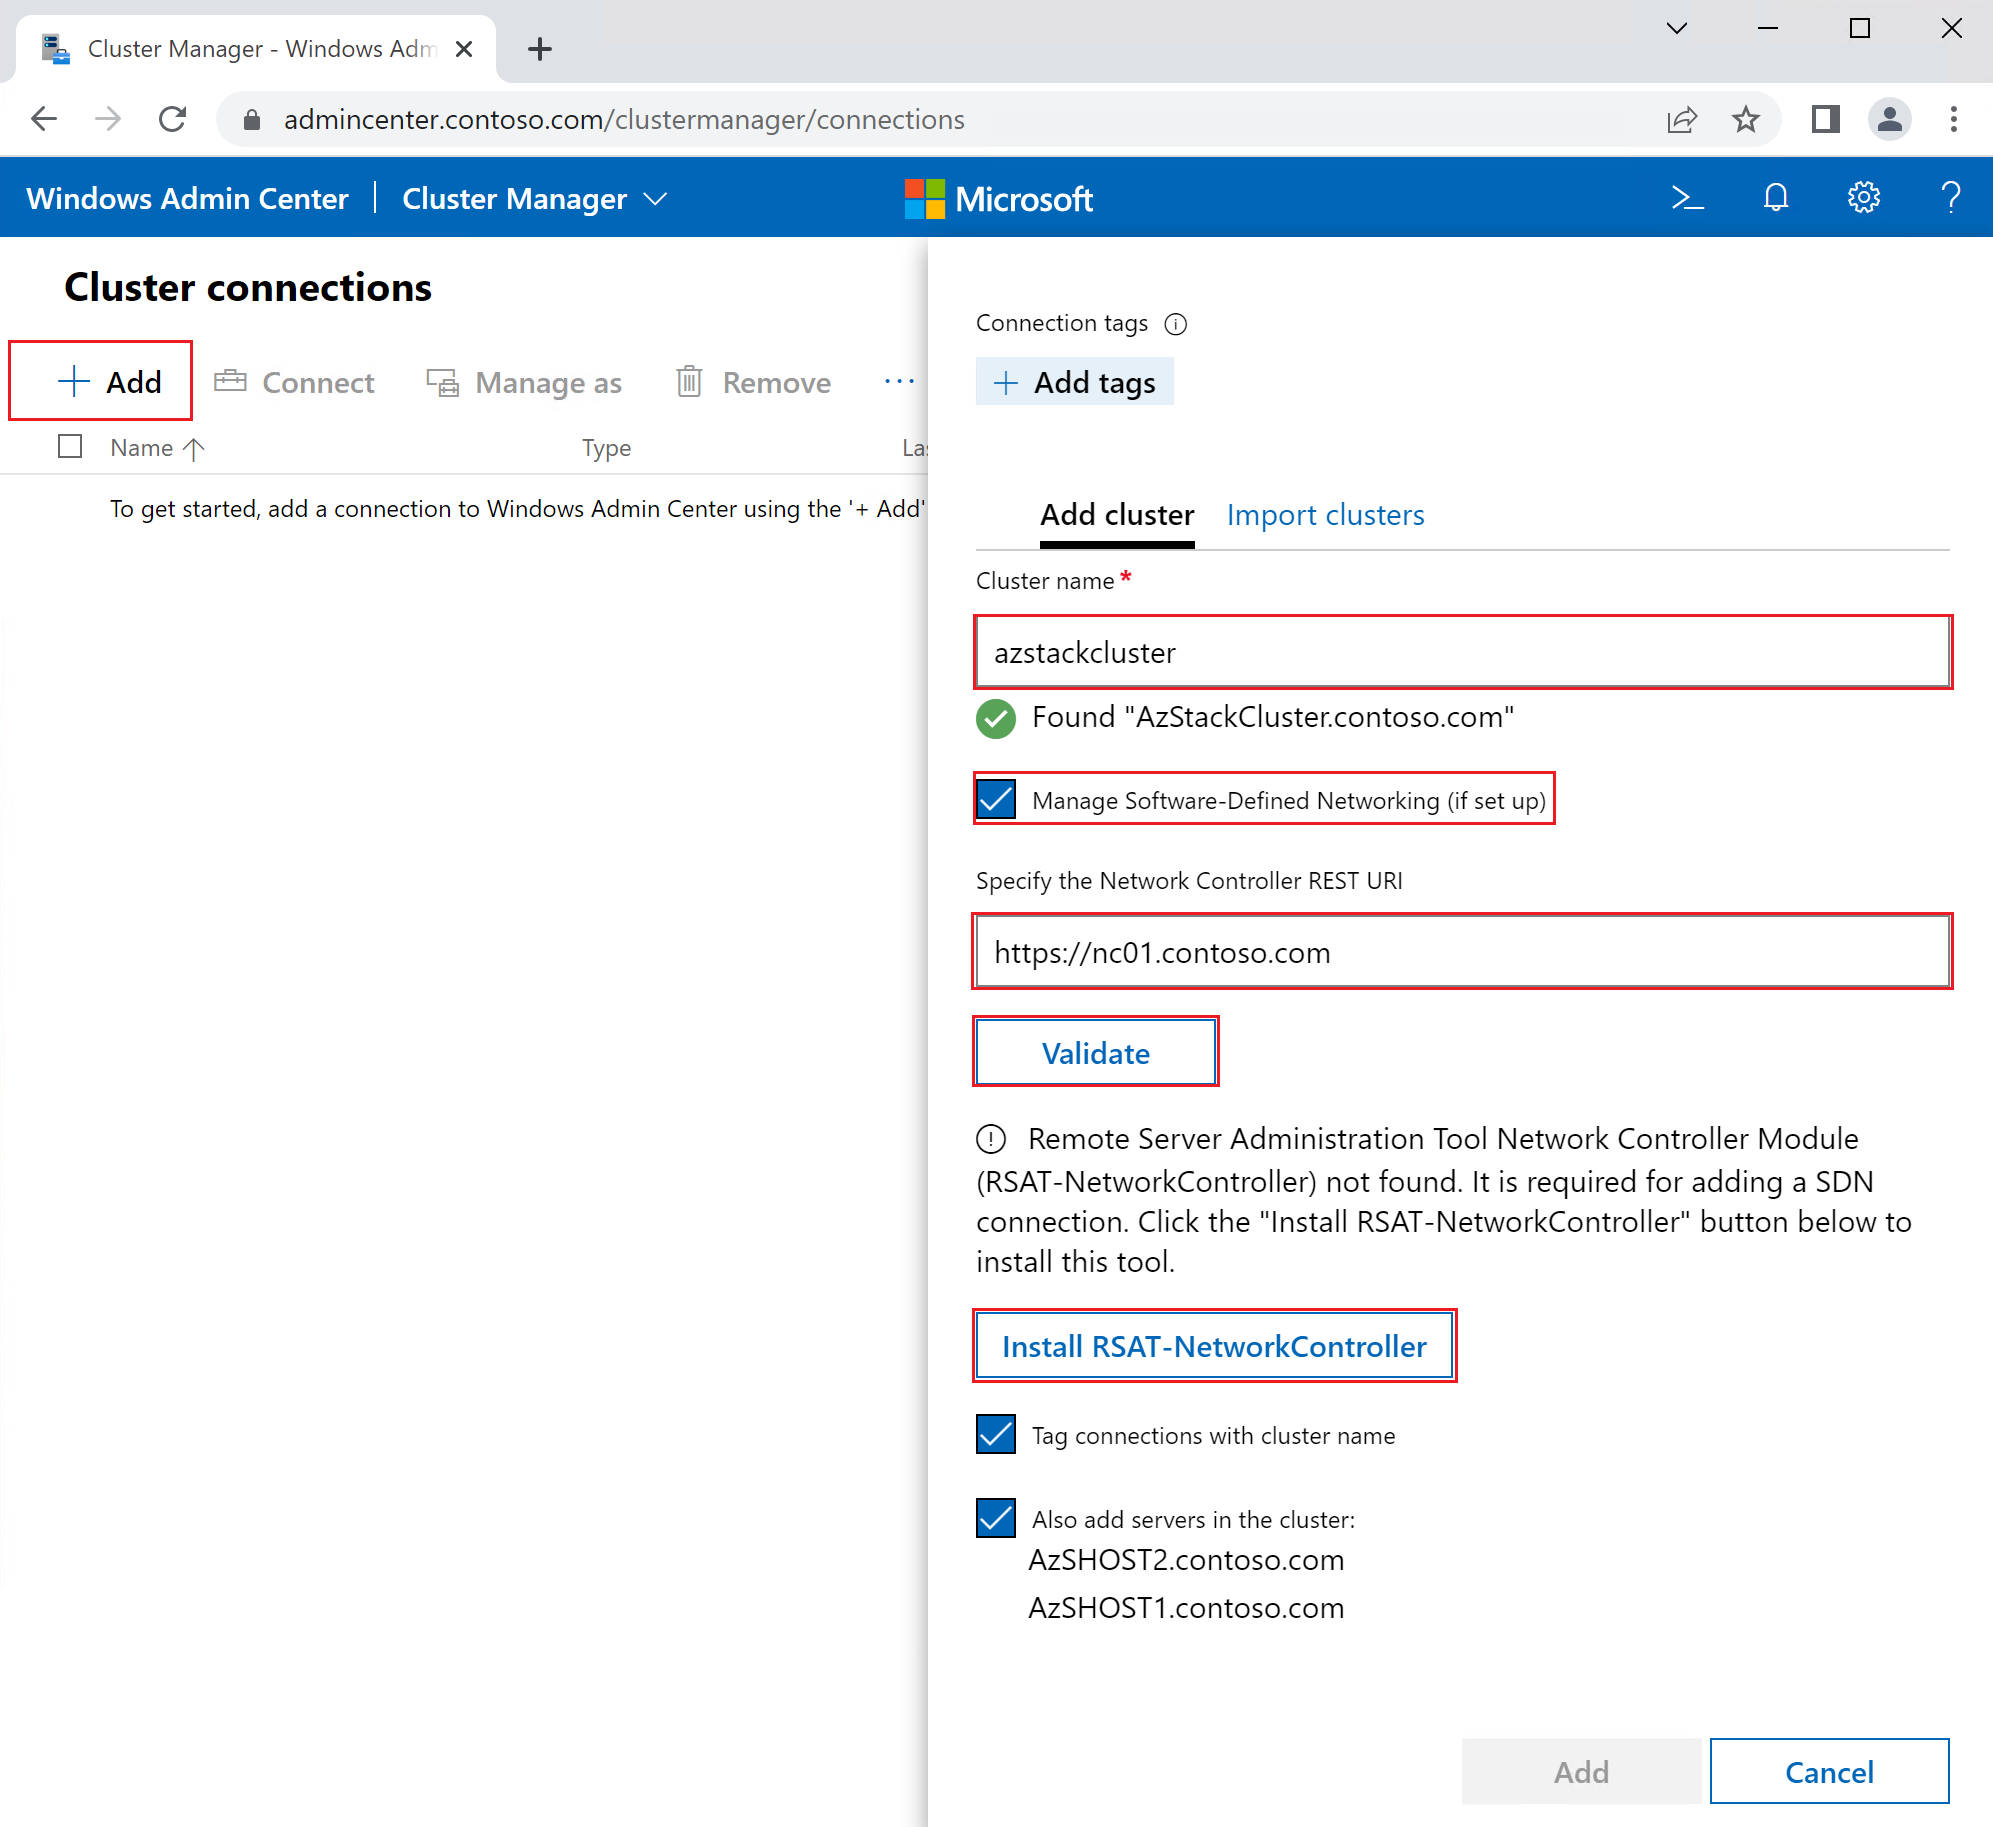
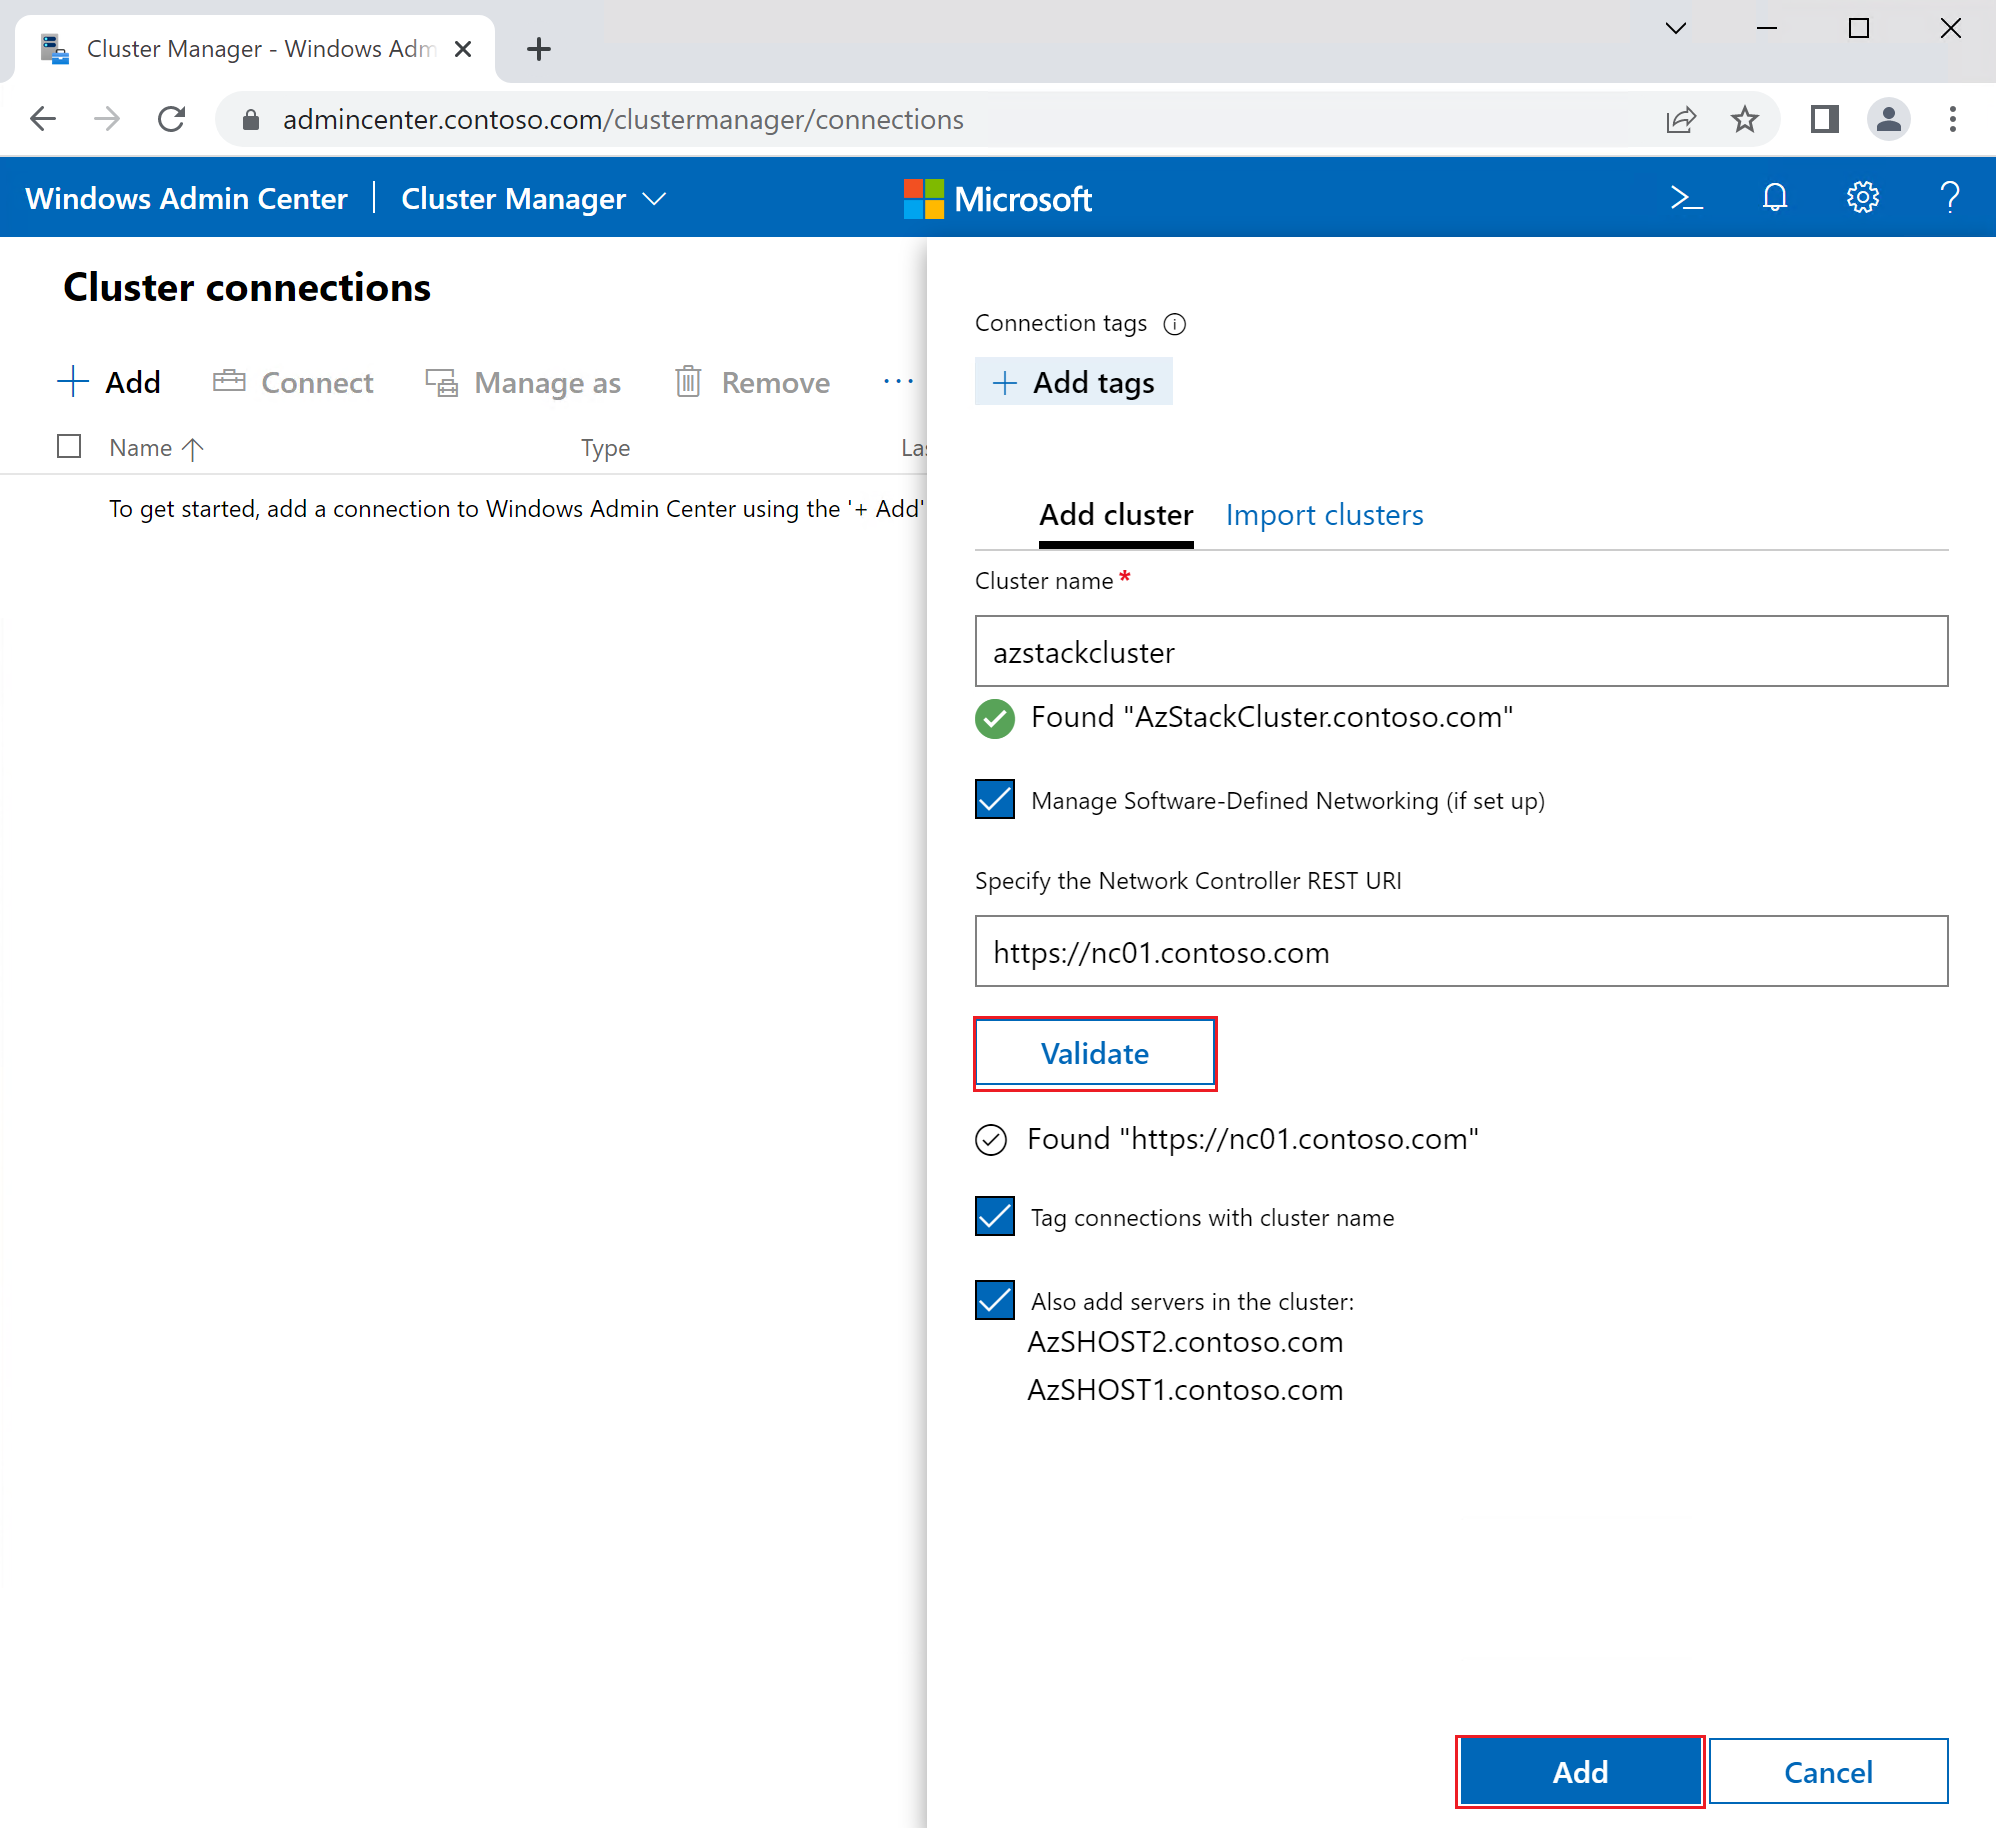
Select + Add
Under Cluster name enter "azstackcluster". After a short pause you see a "Found "AzStackCluster.contoso.com"" validation message, and the two cluster VM nodes showing at the bottom.
Select the Manage Software-Defined Networking checkbox.
Under Specify the Network Controller REST URI enter "https://nc01.contoso.com"
Select the Validate button. There might be a short pause while the SDN URI is detected and configured.
Once you see the "Remote Server Administration Tool Network Controller Module not found" message, select the Install RSAT-NetworkController button.
Wait for the Network Controller Module installation. When complete, you should see a "Validate to continue" message.
Select the Validate button a second time. After another short pause, you'll see a "Found "https://nc01.contoso.com"" validation message.
Select the Add button at the bottom and wait for the addition of the cluster to Windows Admin Center to complete.
Back in the Cluster Manager view, you should see the new "azstackcluster.contoso.com" server cluster entry. Select the "azstackcluster.contoso.com" cluster:
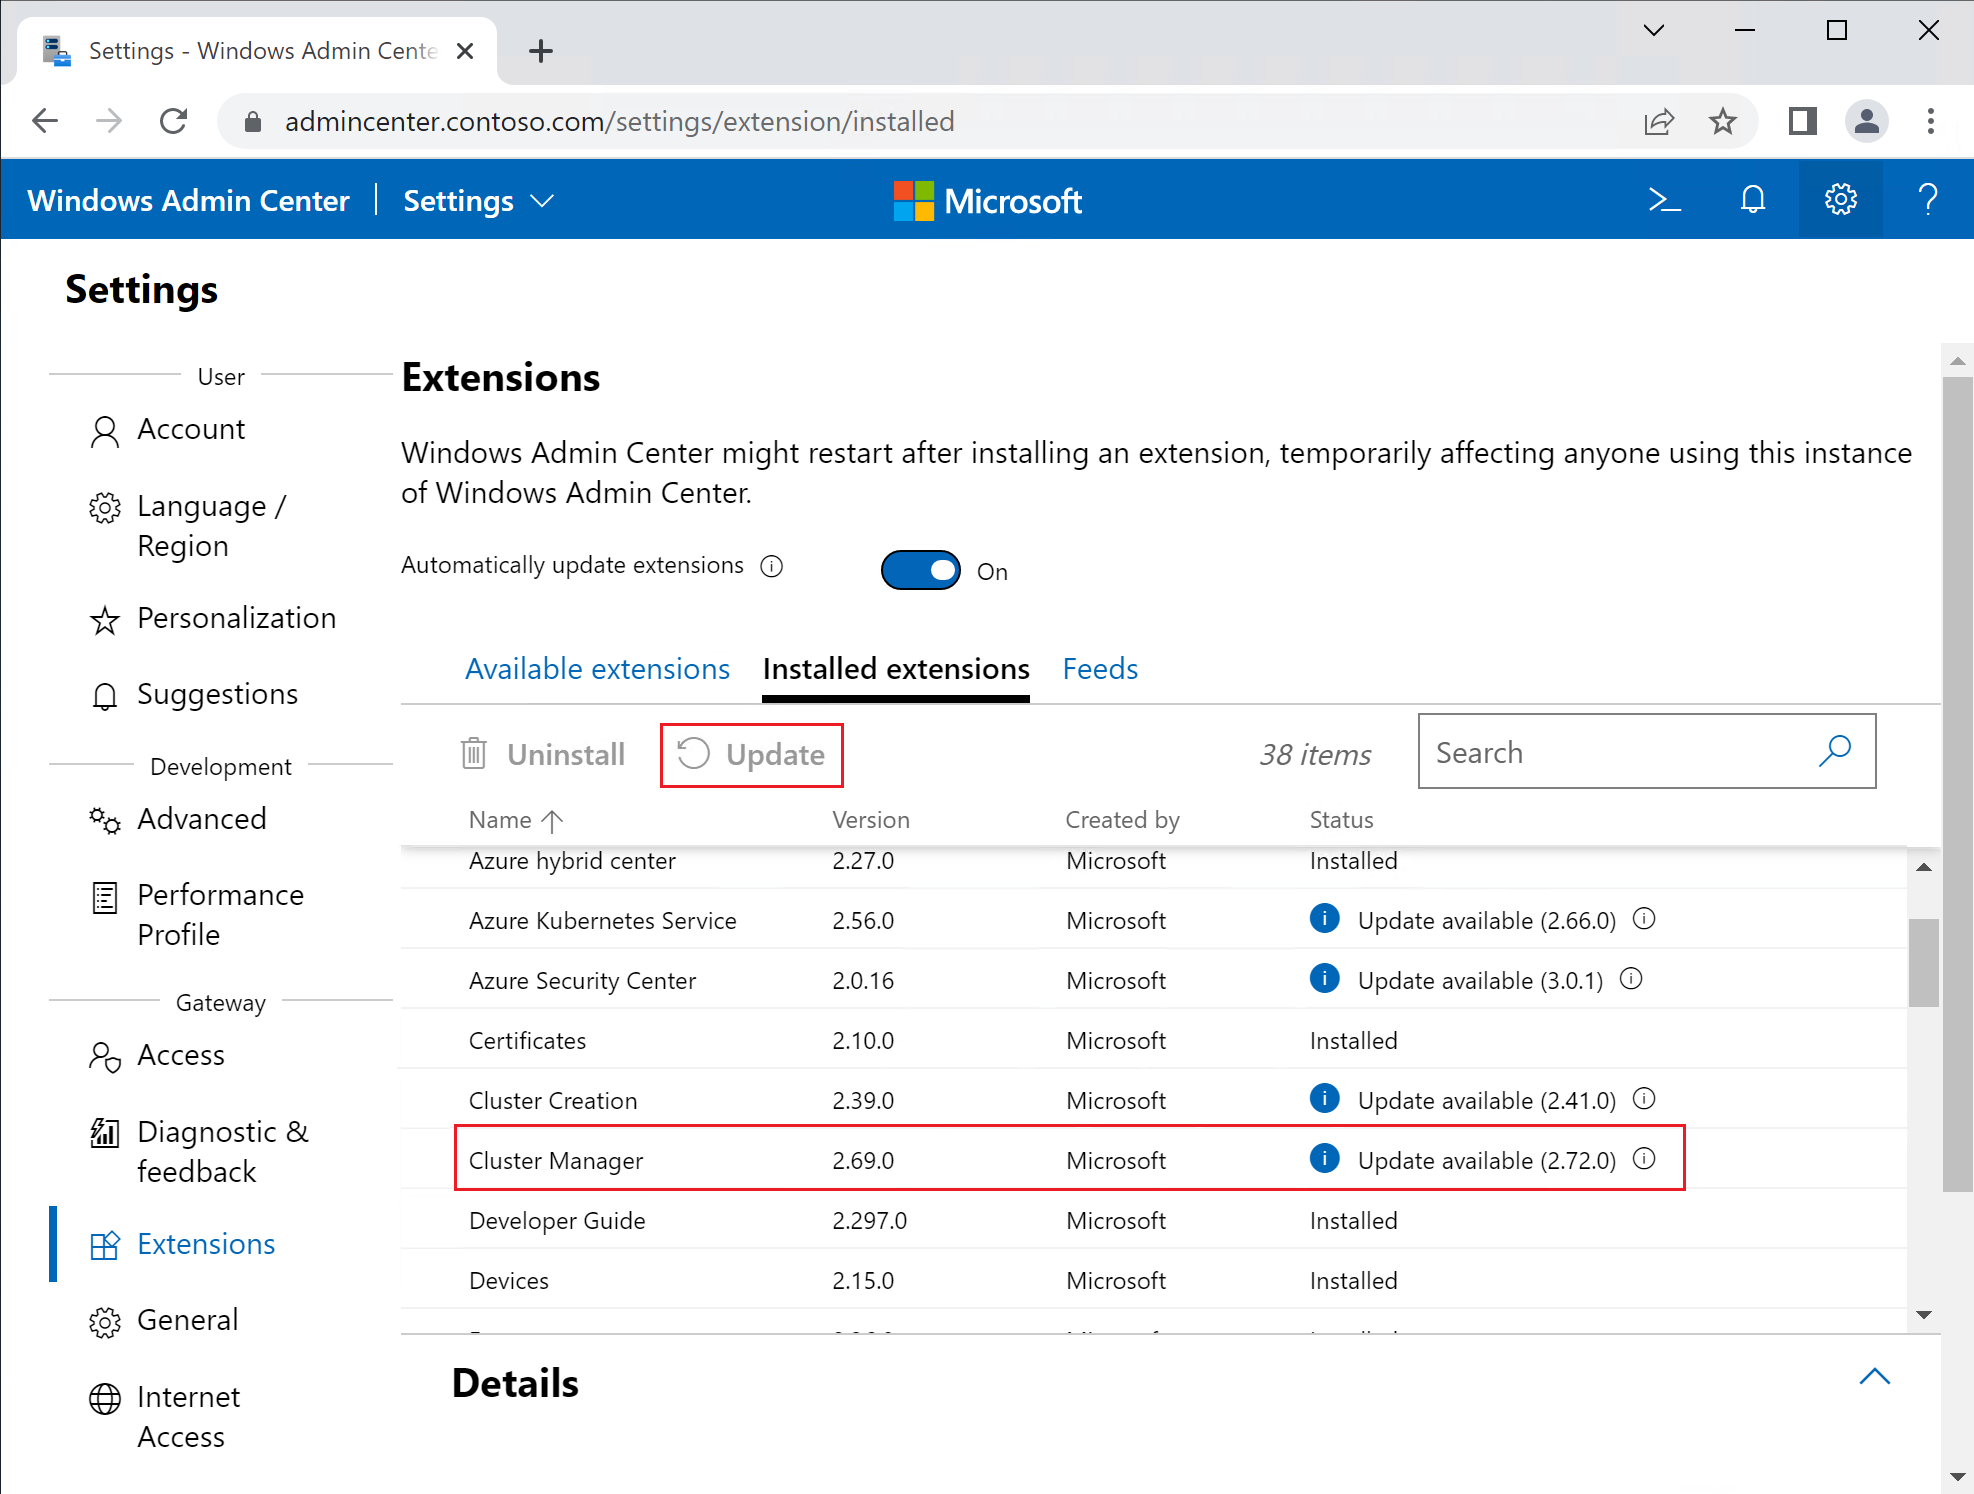
In Cluster Manager, if you see the banner "An update is available for this extension", complete the following items. Otherwise, jump to the next step:
Select the Update now link:
In the Settings Extensions view, select the Cluster Manager extension row, then select the Update button at the top. Wait for the Updating... dialog to complete, then you should be returned to Settings Extensions where you notice the Cluster Creation extension status changed to "Installed":
Select the back arrow in your browser to return to the Cluster Manager view.
Select the Next button at the bottom of this page.
Register with Azure
Now you can integrate your cluster with Azure by completing the Azure registration process using Windows Admin Center, which includes:
- Registering Windows Admin Center with Azure
- Registering the Azure Stack HCI cluster with Azure
Important
You need an Azure account to sign in during registration. For the easiest experience the account should have membership in the following roles:
Azure RBAC roles on the subscription:
- Either membership in the "Owner" role (you're already a member if you created the subscription)
- Or membership in the "User Access Administrator" and "Contributor" roles
Microsoft Entra RBAC roles on the Microsoft Entra tenant:
- "Cloud application administrator"
If you don't have an account with the appropriate permissions, you need to work with an administrator that can either:
- Complete this entire registration section for you
- Or allow you to proceed with registration, but be available to provide permissions consent as necessary during the flow
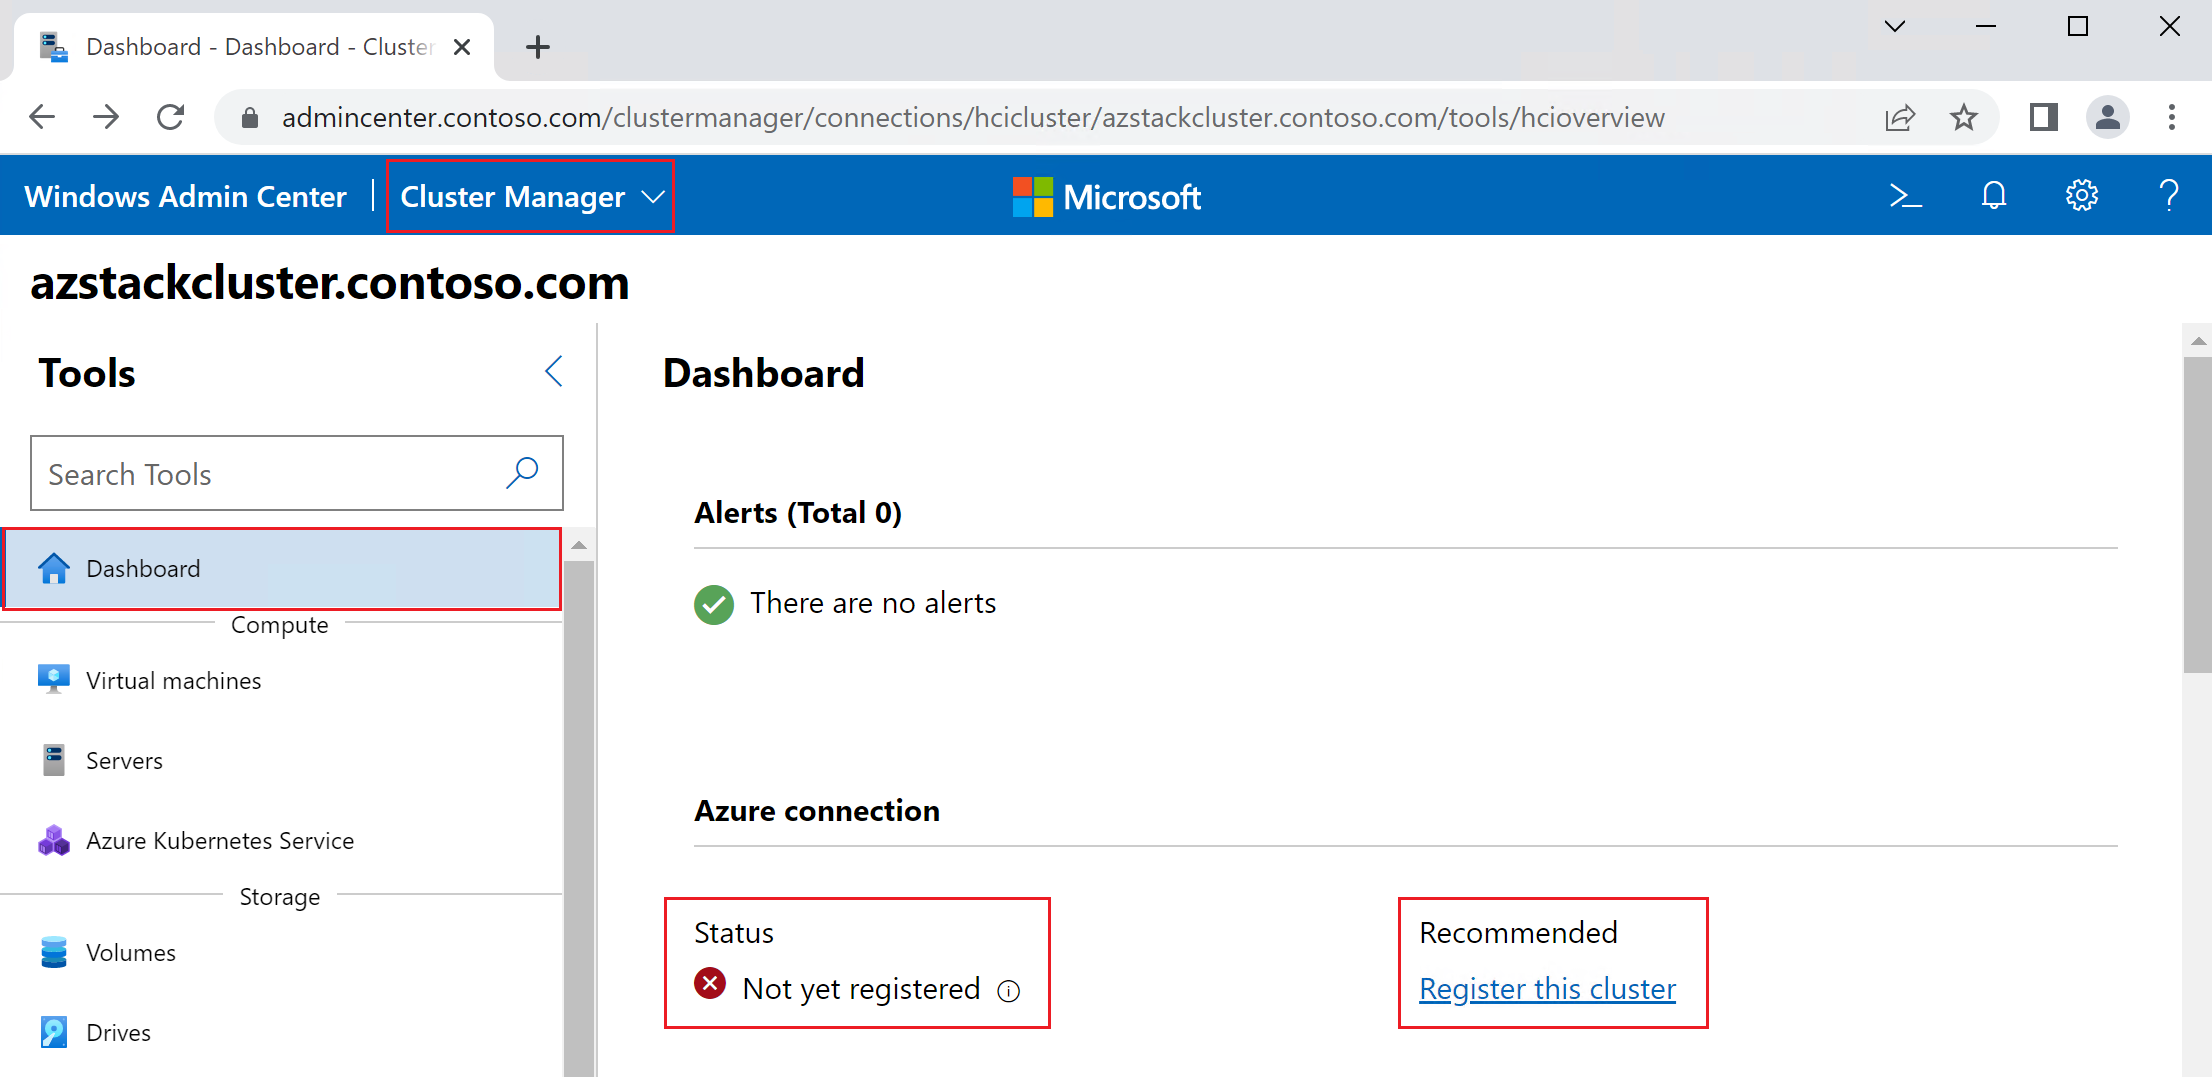
Return to the Cluster Manager Dashboard view, where you see a status of Not yet registered under Azure connection. Select the Register this cluster link to begin the first part of the registration process, which registers your Windows Admin Center gateway with Azure:
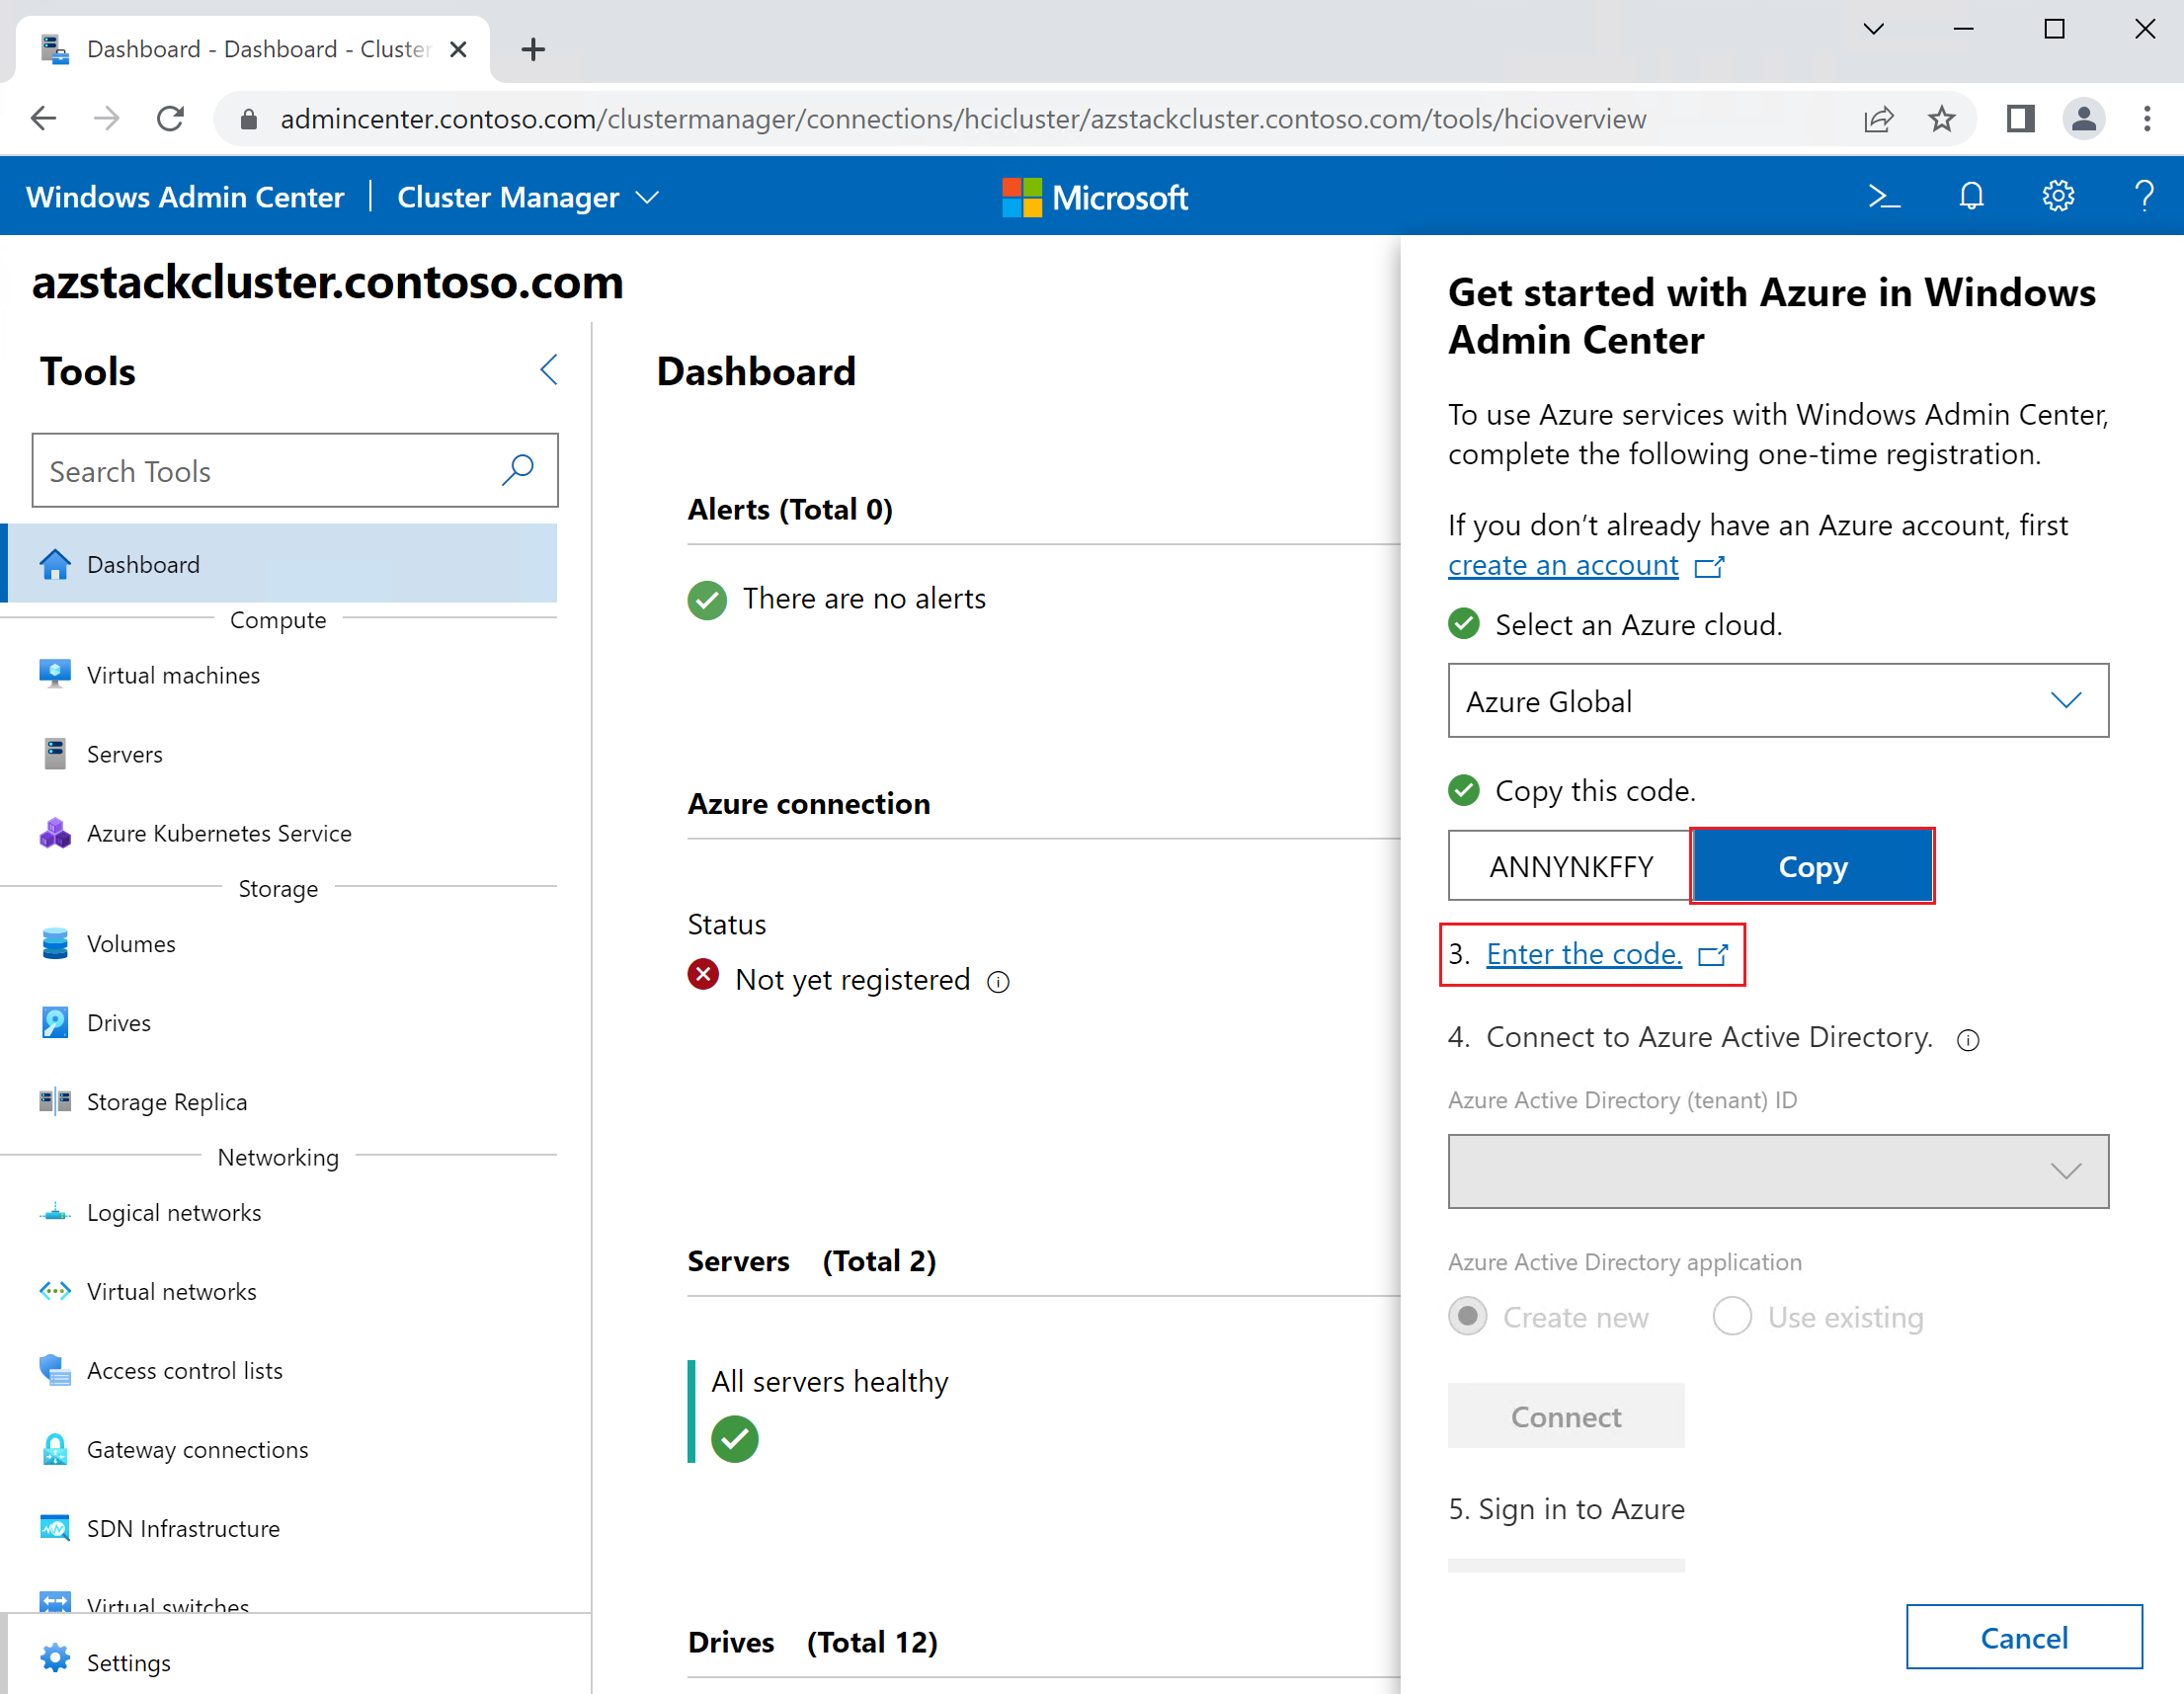
In the Get started with Azure in Windows Admin Center panel on the right, select the Copy button, then select the Enter the code link to open a new browser tab for authentication.
Note
The device authentication code will expire after a few minutes. If yours expires, you need to Cancel the panel and return to the previous step.
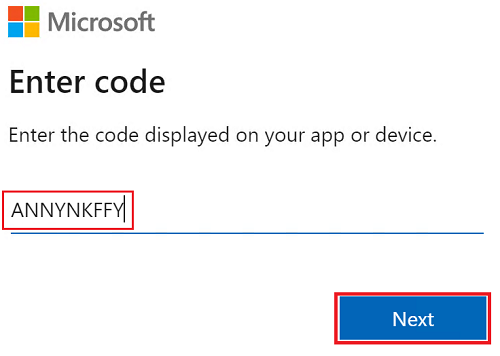
In the new browser tab, paste the authentication code then select the Next button:
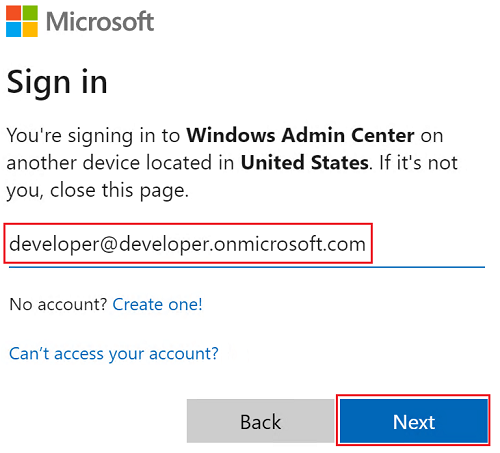
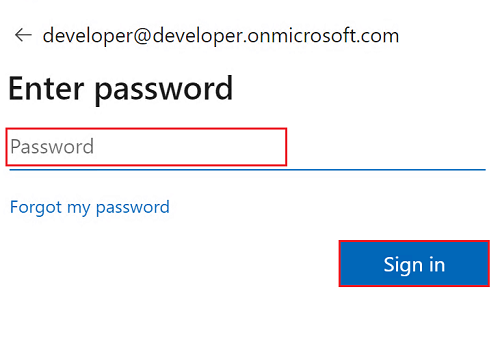
Next, enter the email address then the password of the Azure account that has the permissions discussed earlier:
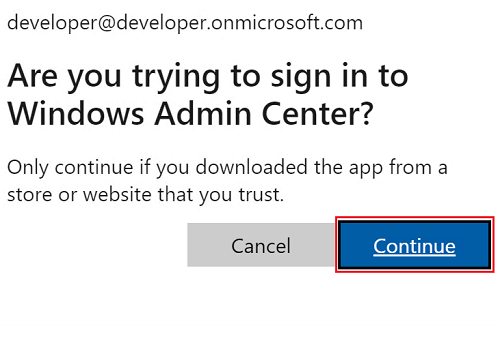
When you see the Are you trying to sign in to Windows Admin Center? confirmation dialog, select Continue. After you see the sign-in confirmation dialog, you can close the browser tab.
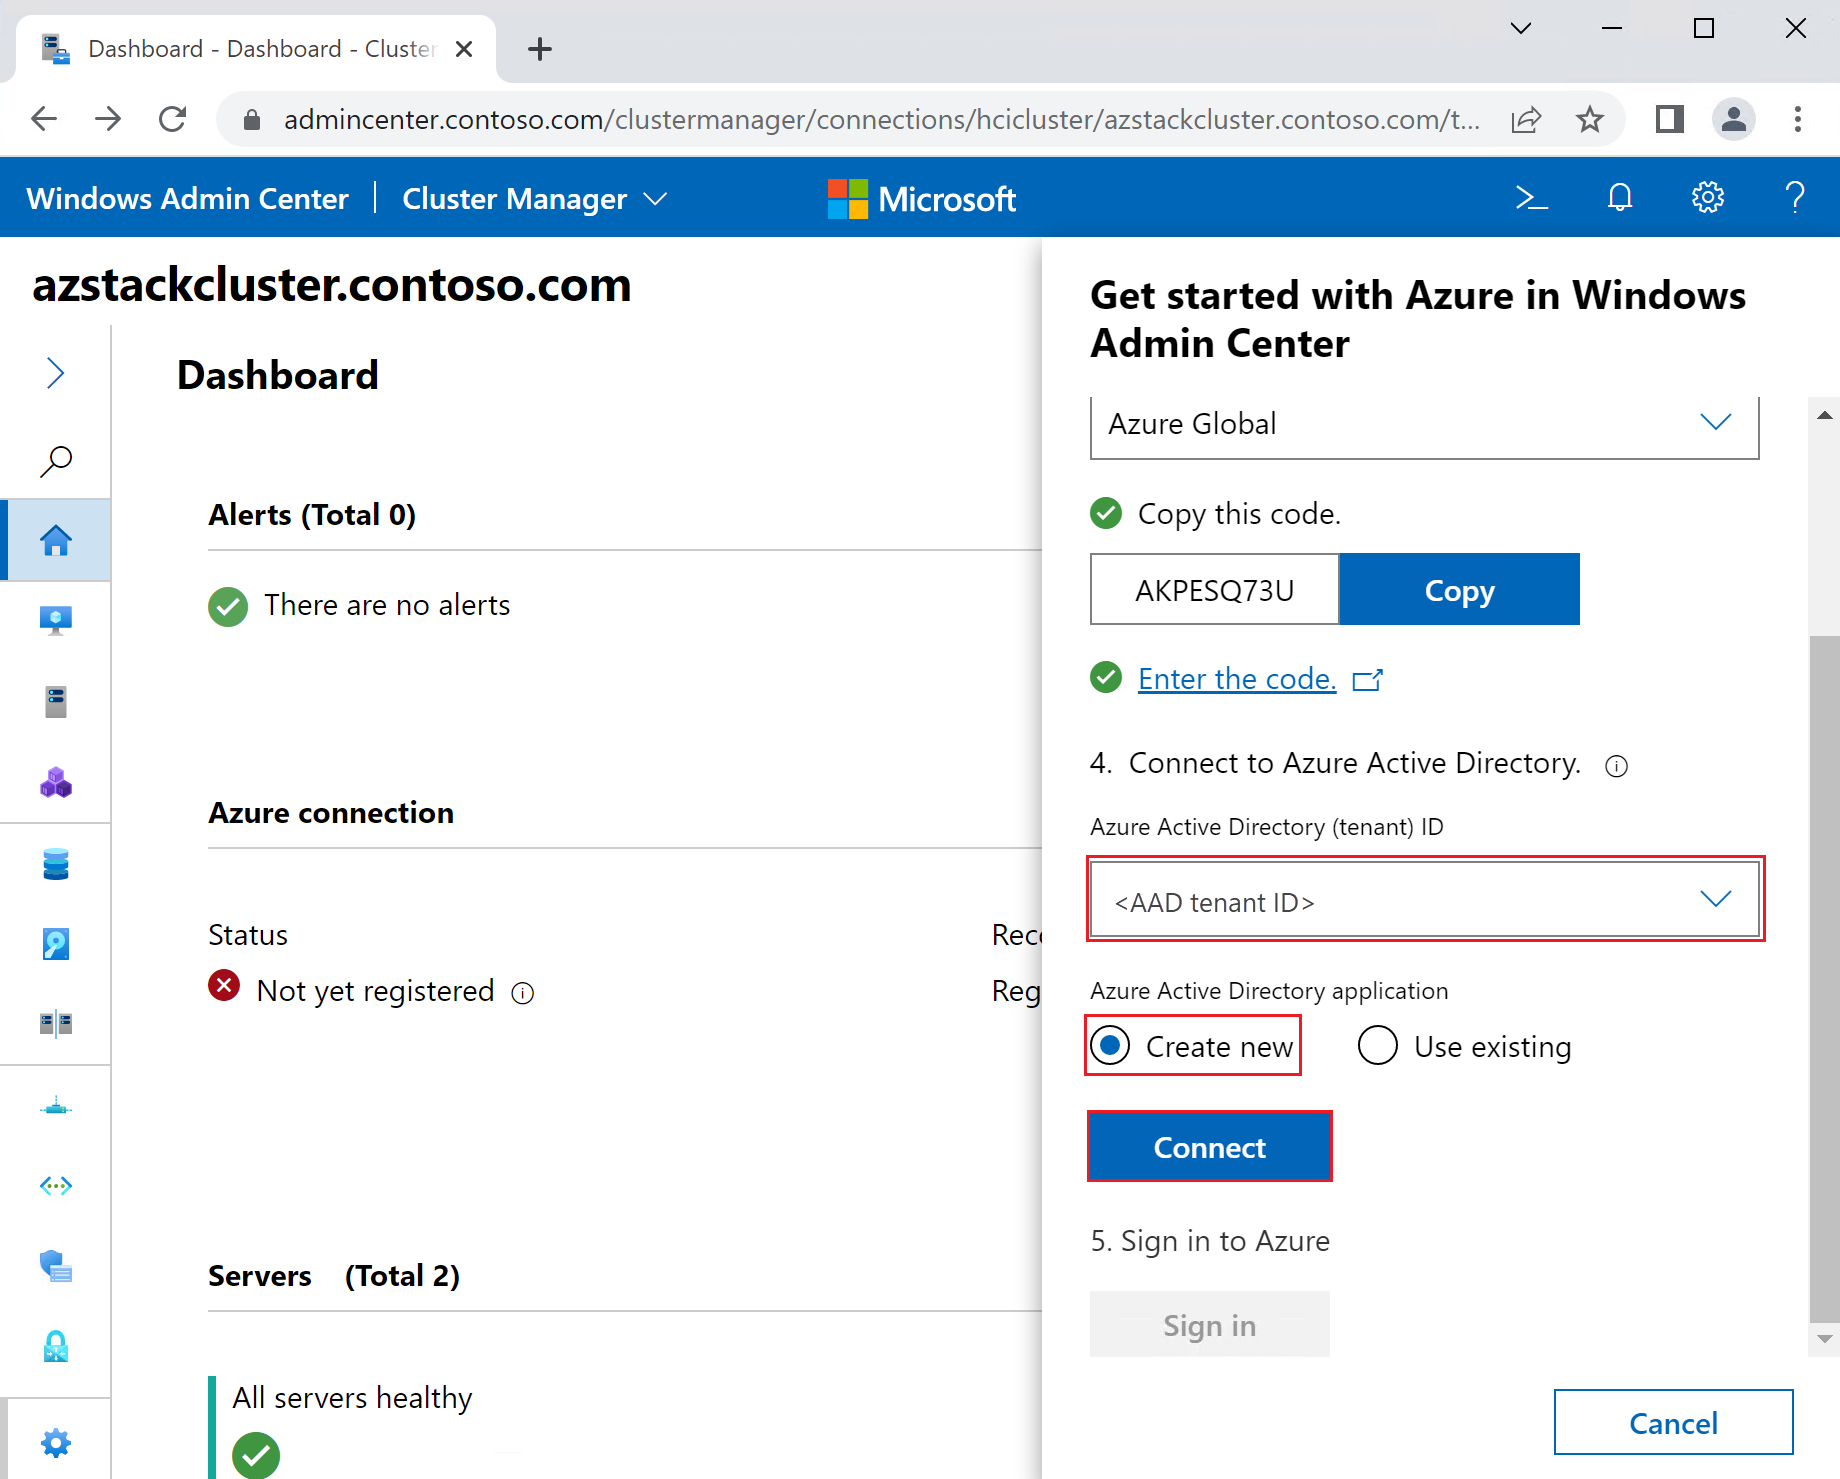
Back in the Cluster Manager Dashboard view you should see your Microsoft Entra tenant ID populated. Confirm the tenant ID, select Create new, then select the Connect button:
Warning
It's critical that you pause here for 60 seconds to avoid a synchronization problem. Do not select Sign in and proceed until you wait for at least 60 seconds, or you'll run into problems later in the registration flow.
Once you've paused for at least 60 seconds after the previous step, and you see the "Now connected to Microsoft Entra ID" confirmation, select the Sign in button.
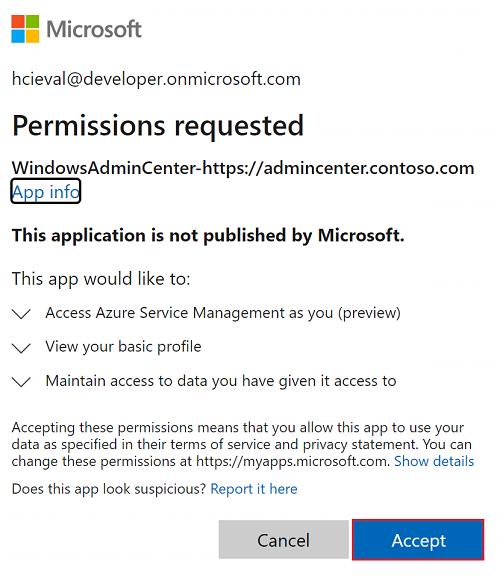
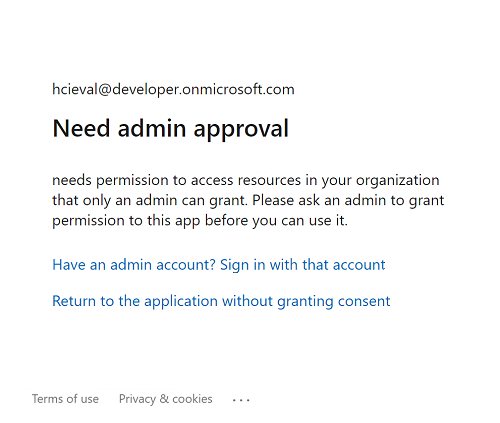
The next response is based on the Microsoft Entra role membership of your account. Select the tab below that matches the role membership of your Azure account. Then consent to the permissions requested by the Microsoft Entra application representing Windows Admin Center, by selecting Accept:
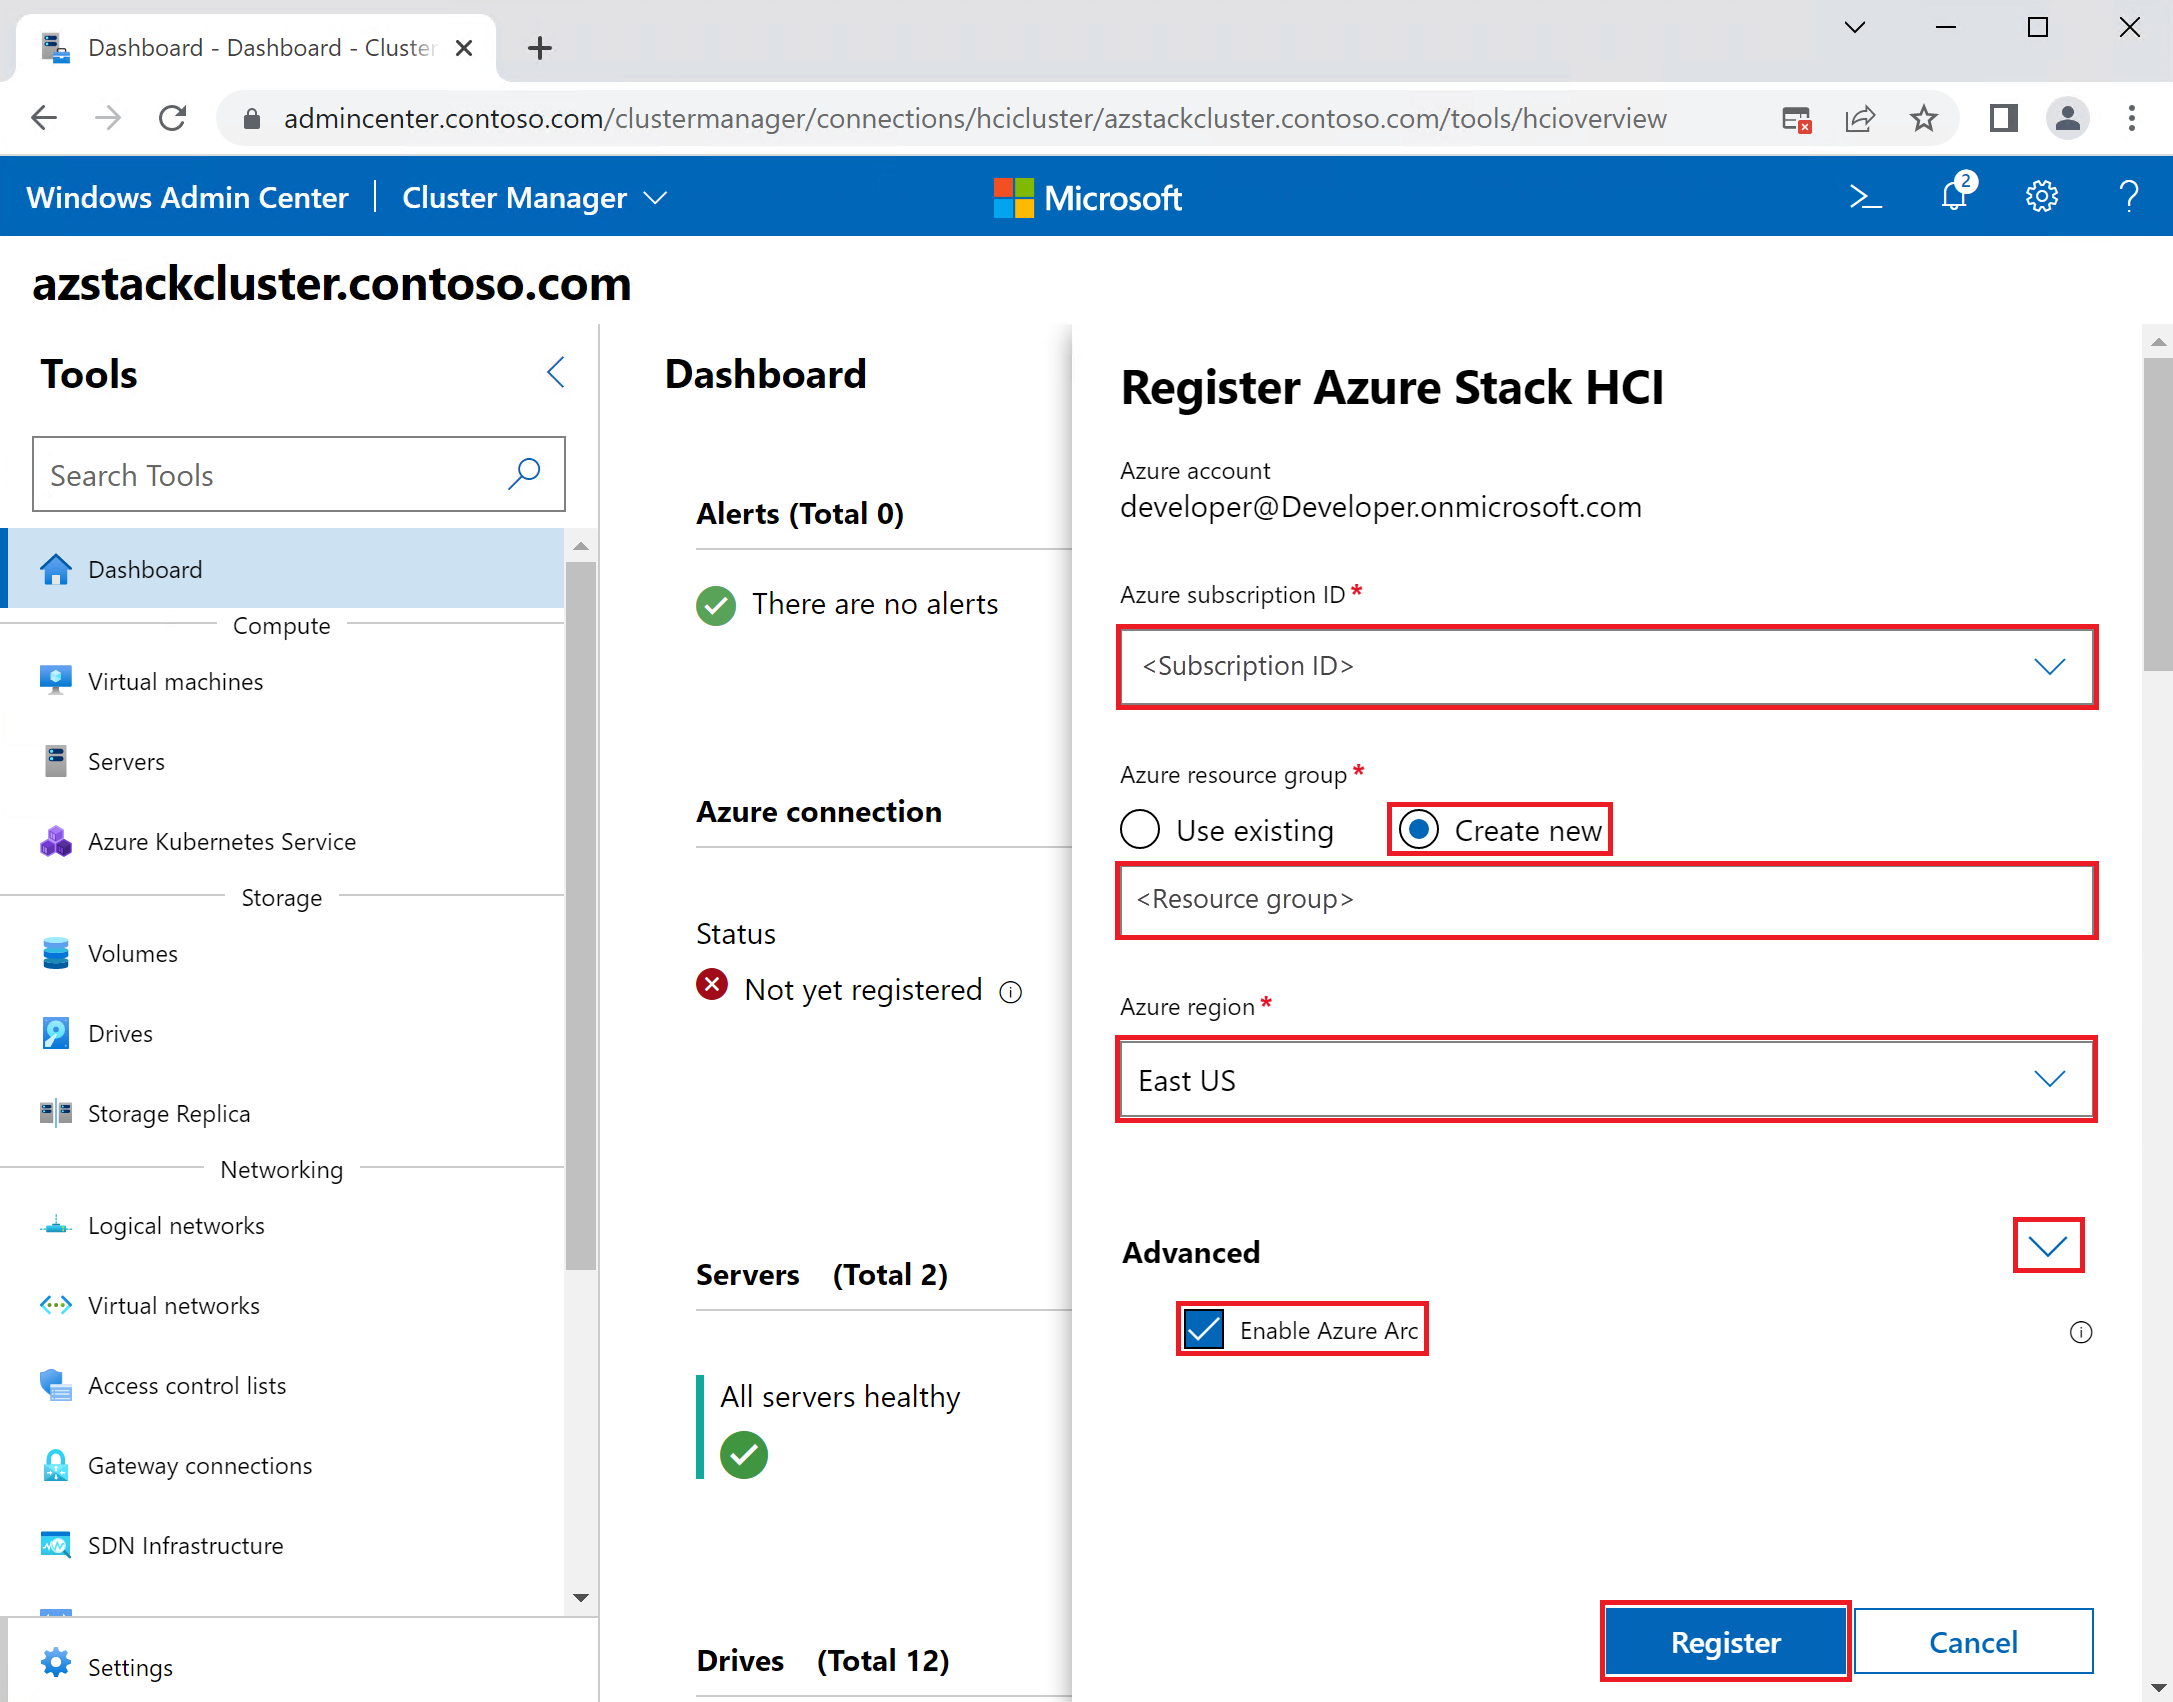
You've completed Azure registration for Windows Admin Center. Next, return to the Cluster Manager Dashboard view where you still see a status of Not yet registered under Azure connection. Select the Register this cluster link again to finalize registration by registering the cluster with Azure:
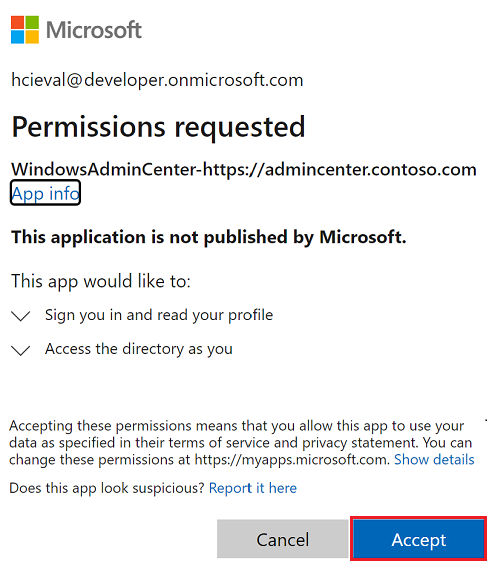
The next response is based on the Microsoft Entra role membership of your account. Select the tab below that matches the role membership of your account:
Select Accept to consent incremental permissions to the Microsoft Entra application, allowing it to perform cluster registration:
You'll notice a new panel on the right:
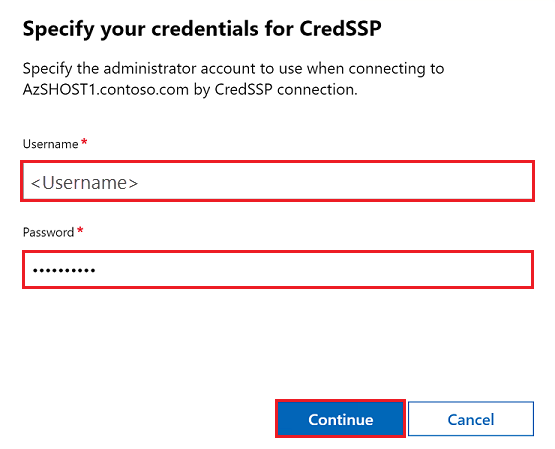
After a brief Registering.. dialog you should be prompted to reenter the cluster administrator credentials. Enter user "Contoso\Administrator" and password "Password01", then select Continue. The Registering.. dialog continues to show for 5-10 minutes until registration is complete:
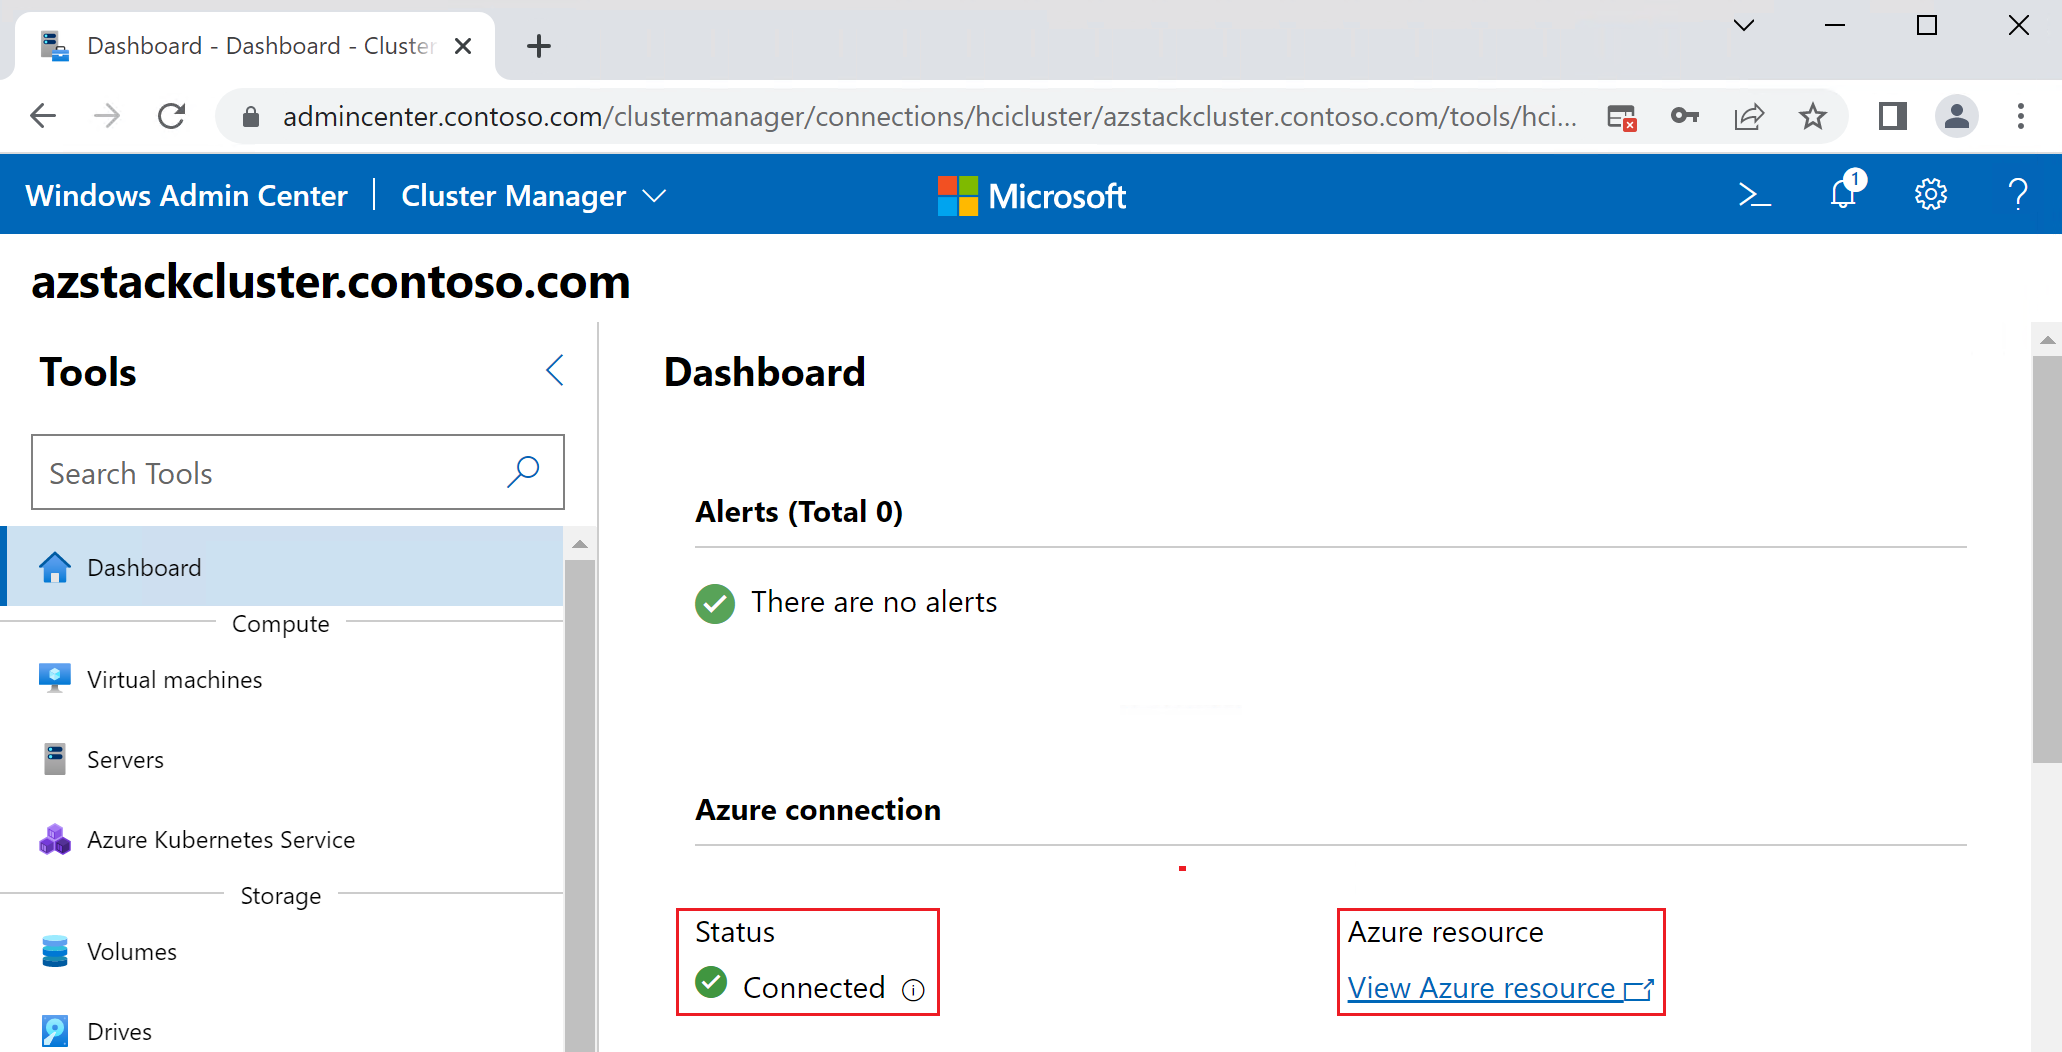
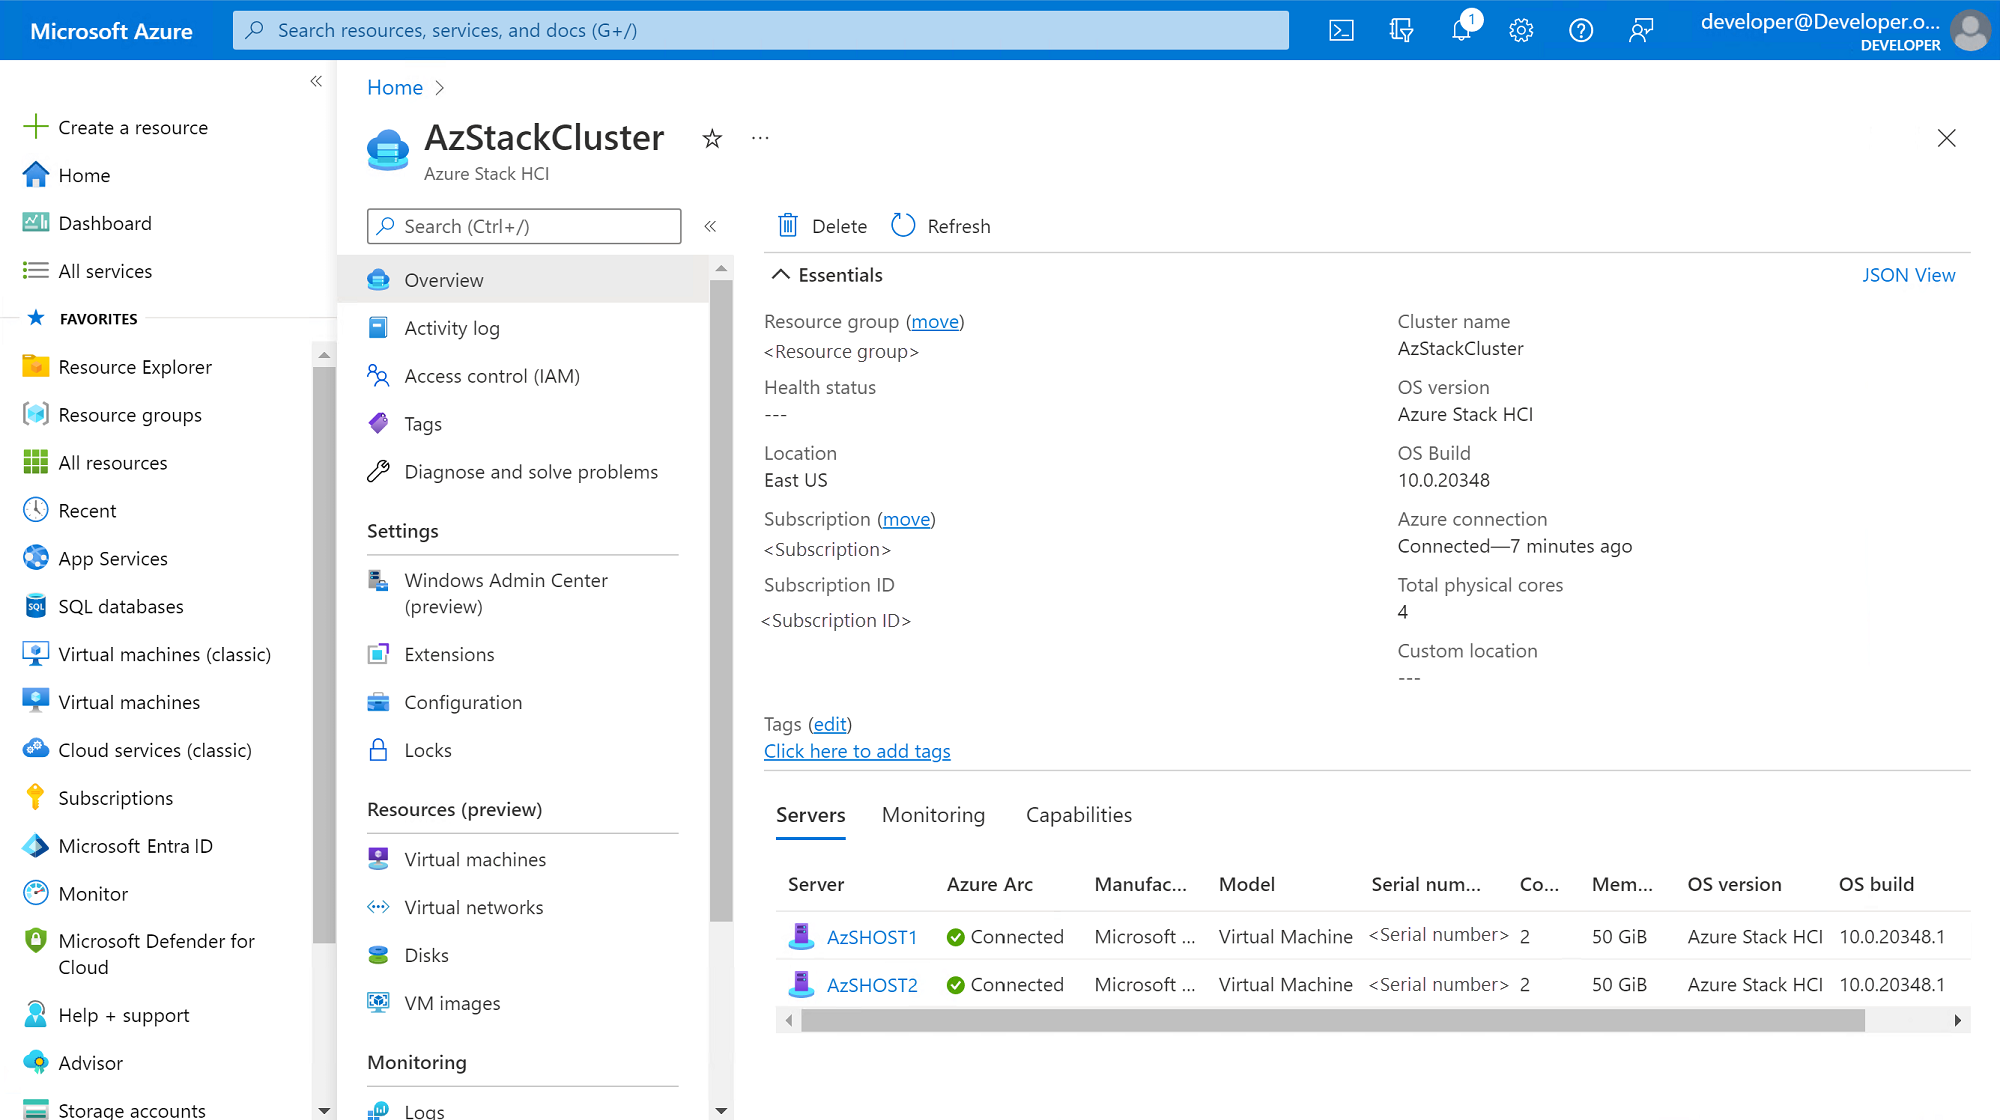
You'll return to the Cluster Manager Dashboard view again, but notice that the cluster status has been updated to Connected. Select the View Azure resource link to see the newly created Azure Stack HCI cluster registration resource in the Azure portal:
Select the Next button at the bottom of this page.
Create and manage virtual machines
This section shows you how to create and manage VMs on your new Azure Stack HCI cluster using Windows Admin Center:
Return to the Windows Admin Center session you used in the previous sections.
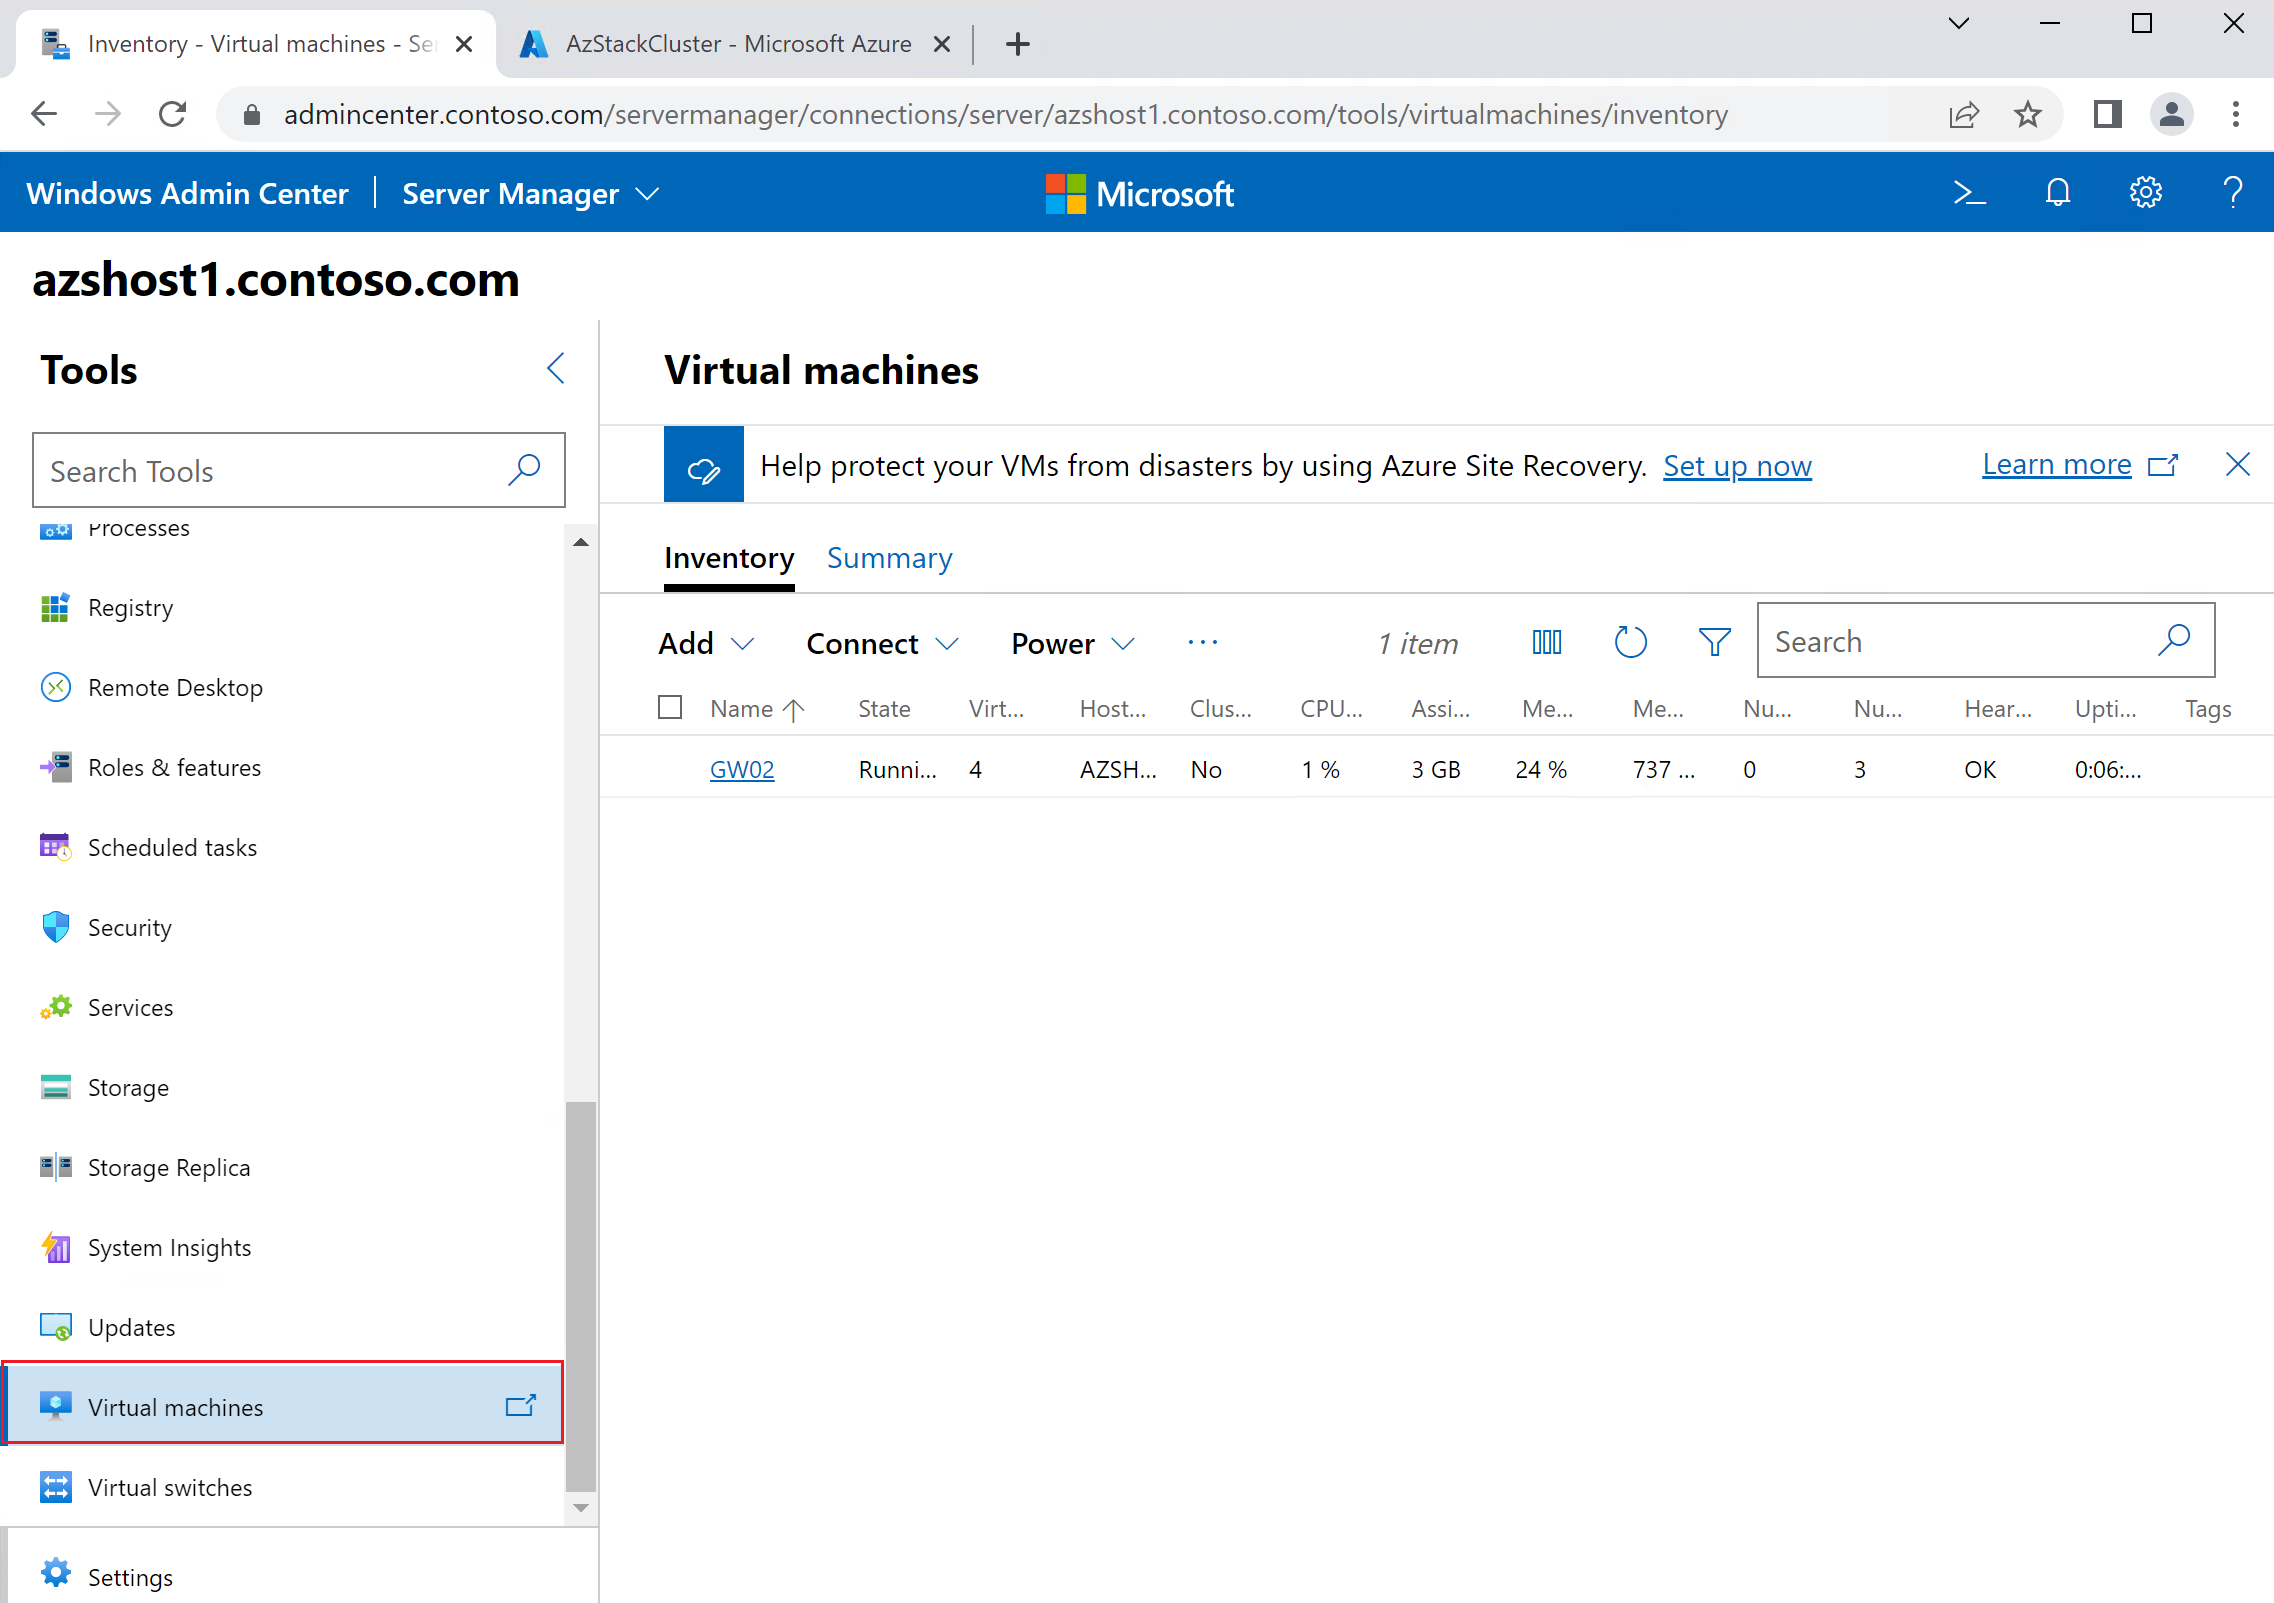
Select the All Connections view, then pick a server or the cluster. In this example, we picked server "azshost1.contoso.com":
In Server Manager, select the Tools / Virtual Machines view. From here, you can use Windows Admin Center features to create and manage VMs.
Select the Next button at the bottom of this page.
Visualize and monitor the cluster and VMs
There are multiple options for monitoring and visualizing your cluster, the VMs you deployed, and other resources:
Choose from the following choices:
- Enable Azure Insights capabilities to monitor an Azure Stack HCI cluster with Azure Stack HCI Insights. See Configure Azure portal to monitor Azure Stack HCI clusters (preview) for more details.
- Use the Windows Admin Center Cluster Manager dashboard. See Monitor Azure Stack HCI clusters from Windows Admin Center for details.
- Use the Windows Health Service, which provides multiple monitoring features including cluster performance history, Health Service faults, and more. See Monitor clusters with the Health Service for more information.
Select the Next button at the bottom of this page.
Congratulations!
You've completed your Azure Stack HCI evaluation!
If you'd like to remove all of the evaluation resources from your Azure subscription, see Azure Resource Manager resource group and resource deletion for details on how to delete the Azure resource group that was created at the beginning of this guide.
For more details on cluster deployment and management:
- Deploy the Azure Stack HCI operating system provides a more detailed look at deployment and the various options and considerations.
- Learn how to manage VMs using PowerShell.
- Check out the web-based Azure Stack HCI sizing tool to get an idea of the type of hardware you need for your cluster based on your workloads.
Have an issue with this section? If so, please give us some feedback so we can improve this section.
