Note
Access to this page requires authorization. You can try signing in or changing directories.
Access to this page requires authorization. You can try changing directories.
Learn how to create a function that is triggered when messages are submitted to an Azure Storage queue.
Note
In-portal editing is only supported for JavaScript, PowerShell, Python, and C# Script functions. Python in-portal editing is only supported when running in the Consumption plan and using the Python v1 programming model.
In-portal editing is currently only supported for functions that were created or last modified in the portal. When you deploy code to a function app from outside the portal, you can no longer edit any of the code for that function app in the portal. In this case, just continue using local development.
For compiled C# functions, Java functions, and other Python functions, you can create the function app in the portal, but you must also create the functions code project locally and then publish it to Azure.
Prerequisites
- An Azure subscription. If you don't have one, create a Trial before you begin.
Create an Azure Function app
From the Azure portal menu or the Home page, select Create a resource.
In the New page, select Compute > Function App.
On the Basics page, use the function app settings as specified in the following table:
Setting Suggested value Description Subscription Your subscription The subscription under which you'll create your new function app. Resource Group myResourceGroup Name for the new resource group in which you'll create your function app. You should create a new resource group because there are known limitations when creating new function apps in an existing resource group. Function App name Globally unique name Name that identifies your new function app. Valid characters are a-z(case insensitive),0-9, and-.Publish Code Option to publish code files or a Docker container. Runtime stack Preferred language Choose a runtime that supports your favorite function programming language. In-portal editing is only available for JavaScript, PowerShell, TypeScript, and C# script. C# class library, Java, and Python functions must be developed locally. Version Version number Choose the version of your installed runtime. Region Preferred region Select a region that's near you or near other services that your functions can access. Select Next : Hosting. On the Hosting page, enter the following settings:
Setting Suggested value Description Storage account Globally unique name Create a storage account used by your function app. Storage account names must be between 3 and 24 characters in length and can contain numbers and lowercase letters only. You can also use an existing account, which must meet the storage account requirements. Operating system Windows An operating system is pre-selected for you based on your runtime stack selection, but you can change the setting if necessary. In-portal editing is only supported on Windows. Plan Consumption (Serverless) Hosting plan that defines how resources are allocated to your function app. In the default Consumption plan, resources are added dynamically as required by your functions. In this serverless hosting, you pay only for the time your functions run. When you run in an App Service plan, you must manage the scaling of your function app. Select Next : Monitoring. On the Monitoring page, enter the following settings:
Setting Suggested value Description Application Insights Default Creates an Application Insights resource of the same App name in the nearest supported region. By expanding this setting or selecting Create new, you can change the Application Insights name or select a different region in an Azure geography where you want to store your data. Select Review + create to review the app configuration selections.
On the Review + create page, review your settings, and then select Create to provision and deploy the function app.
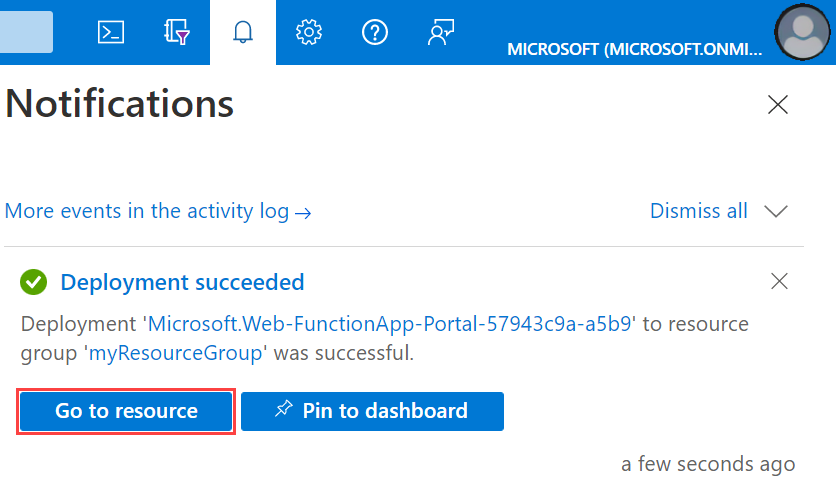
Select the Notifications icon in the upper-right corner of the portal and watch for the Deployment succeeded message.
Select Go to resource to view your new function app. You can also select Pin to dashboard. Pinning makes it easier to return to this function app resource from your dashboard.

Next, you create a function in the new function app.
Create a Queue triggered function
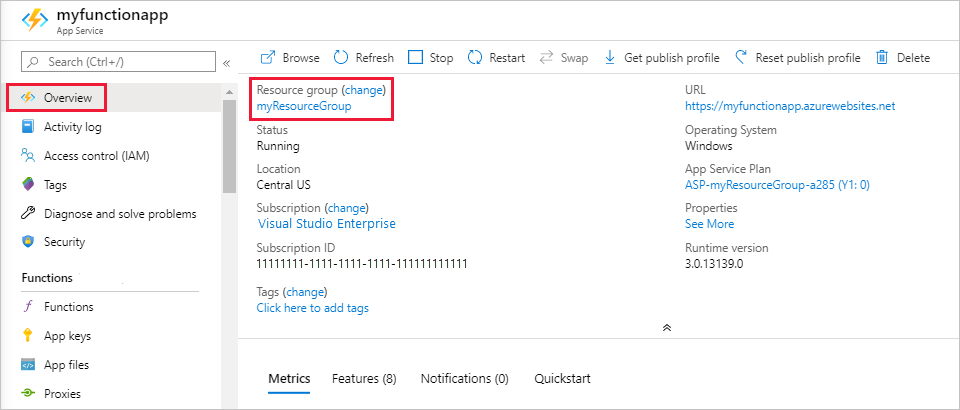
In your function app, select Overview, and then select + Create under Functions.
Under Select a template, scroll down and choose the Azure Queue Storage trigger template.
In Template details, configure the new trigger with the settings as specified in this table, then select Create:
Setting Suggested value Description Job type Append to app You only see this setting for a Python v2 app. Name Unique in your function app Name of this queue triggered function. Queue name myqueue-items Name of the queue to connect to in your Storage account. Storage account connection AzureWebJobsStorage You can use the storage account connection already being used by your function app, or create a new one. Azure creates the Queue Storage triggered function based on the provided values. Next, you connect to your Azure storage account and create the myqueue-items storage queue.
Create the queue
Return to the Overview page for your function app, select your Resource group, then find and select the storage account in your resource group.
In the storage account page, select Data storage > Queues > + Queue.
In the Name field, type
myqueue-items, and then select Create.Select the new myqueue-items queue, which you use to test the function by adding a message to the queue.
Test the function
In a new browser window, return to your function app page and select Log stream, which displays real-time logging for your app.
In the myqueue-items queue, select Add message, type "Hello World!" in Message text, and select OK.
Go back to your function app logs and verify that the function ran to process the message from the queue.
Back in your storage queue, select Refresh and verify that the message has been processed and is no longer in the queue.
Clean up resources
Other quickstarts in this collection build upon this quickstart. If you plan to work with subsequent quickstarts, tutorials, or with any of the services you've created in this quickstart, don't clean up the resources.
Resources in Azure refer to function apps, functions, storage accounts, and so forth. They're grouped into resource groups, and you can delete everything in a group by deleting the group.
You've created resources to complete these quickstarts. You might be billed for these resources, depending on your account status and service pricing. If you don't need the resources anymore, here's how to delete them:
In the Azure portal, go to the Resource group page.
To get to that page from the function app page, select the Overview tab, and then select the link under Resource group.

To get to that page from the dashboard, select Resource groups, and then select the resource group that you used for this article.
In the Resource group page, review the list of included resources, and verify that they're the ones you want to delete.
Select Delete resource group and follow the instructions.
Deletion might take a couple of minutes. When it's done, a notification appears for a few seconds. You can also select the bell icon at the top of the page to view the notification.
Next steps
You have created a function that runs when a message is added to a storage queue. For more information about Queue storage triggers, see Azure Functions Storage queue bindings.
Now that you have a created your first function, let's add an output binding to the function that writes a message back to another queue.