Add messages to an Azure Storage queue using Functions
In Azure Functions, input and output bindings provide a declarative way to make data from external services available to your code. In this article, you use an output binding to create a message in a queue when an HTTP request triggers a function. You use Azure storage container to view the queue messages that your function creates.
Prerequisites
An Azure subscription. If you don't have one, create a Trial before you begin.
Follow the directions in Create your first function in the Azure portal, omitting the Clean up resources step, to create the function app and function to use in this article.
Add an output binding
In this section, you use the portal UI to add an Azure Queue Storage output binding to the function you created in the prerequisites. This binding makes it possible to write minimal code to create a message in a queue. You don't need to write code for such tasks as opening a storage connection, creating a queue, or getting a reference to a queue. The Azure Functions runtime and queue output binding take care of those tasks for you.
In the Azure portal, search for and select the function app that you created in Create your first function from the Azure portal.
In your function app, select the function that you created.
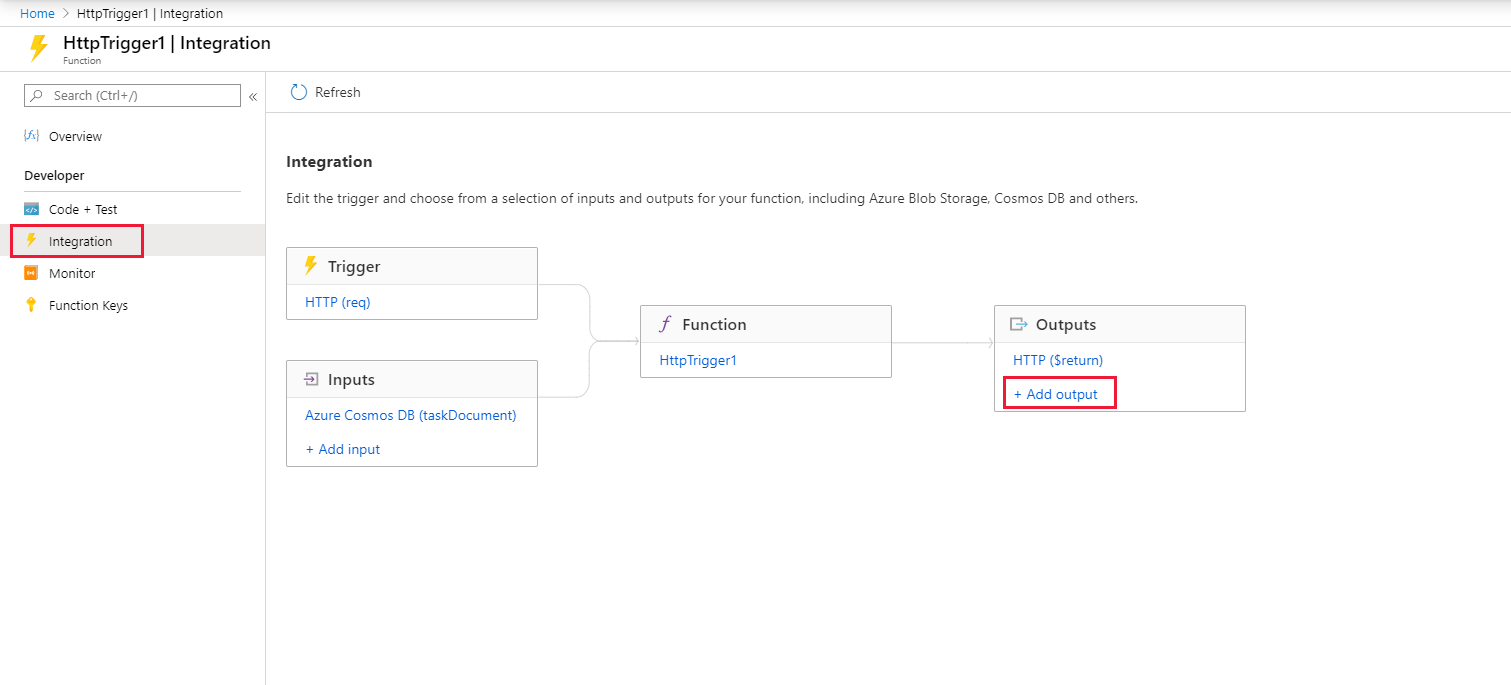
Select Integration, and then select + Add output.
Select the Azure Queue Storage binding type and add the settings as specified in the table that follows this screenshot:
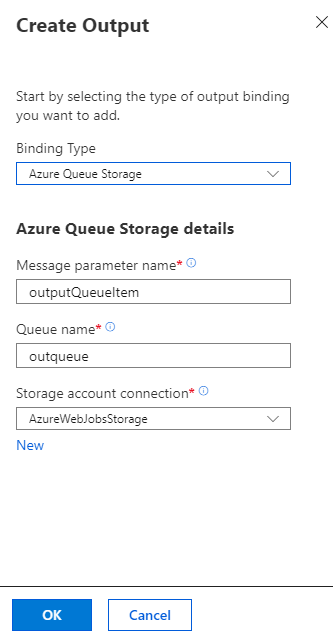
Setting Suggested value description Message parameter name outputQueueItem The name of the output binding parameter. Queue name outqueue The name of the queue to connect to in your storage account. Storage account connection AzureWebJobsStorage You can use the existing storage account connection used by your function app or create a new one. Select OK to add the binding.
Now that you have an output binding defined, you need to update the code to use the binding to add messages to a queue.
Add code that uses the output binding
In this section, you add code that writes a message to the output queue. The message includes the value passed to the HTTP trigger in the query string. For example, if the query string includes name=Azure, the queue message is Name passed to the function: Azure.
In your function, select Code + Test to display the function code in the editor.
Update the function code, according to your function language:
Add an outputQueueItem parameter to the method signature as shown in the following example:
public static async Task<IActionResult> Run(HttpRequest req,
    ICollector<string> outputQueueItem, ILogger log)
{
    ...
}
In the body of the function, just before the
returnstatement, add code that uses the parameter to create a queue message:outputQueueItem.Add("Name passed to the function: " + name);Select Save to save your changes.
Test the function
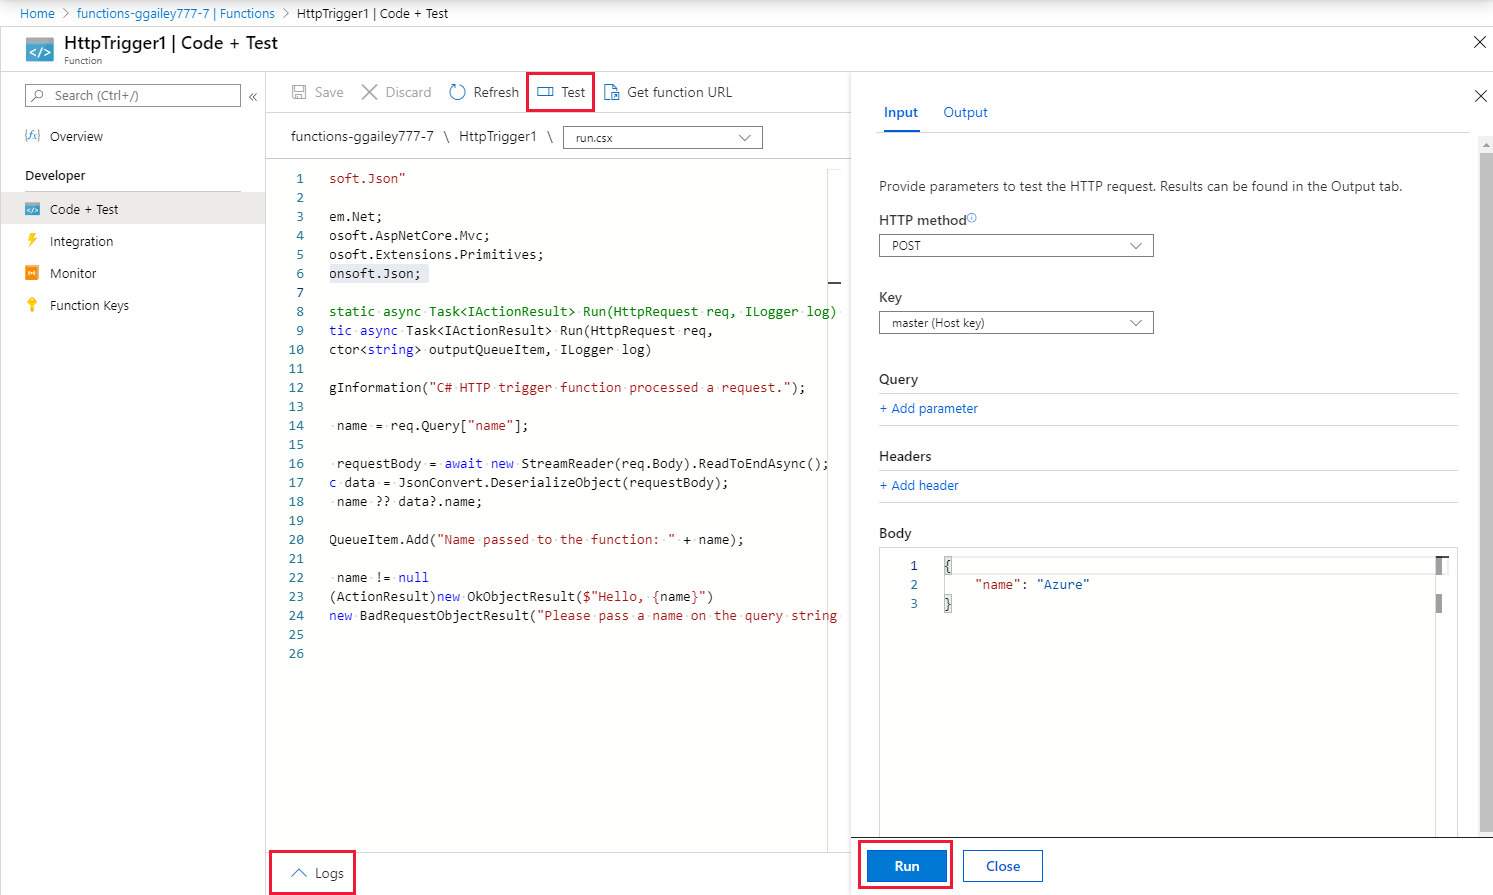
After the code changes are saved, select Test.
Confirm that your test matches this screenshot, and then select Run.
Notice that the Request body contains the
namevalue Azure. This value appears in the queue message created when the function is invoked.As an alternative to selecting Run, you can call the function by entering a URL in a browser and specifying the
namevalue in the query string. This browser method is shown in Create your first function from the Azure portal.Check the logs to make sure that the function succeeded.
A new queue named outqueue is created in your storage account by the Functions runtime when the output binding is first used. You use storage account to verify that the queue and a message in it were created.
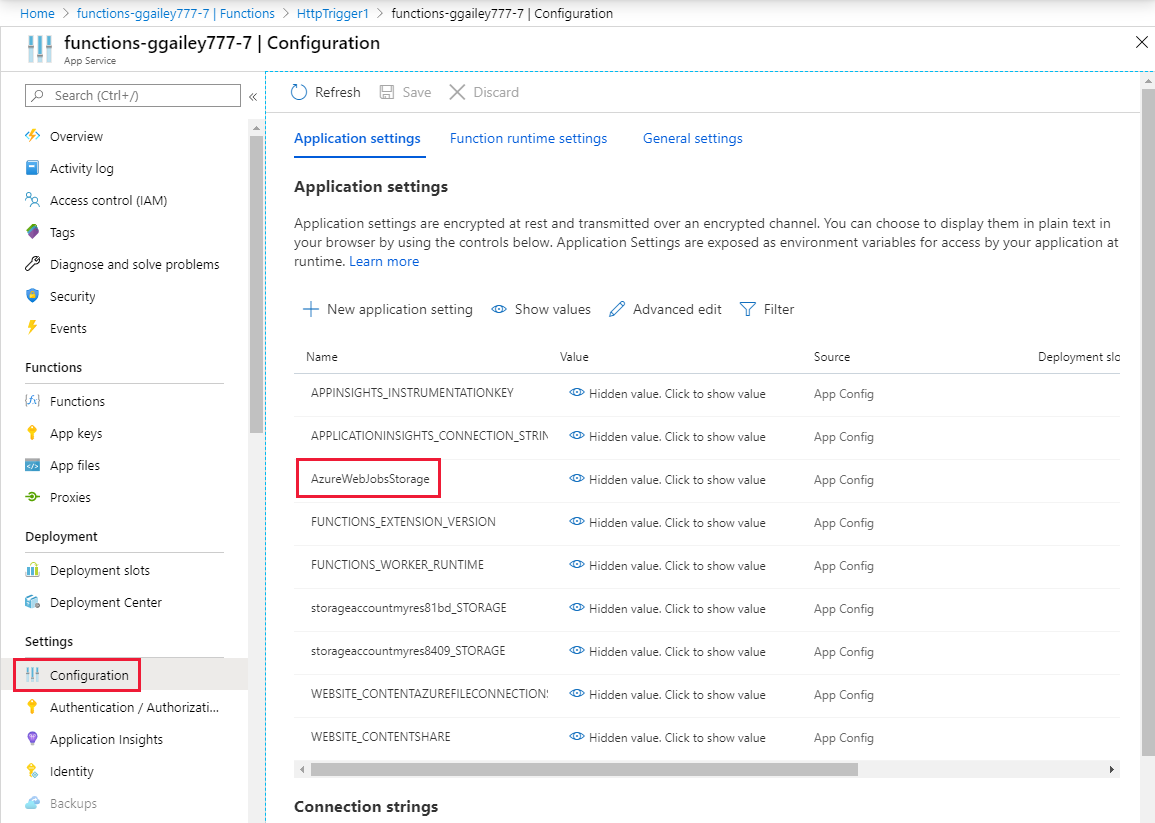
Find the storage account connected to AzureWebJobsStorage
In your function app, expand Settings, and then select Environment variables.
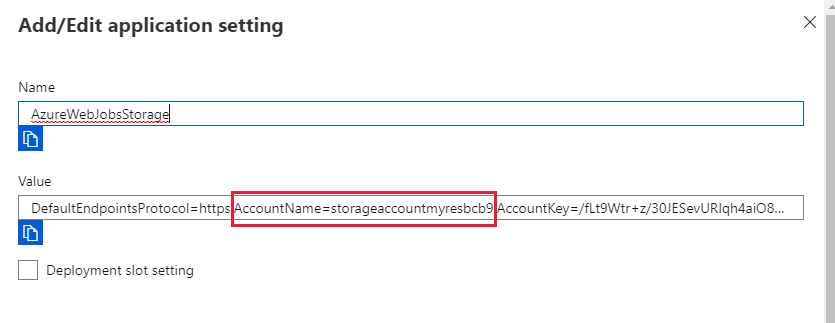
In the App settings tab, select AzureWebJobsStorage.
Locate and make note of the account name.
Examine the output queue
In the resource group for your function app, select the storage account that you're using.
Under Queue service, select Queues, and select the queue named outqueue.
The queue contains the message that the queue output binding created when you ran the HTTP-triggered function. If you invoked the function with the default
namevalue of Azure, the queue message is Name passed to the function: Azure.Run the function again.
A new message appears in the queue.
Clean up resources
In the preceding steps, you created Azure resources in a resource group. If you don't expect to need these resources in the future, you can delete them by deleting the resource group.
From the Azure portal menu or Home page, select Resource groups. Then, on the Resource groups page, select myResourceGroup.
On the myResourceGroup page, make sure that the listed resources are the ones you want to delete.
Select Delete resource group, type myResourceGroup in the text box to confirm, and then select Delete.
Related content
In this article, you added an output binding to an existing function. For more information about binding to Queue Storage, see Queue Storage trigger and bindings.
- Azure Functions triggers and bindings concepts
Learn how Functions integrates with other services. - Azure Functions developer reference
Provides more technical information about the Functions runtime and a reference for coding functions and defining triggers and bindings. - Code and test Azure Functions locally
Describes the options for developing your functions locally.
