注意
Azure 资源组项目现已获得外延支持,这意味着我们将继续支持现有功能和能力,但不会优先添加新功能。
注意
为了获得最佳和最安全的体验,我们强烈建议将 Visual Studio 安装更新到最新的长期支持 (LTS) 版本。 更新将提高 Visual Studio 环境的可靠性和整体性能。 如果你选择不升级,可能会遇到通过 Visual Studio 创建和部署 Azure 资源组时出现问题中记录的问题。
使用 Visual Studio 可以创建一个项目,用于将基础结构和代码部署到 Azure。 例如,可以部署 Web 主机、网站和网站代码。 Visual Studio 许多不同的入门模板用于部署常见方案。 本文中将部署一个 Web 应用。
本文介绍如何使用装有 Azure 开发和 ASP.NET 工作负荷的 Visual Studio 2019 或更高版本。 如果使用 Visual Studio 2017,体验将大体相同。
创建 Azure 资源组项目
在本部分,我们将使用“Web 应用”模板创建 Azure 资源组项目 。
在 Visual Studio 中,选择“文件”>“新建”>“项目”。
搜索“资源组”,然后依次选择“Azure 资源组(外延支持)”项目模板和“下一步”。
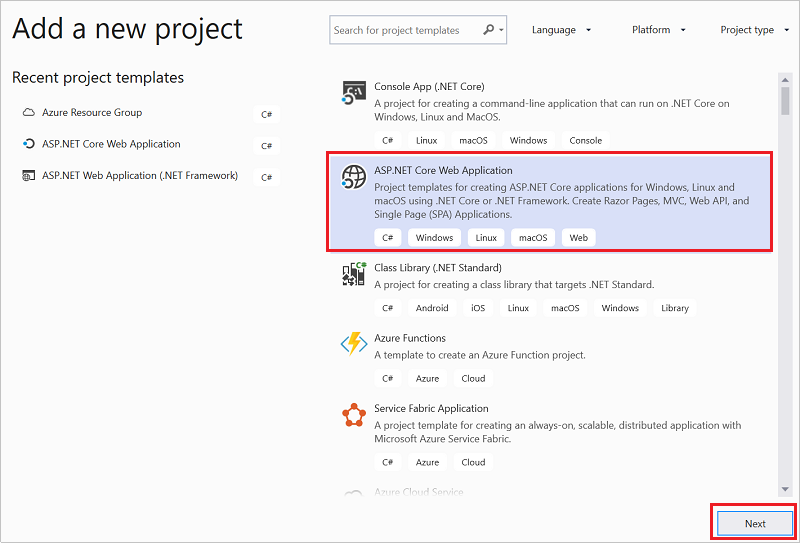
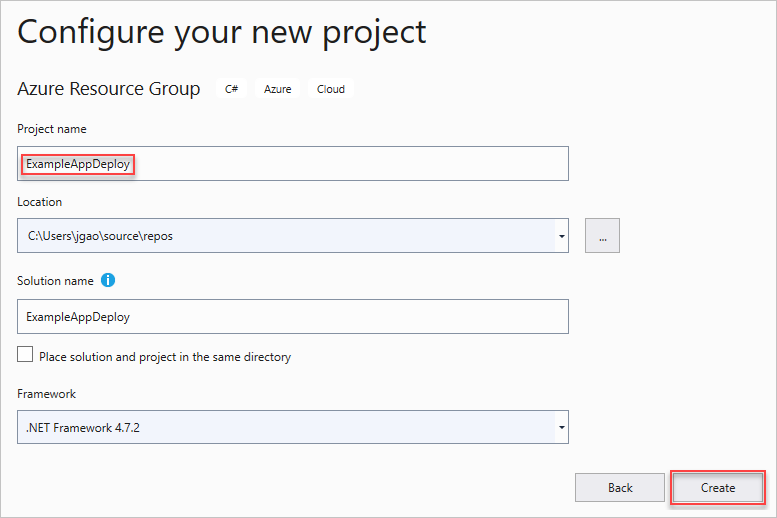
为你的项目命名。 其他默认设置可能没问题,但请查看它们,使它们适用于你的环境。 完成后,选择“创建”。
选择要部署到 Azure 资源管理器的模板。 可以看到,系统根据要部署的项目类型提供了许多不同的选项。 就本文来说,请选择“Web 应用”模板和“确定” 。
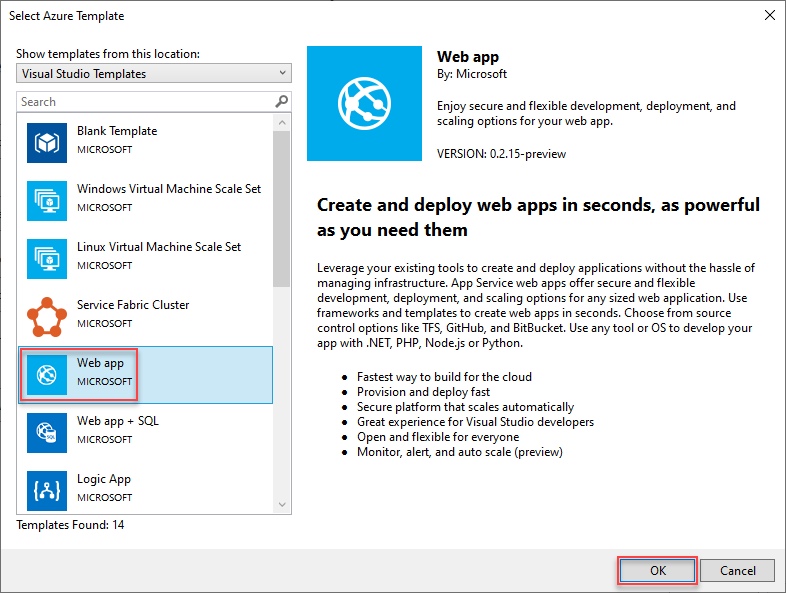
选择的模板只是起点;可以根据方案添加和删除资源。
Visual Studio 将创建 Web 应用的资源组部署项目。 若要查看项目文件,请查看部署项目中的节点。
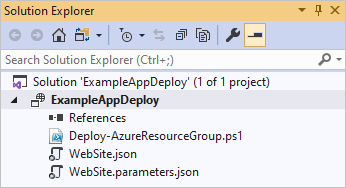
由于选择了“Web 应用”模板,因此会看到以下文件:
文件名 说明 Deploy-AzureResourceGroup.ps1 一个 PowerShell 脚本,运行 PowerShell 命令以部署到 Azure 资源管理器。 Visual Studio 使用此 PowerShell 脚本来部署模板。 WebSite.json 资源管理器模板,定义要部署到 Azure 的基础结构,以及在部署期间可以提供的参数。 它还定义各资源之间的依赖关系,以便资源管理器按正确的顺序部署资源。 WebSite.parameters.json 包含模板所需值的参数文件。 需要传入这些参数值来自定义每个部署。 请注意将“生成操作”设置为“内容” 。 如果添加更多参数文件,请确保将“生成操作”设置为“内容”。 所有资源组部署项目都包含这些基本文件。 其他项目可能包含更多文件以支持其他功能。
自定义资源管理器模板
可以通过修改资源管理器模板(描述要部署的资源)来自定义部署项目。 若要了解资源管理器模板的元素,请参阅创作 Azure 资源管理器模板。
若要使用模板,请打开“WebSite.json” 。
Visual Studio 编辑器提供了工具来帮助编辑资源管理器模板。 “JSON 大纲”窗口可让你轻松查看模板中定义的元素 。
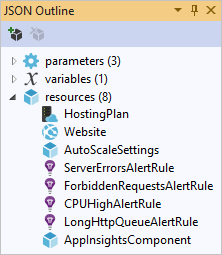
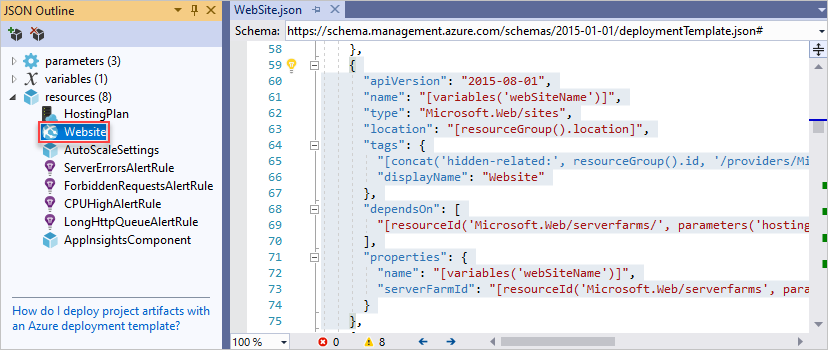
选择大纲中的一个元素以转到模板的那个部分。
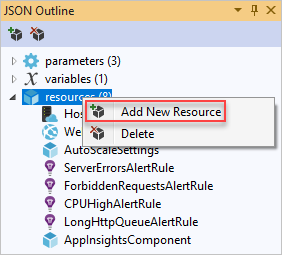
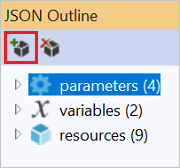
可以通过右键单击“资源”并选择“添加新资源”来添加资源。
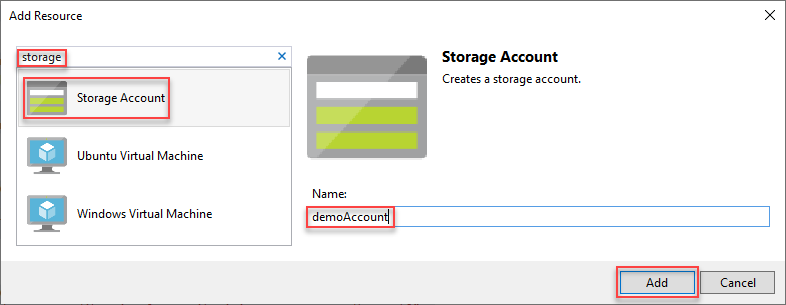
选择“存储帐户” 并为其命名。 提供一个名称,该名称不超过 11 个字符,并且只包含数字和小写字母。
请注意,不仅会添加资源,而且还添加存储帐户类型的参数,以及存储帐户名称的变量。
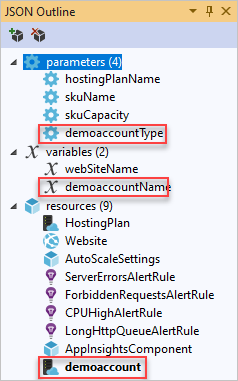
存储帐户类型的参数是使用允许的类型和默认类型预定义的。 可以保留或根据方案编辑这些值。 如果不希望任何人通过此模板部署 Premium_LRS 存储帐户,请将它从允许的类型中删除。
"demoAccountType": {
  "type": "string",
  "defaultValue": "Standard_LRS",
  "allowedValues": [
    "Standard_LRS",
    "Standard_GRS",
    "Standard_RAGRS"
  ]
}
将项目部署到 Azure
现在已准备好将项目部署到资源组。
默认情况下,项目中的 PowerShell 脚本 (Deploy-AzureResourceGroup.ps1) 使用 AzureRM 模块。 如果仍然安装了 AzureRM 模块,并想要继续使用它,可以使用此默认脚本。 借助此脚本,可以使用 Visual Studio 接口部署解决方案。
但是,如果你已迁移到新的 Az 模块,需要将新脚本添加到项目。 若要添加使用 Az 模块的脚本,请复制 Deploy-AzTemplate.ps1 脚本并将其添加到项目。 若要使用此脚本进行部署,必须从 PowerShell 控制台中运行它,而不是使用 Visual Studio 部署接口。
本文对这两种方法都进行了介绍。 本文将默认脚本称为 AzureRM 模块脚本,新脚本称为 Az 模块脚本。
Az 模块脚本
对于 Az 模块脚本,请打开 PowerShell 控制台并运行:
Connect-AzAccount -Environment AzureChinaCloud

.\Deploy-AzTemplate.ps1 -ArtifactStagingDirectory . -Location chinaeast -TemplateFile WebSite.json -TemplateParametersFile WebSite.parameters.json
AzureRM 模块脚本
对于 AzureRM 模块脚本,请使用 Visual Studio:
在部署项目节点的快捷菜单中,选择“部署” >“新建” 。

此时会显示“部署到资源组”对话框 。 在“资源组” 下拉框中,选择现有资源组或创建新资源组。 选择“部署”。
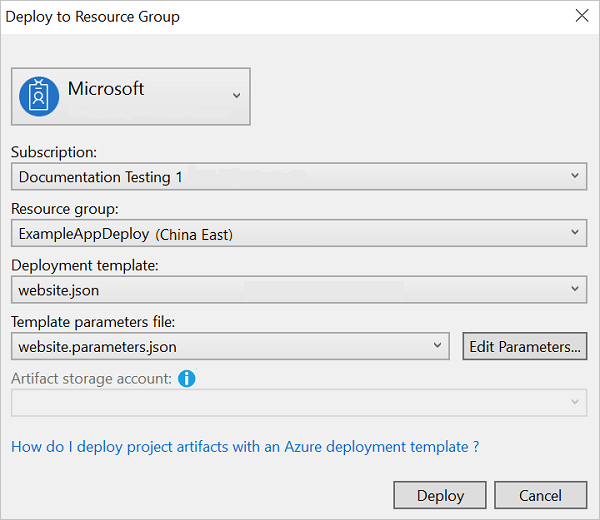
在“输出” 窗口中可查看部署状态。 完成部署后,最后一条消息指示部署成功,其内容与下面的消息类似:
18:00:58 - Successfully deployed template 'website.json' to resource group 'ExampleAppDeploy'.
查看已部署的资源
让我们检查结果。
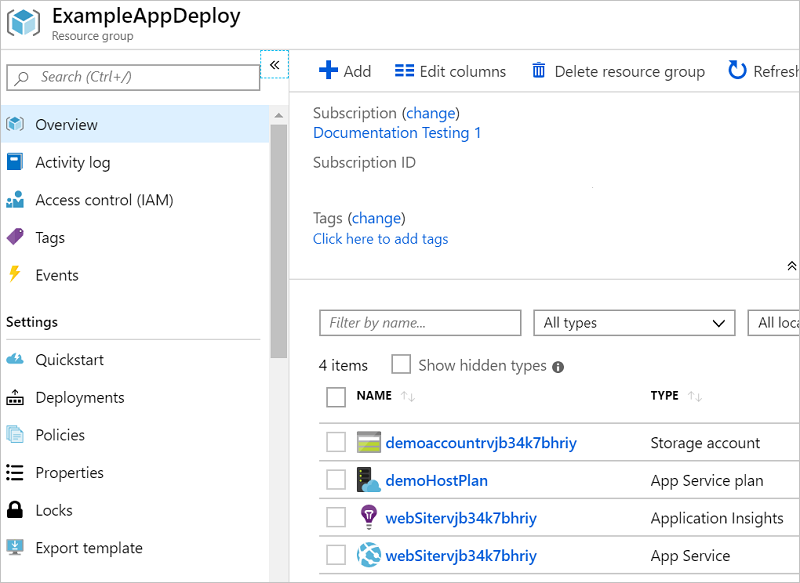
在浏览器中,打开 Azure 门户并登录到帐户。 要查看资源组,请选择“资源组” ,并选择已部署到的资源组。
将显示所有已部署的资源。 请注意,存储帐户的名称并不完全是添加资源时指定的名称。 存储帐户必须是唯一的。 模板自动向所提供的名称添加一个字符串,以便创建唯一名称。
将代码添加到项目
此时,已为应用部署基础结构,但尚未在项目中部署实际代码。
将项目添加到 Visual Studio 解决方案。 右键单击解决方案,选择“添加” >“新建项目” 。
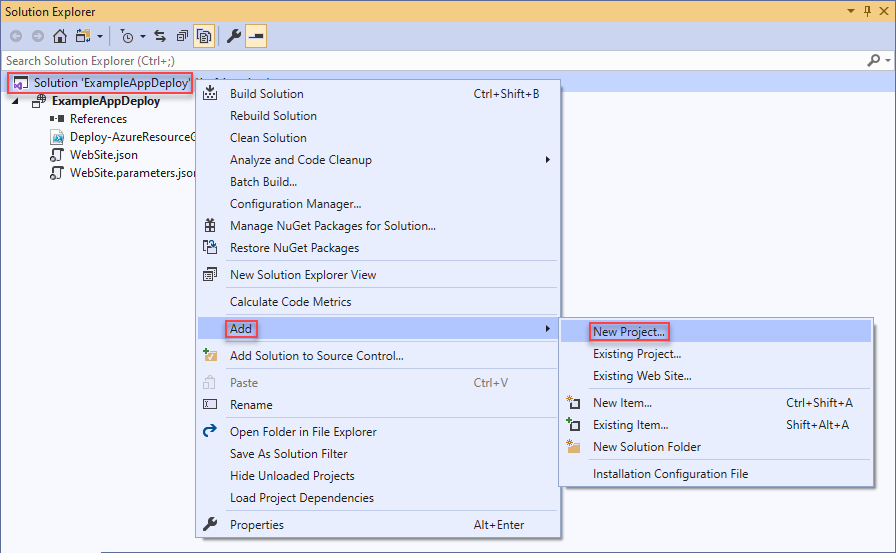
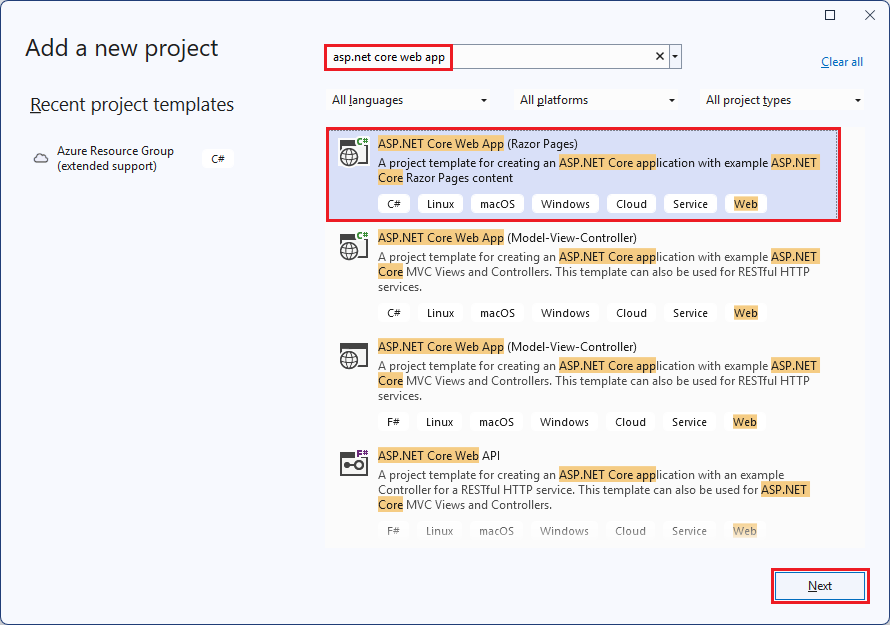
添加“ASP.NET Core Web 应用程序” 。
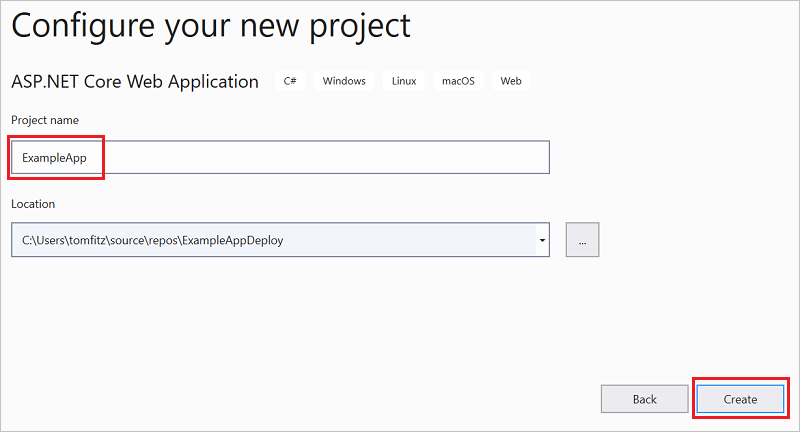
为你的 web 应用命名,然后选择“创建” 。
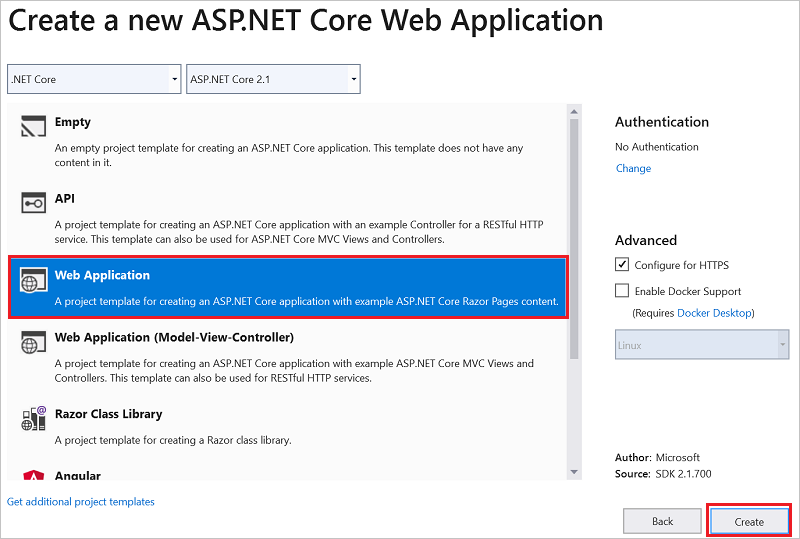
选择“Web 应用程序”和“创建” 。
在 Visual Studio 创建 Web 应用之后,可在解决方案中看到这两个项目。
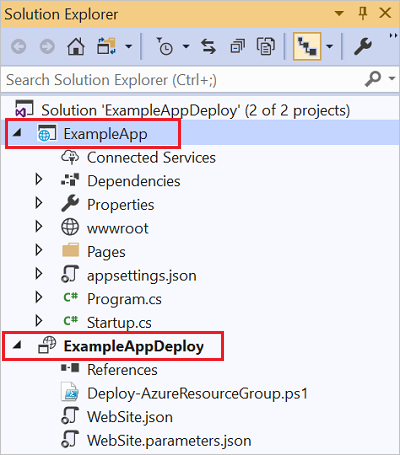
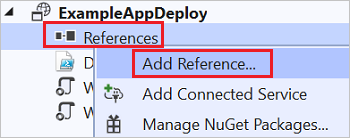
现在,需要确保资源组项目与此新项目之间建立链接。 返回到资源组项目 (ExampleAppDeploy)。 右键单击“引用” ,选择“添加引用” 。
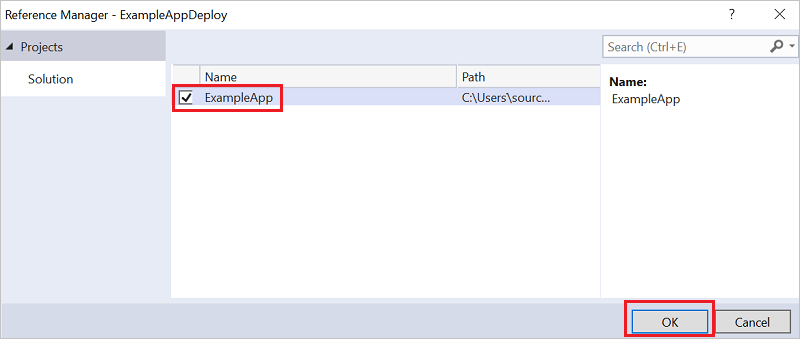
选择创建的 Web 应用项目。
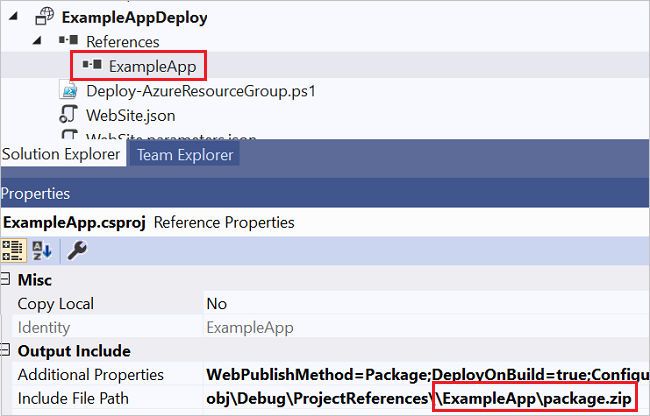
通过添加引用,可以将 Web 应用项目链接到资源组项目中,并自动设置一些属性。 可以在“属性” 窗口中看到针对该引用的属性。 “包含文件路径” 包含创建包所在的路径。 请记下文件夹 (ExampleApp) 和文件 (package.zip)。 用户需要知道这些值,因为在部署应用时需提供这些值作为参数。
返回到你的模板 (WebSite.json),向模板添加资源。
这次选择“用于 Web 应用的 Web 部署” 。
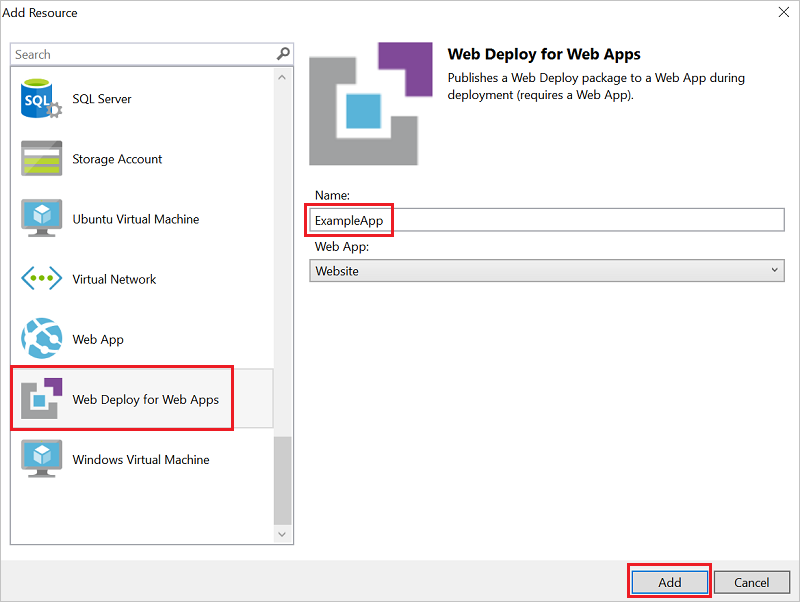
保存模板。
在上一步骤中已添加了一些新参数。
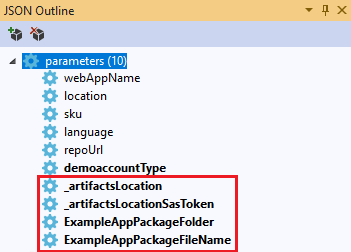
不需要为 _artifactsLocation 或 _artifactsLocationSasToken 提供值,因为这些值自动生成 。 但是,必须将文件夹和文件名称设置为包含部署包的路径。 这些参数的名称以 PackageFolder 和 PackageFileName 结尾 。 名称的第一部分是添加的 Web 部署资源的名称。 在本文中,它们被命名为 ExampleAppPackageFolder 和 ExampleAppPackageFileName 。
打开 Website.parameters.json 并将这些参数设置为你在引用属性中看到的值 。 将 ExampleAppPackageFolder 设置为文件夹的名称 。 将 ExampleAppPackageFileName 设置为 zip 文件的名称 。
{
  "$schema": "https://schema.management.azure.com/schemas/2019-04-01/deploymentParameters.json#",
  "contentVersion": "1.0.0.0",
  "parameters": {
    "ExampleAppPackageFolder": {
      "value": "ExampleApp"
    },
    "ExampleAppPackageFileName": {
      "value": "package.zip"
    }
  }
}
将代码与基础结构一起部署
因为你将代码添加到了项目,所以这次部署会稍有不同。 在部署期间,将项目的生成工件暂存到资源管理器可以访问的位置。 生成工件会被暂存到存储帐户。
Az 模块脚本
如果你正在使用 Az 模块脚本,那么需要对模板做一个小的更改。 此脚本将斜杠添加到生成工件位置,但模板并不需要该斜杠。 打开 WebSite.json 并找到 MSDeploy 扩展的属性。 它有一个名为 packageUri 的属性 。 删除生成工件位置和包文件夹之间的斜杠。
它看起来应该如下所示:
"packageUri": "[concat(parameters('_artifactsLocation'), parameters('ExampleAppPackageFolder'), '/', parameters('ExampleAppPackageFileName'), parameters('_artifactsLocationSasToken'))]",
请注意,在前面的示例中,在 parameters('_artifactsLocation') 和 parameters('ExampleAppPackageFolder') 之间没有 '/', 。
重新生成项目。 生成项目可确保需部署的文件添加到暂存文件夹中。
现在,打开 PowerShell 控制台并运行:
.\Deploy-AzTemplate.ps1 -ArtifactStagingDirectory .\bin\Debug\staging\ExampleAppDeploy -Location chinaeast -TemplateFile WebSite.json -TemplateParametersFile WebSite.parameters.json -UploadArtifacts -StorageAccountName <storage-account-name>
AzureRM 模块脚本
对于 AzureRM 模块脚本,请使用 Visual Studio:
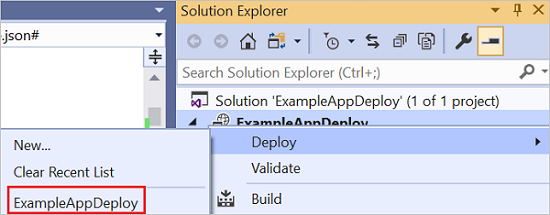
若要重新部署,请选择“部署” ,以及以前部署的资源组。
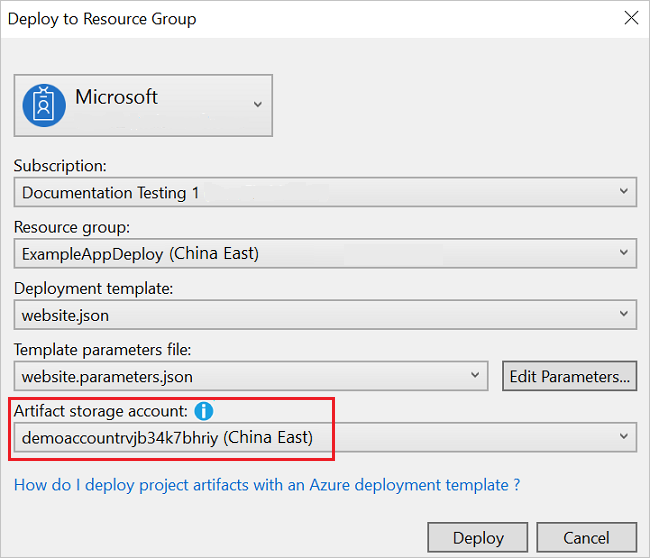
为“生成工件存储帐户”选择部署此资源组时所用的存储帐户 。
查看 Web 应用
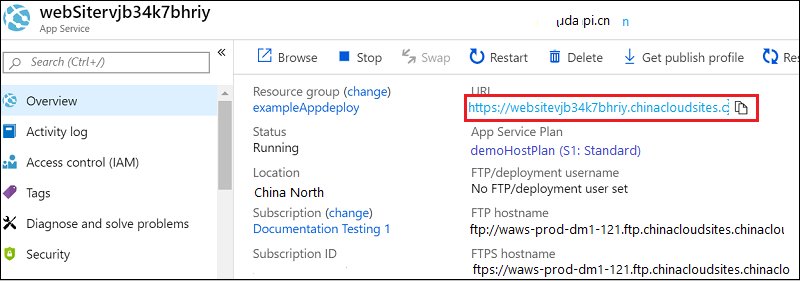
部署完毕后,请在门户中选择 Web 应用。 选择 URL 以浏览到此站点。
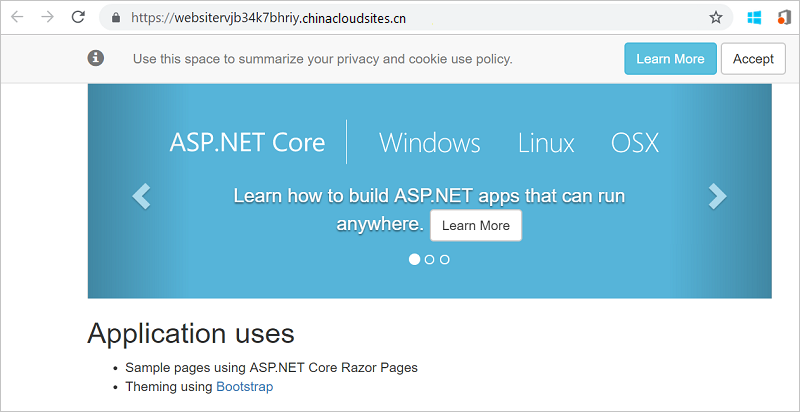
请注意已成功部署默认的 ASP.NET 应用程序。
添加操作仪表板
并不仅限于通过 Visual Studio 界面提供的资源。 可将自定义资源添加到模板来自定义部署。 若要显示如何添加资源,请添加一个操作仪表板来管理部署的资源。
打开 WebSite.json 文件,在存储帐户资源后但在资源部分的右
]前添加以下 JSON。,{ "properties": { "lenses": { "0": { "order": 0, "parts": { "0": { "position": { "x": 0, "y": 0, "colSpan": 4, "rowSpan": 6 }, "metadata": { "inputs": [ { "name": "resourceGroup", "isOptional": true }, { "name": "id", "value": "[resourceGroup().id]", "isOptional": true } ], "type": "Extension/HubsExtension/PartType/ResourceGroupMapPinnedPart" } }, "1": { "position": { "x": 4, "y": 0, "rowSpan": 3, "colSpan": 4 }, "metadata": { "inputs": [], "type": "Extension[azure]/HubsExtension/PartType/MarkdownPart", "settings": { "content": { "settings": { "content": "__Customizations__\n\nUse this dashboard to create and share the operational views of services critical to the application performing. To customize simply pin components to the dashboard and then publish when you're done. Others will see your changes when you publish and share the dashboard.\n\nYou can customize this text too. It supports plain text, __Markdown__, and even limited HTML like images <img width='10' src='https://portal.azure.cn/favicon.ico'/> and <a href='https://azure.microsoft.com' target='_blank'>links</a> that open in a new tab.\n", "title": "Operations", "subtitle": "[resourceGroup().name]" } } } } } } } }, "metadata": { "model": { "timeRange": { "value": { "relative": { "duration": 24, "timeUnit": 1 } }, "type": "MsPortalFx.Composition.Configuration.ValueTypes.TimeRange" } } } }, "type": "Microsoft.Portal/dashboards", "apiVersion": "2015-08-01-preview", "name": "[concat('ARM-',resourceGroup().name)]", "location": "[resourceGroup().location]", "tags": { "hidden-title": "[concat('OPS-',resourceGroup().name)]" } }重新部署项目。
部署完成后,请在门户中查看你的仪表板。 选择“仪表板” 并选择你部署的仪表板。
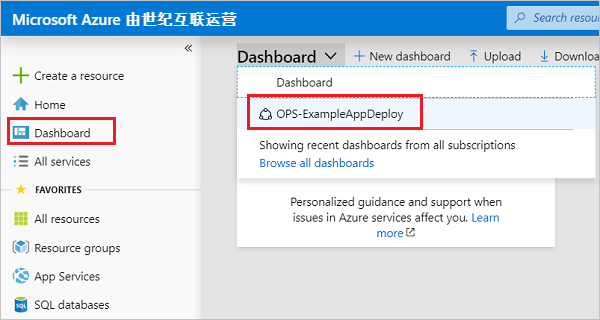
可看到自定义的仪表板。
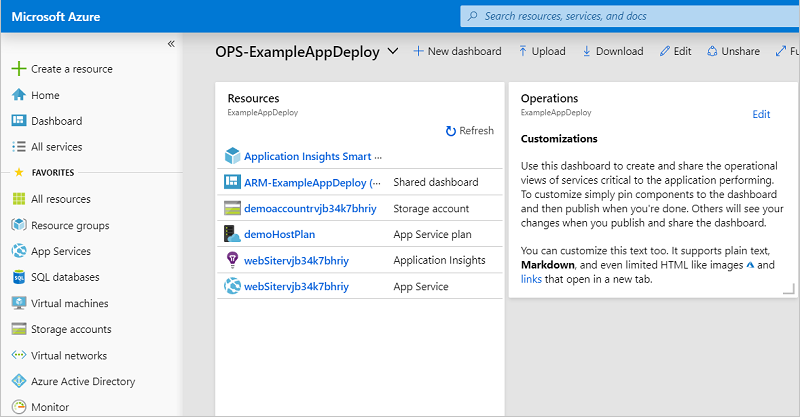
可以使用 Azure 基于角色的访问控制 (Azure RBAC) 来管理对仪表板的访问权限。 部署后,还可以自定义仪表板的外观。 但是,如果重新部署资源组,则模板中的仪表板将重置为其默认状态。 有关创建仪表板的详细信息,请参阅以编程方式创建 Azure 仪表板。
清理资源
不再需要 Azure 资源时,请通过删除资源组来清理部署的资源。
在 Azure 门户上的左侧菜单中选择“资源组” 。
选择资源组名称。
在顶部菜单中选择“删除资源组”。
后续步骤
本文介绍了如何使用 Visual Studio 创建和部署模板。 若要详细了解模板开发,请参阅新的初学者教程系列: