Note
Access to this page requires authorization. You can try signing in or changing directories.
Access to this page requires authorization. You can try changing directories.
This article covers how to deploy a disk that uses zone-redundant storage (ZRS) as a redundancy option. ZRS replicates your Azure managed disk synchronously across three Azure availability zones in the selected region. Each availability zone is a separate physical location with independent power, cooling, and networking.
For conceptual information on ZRS, see Zone-redundant storage for managed disks
Limitations
ZRS for managed disks is only supported with Premium SSD and Standard SSD managed disks. ZRS for managed disks isn't supported with Premium SSD v2 managed disks. Force detach only supports data disks.
Regional availability
ZRS disks are currently available in China North 3.
Create a VM with a ZRS OS disk
Sign in to the Azure portal.
Navigate to Virtual machines and follow the normal VM creation process.
Proceed to the Disks pane.
Select your disk and select one of the ZRS disks in the drop-down.
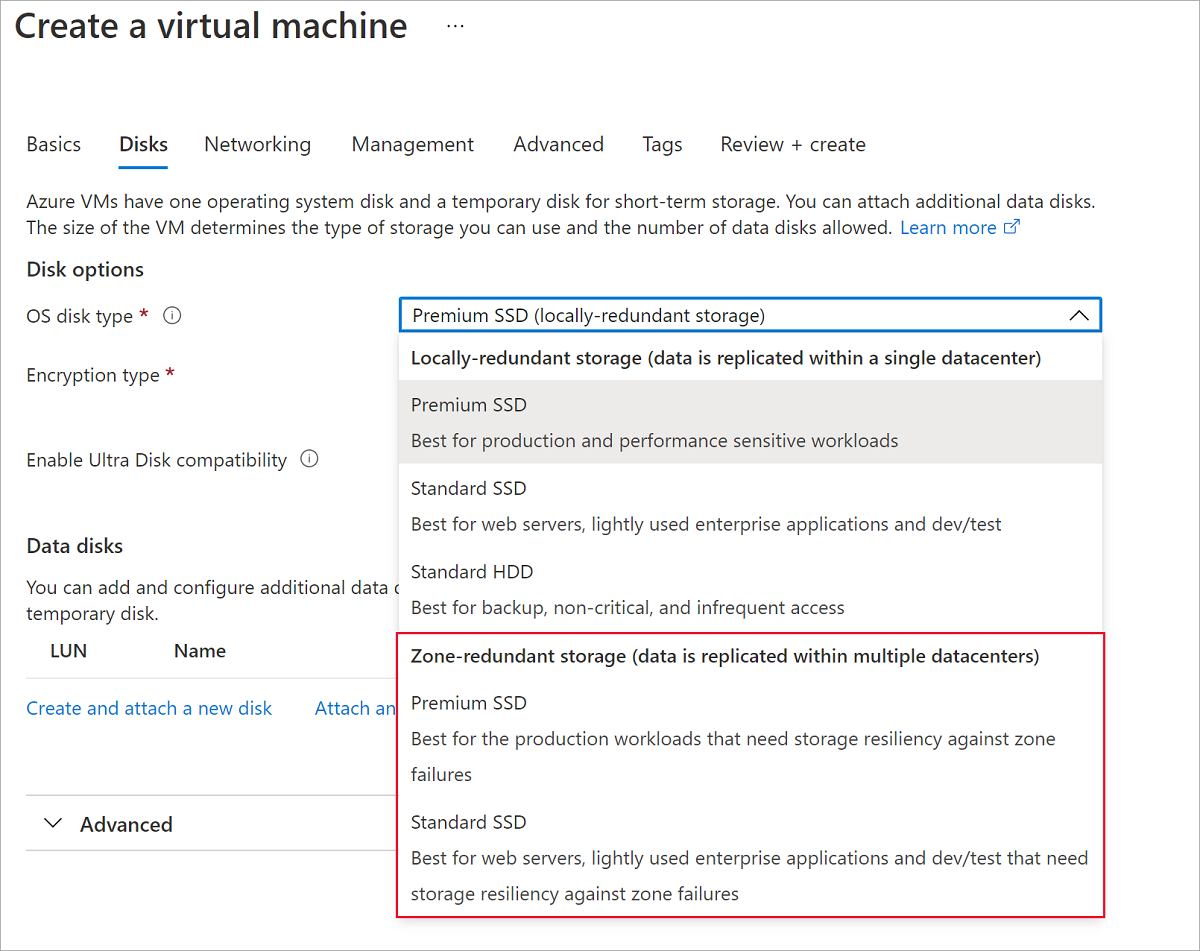
Proceed through the rest of the VM deployment, making any choices that you desire.

You've now deployed a VM with a ZRS OS disk.
Create a ZRS disk
In the Azure portal, search for and select Disks.
Select + Add to create a new disk.
Select a supported region and Availability zone to None.
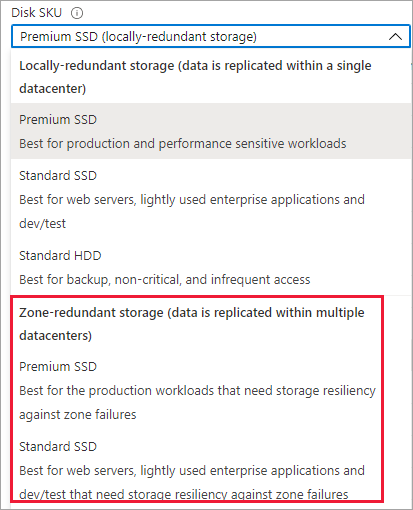
Select Change size.
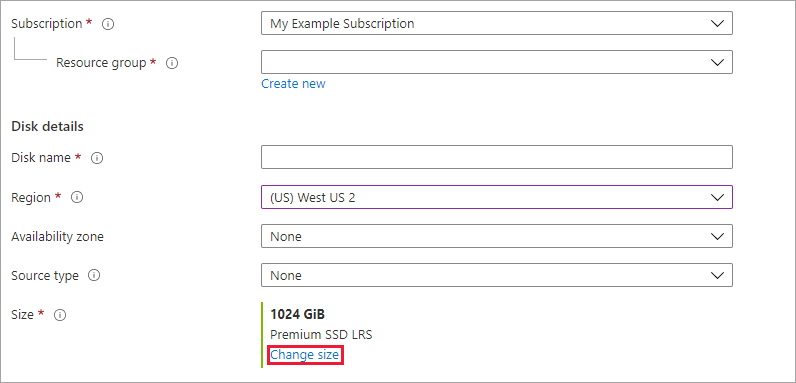
Select one of the available ZRS disks and select OK.
Continue through the deployment process.


You have now created a managed disk that uses ZRS.
Next steps
- Check out more Azure Resource Manager templates to create a VM with ZRS disks.