Note
Access to this page requires authorization. You can try signing in or changing directories.
Access to this page requires authorization. You can try changing directories.
Azure Files is Azure's easy-to-use cloud file system. Azure file shares can be mounted with the industry standard SMB 3 protocol by macOS High Sierra 10.13+.
Warning
Mounting a file share using storage account keys carries inherent security risks. For information on how to protect and manage your keys, see Manage storage account access keys. Azure Files doesn't currently support using identity-based authentication to mount a file share on macOS.
Applies to
| Management model | Billing model | Media tier | Redundancy | SMB | NFS |
|---|---|---|---|---|---|
| Microsoft.Storage | Provisioned v1 | SSD (premium) | Local (LRS) | ||
| Microsoft.Storage | Provisioned v1 | SSD (premium) | Zone (ZRS) | ||
| Microsoft.Storage | Pay-as-you-go | HDD (standard) | Local (LRS) | ||
| Microsoft.Storage | Pay-as-you-go | HDD (standard) | Zone (ZRS) | ||
| Microsoft.Storage | Pay-as-you-go | HDD (standard) | Geo (GRS) | ||
| Microsoft.Storage | Pay-as-you-go | HDD (standard) | GeoZone (GZRS) |
Prerequisites for mounting an Azure file share on macOS
Storage account name: To mount an Azure file share, you need the name of the storage account.
Storage account key: To mount an Azure file share, you need the primary (or secondary) storage account key.
Ensure port 445 is open: SMB communicates over TCP port 445. On your macOS, check to make sure your firewall doesn't block TCP port 445. If port 445 is blocked, you can set up a VPN from on-premises to your Azure file share using private endpoints. For more information, see Networking considerations for direct Azure file share access.
Mount an Azure file share via Finder
Open Finder: Finder is open on macOS by default, but you can ensure that it's the currently selected application by clicking the macOS face icon on the dock:

Select "Connect to Server" from the "Go" Menu: Using the UNC path, convert the beginning double backslash (
\\) tosmb://and all other backslashes (\) to forward slashes (/).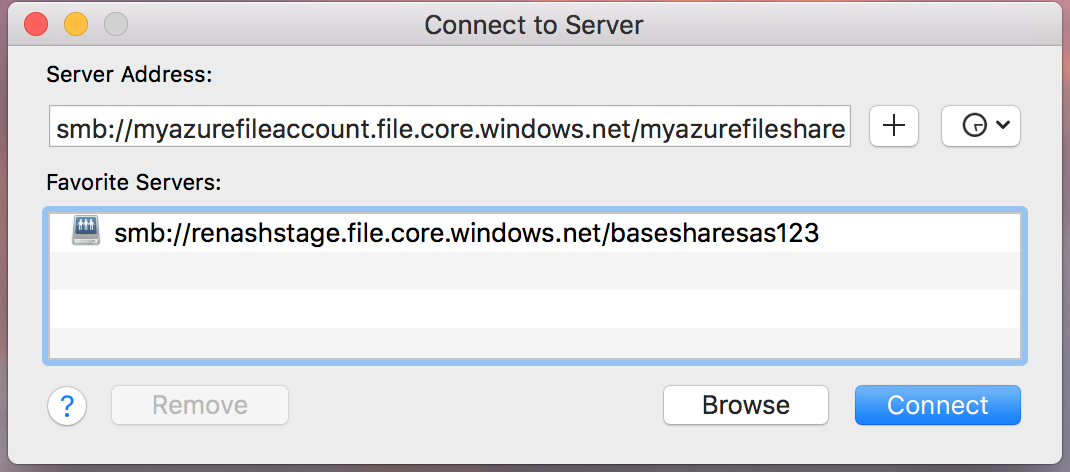
Use the storage account name and storage account key when prompted for a username and password: If desired, you can persist the storage account name and storage account key in your macOS Keychain.
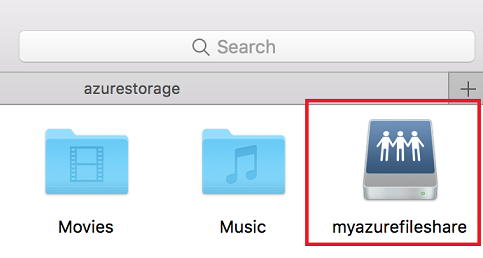
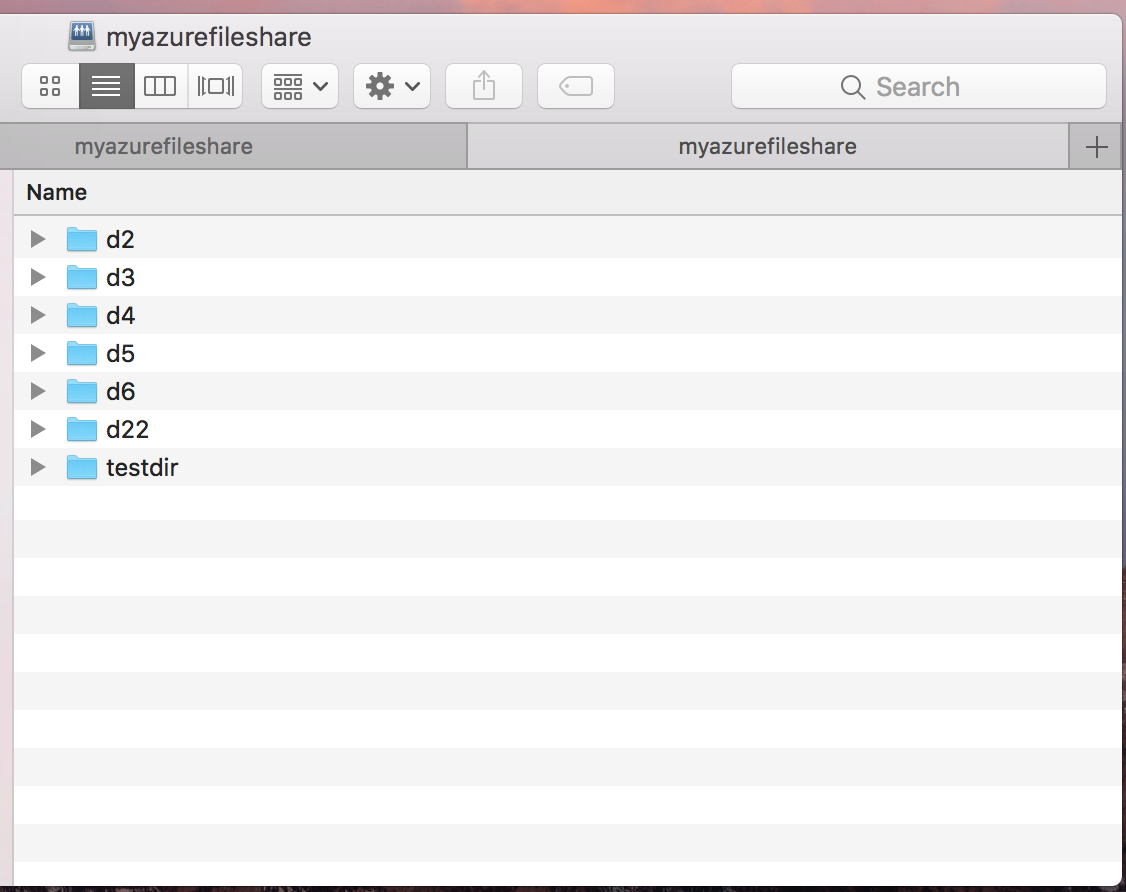
Use the Azure file share as desired: After substituting the share name and storage account key for the username and password, the share is be mounted. You can use the file share as you would normally use a local folder, including dragging and dropping files into the file share:
Mount an Azure file share via Terminal
Replace
<storage-account-name>,<storage-account-key>, and<share-name>with the appropriate values for your environment.open smb://<storage-account-name>:<storage-account-key>@<storage-account-name>.file.core.chinacloudapi.cn/<share-name>Use the Azure file share as desired: The Azure file share is mounted at the mount point specified by the previous command.