Note
Access to this page requires authorization. You can try signing in or changing directories.
Access to this page requires authorization. You can try changing directories.
Important
Manual incident creation, using the portal or Logic Apps, is currently in PREVIEW. See the Supplemental Terms of Use for Azure Previews for additional legal terms that apply to Azure features that are in beta, preview, or otherwise not yet released into general availability.
Manual incident creation is generally available using the API.
With Microsoft Sentinel as your security information and event management (SIEM) solution, your security operations' threat detection and response activities are centered on incidents that you investigate and remediate. These incidents have two main sources:
They're generated automatically when detection mechanisms operate on the logs and alerts that Microsoft Sentinel ingests from its connected data sources.
They're ingested directly from other connected Microsoft security services that created them.
However, threat data can also come from other sources not ingested into Microsoft Sentinel, or events not recorded in any log, and yet can justify opening an investigation. For example, an employee might notice an unrecognized person engaging in suspicious activity related to your organization’s information assets. This employee might call or email the security operations center (SOC) to report the activity.
Microsoft Sentinel in the Azure portal allows your security analysts to manually create incidents for any type of event, regardless of its source or data, so you don't miss out on investigating these unusual types of threats.
Common use cases
Create an incident for a reported event
This is the scenario described in the introduction above.
Create incidents out of events from external systems
Create incidents based on events from systems whose logs are not ingested into Microsoft Sentinel. For example, an SMS-based phishing campaign might use your organization's corporate branding and themes to target employees' personal mobile devices. You may want to investigate such an attack, and you can create an incident in Microsoft Sentinel so that you have a platform to manage your investigation, to collect and log evidence, and to record your response and mitigation actions.
Create incidents based on hunting results
Create incidents based on the observed results of hunting activities. For example, while threat hunting in the context of a particular investigation (or on your own), you might come across evidence of a completely unrelated threat that warrants its own separate investigation.
Manually create an incident
There are three ways to create an incident manually:
- Create an incident using the Azure portal
- Create an incident using Azure Logic Apps, using the Microsoft Sentinel Incident trigger.
- Create an incident using the Microsoft Sentinel API, through the Incidents operation group. It allows you to get, create, update, and delete incidents.
Permissions
The following roles and permissions are required to manually create an incident.
| Method | Required role |
|---|---|
| Azure portal and API | One of the following: |
| Azure Logic Apps | One of the above, plus: |
Learn more about roles in Microsoft Sentinel.
Create an incident using the Azure portal
Select Microsoft Sentinel and choose your workspace.
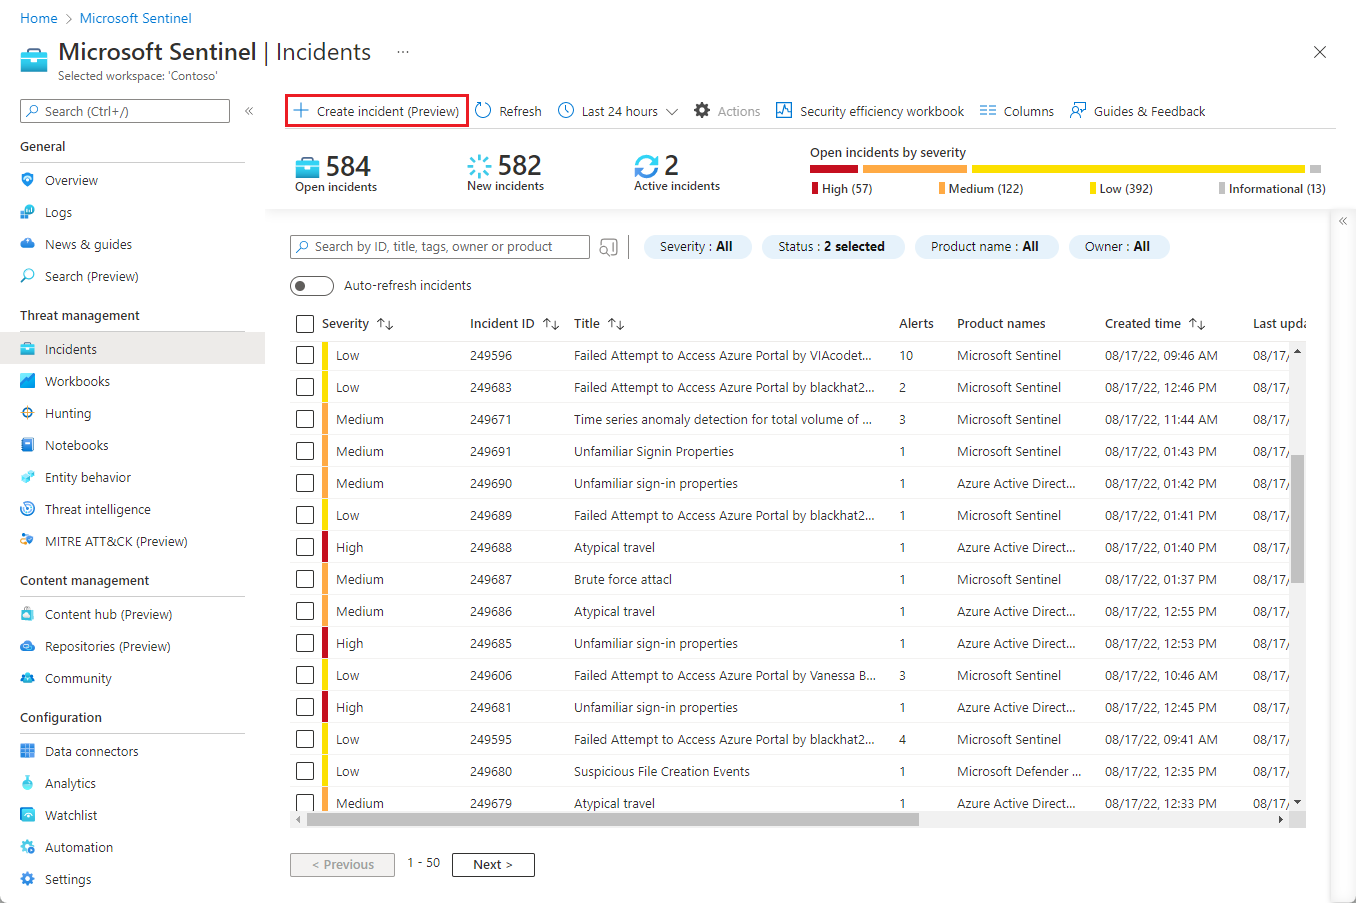
From the Microsoft Sentinel navigation menu, select Incidents.
On the Incidents page, select + Create incident (Preview) from the button bar.
The Create incident (Preview) panel will open on the right side of the screen.
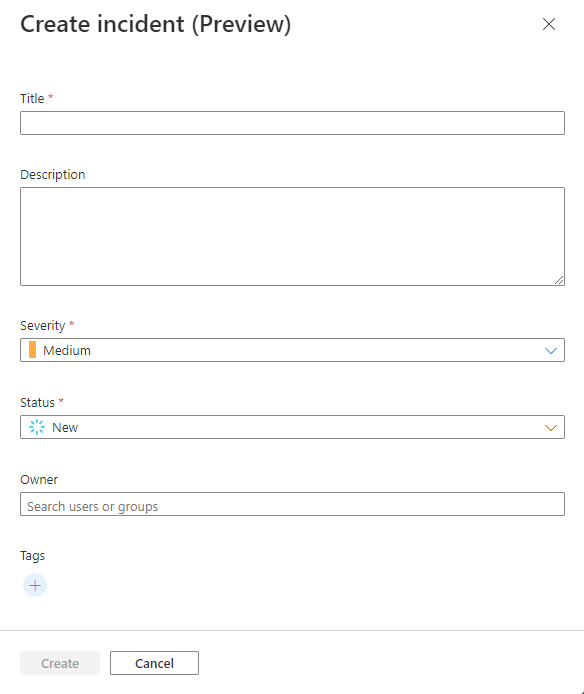
Fill in the fields in the panel accordingly.
Title
- Enter a title of your choosing for the incident. The incident will appear in the queue with this title.
- Required. Free text of unlimited length. Spaces will be trimmed.
Description
- Enter descriptive information about the incident, including details such as the origin of the incident, any entities involved, relation to other events, who was informed, and so on.
- Optional. Free text up to 5000 characters.
Severity
- Choose a severity from the drop-down list. All Microsoft Sentinel-supported severities are available.
- Required. Defaults to "Medium."
Status
- Choose a status from the drop-down list. All Microsoft Sentinel-supported statuses are available.
- Required. Defaults to "New."
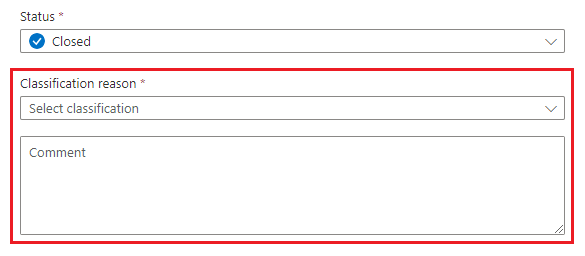
- You can create an incident with a status of "closed," and then open it manually afterward to make changes and choose a different status. Choosing "closed" from the drop-down will activate classification reason fields for you to choose a reason for closing the incident and add comments.
Owner
- Choose from the available users or groups in your tenant. Begin typing a name to search for users and groups. Select the field (click or tap) to display a list of suggestions. Choose "assign to me" at the top of the list to assign the incident to yourself.
- Optional.
Tags
- Use tags to classify incidents and to filter and locate them in the queue.
- Create tags by selecting the plus sign icon, entering text in the dialog box, and selecting OK. Auto-completion will suggest tags used within the workspace over the prior two weeks.
- Optional. Free text.
Select Create at the bottom of the panel. After a few seconds, the incident will be created and will appear in the incidents queue.
If you assign an incident a status of "Closed," it will not appear in the queue until you change the status filter to show closed incidents as well. The filter is set by default to display only incidents with a status of "New" or "Active."
Select the incident in the queue to see its full details, add bookmarks, change its owner and status, and more.
If for some reason you change your mind after the fact about creating the incident, you can delete it from the queue grid, or from within the incident itself. You must have the Microsoft Sentinel Contributor role in order to delete an incident.
Create an incident using Azure Logic Apps
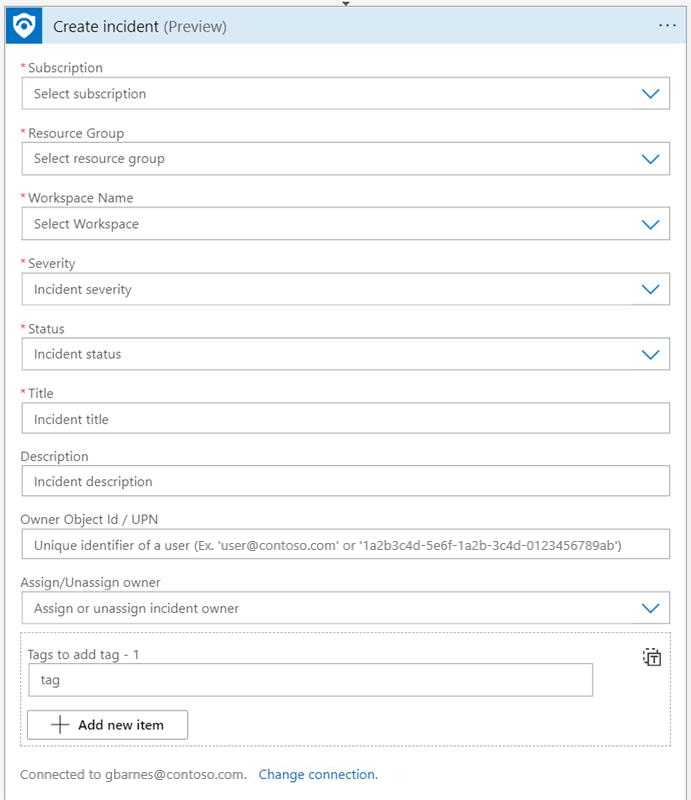
Creating an incident is also available as a Logic Apps action in the Microsoft Sentinel connector, and therefore in Microsoft Sentinel playbooks.
You can find the Create incident (preview) action in the playbook schema for the incident trigger.
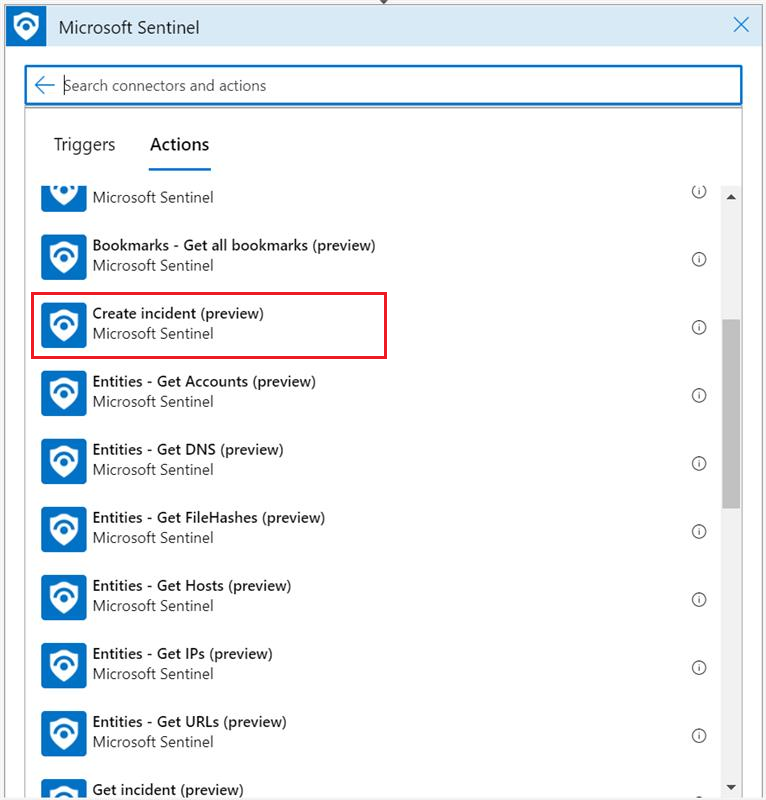
You need to supply parameters as described below:
Select your Subscription, Resource group, and Workspace name from their respective drop-downs.
For the remaining fields, see the explanations above (under Create an incident using the Azure portal).
Create an incident using the Microsoft Sentinel API
The Incidents operation group allows you not only to create, but also to update (edit), get (retrieve), list, and delete incidents.
You create an incident using the following endpoint. After this request is made, the incident will be visible in the incident queue in the portal.
PUT https://management.chinacloudapi.cn/subscriptions/{subscriptionId}/resourceGroups/{resourceGroupName}/providers/Microsoft.OperationalInsights/workspaces/{workspaceName}/providers/Microsoft.SecurityInsights/incidents/{incidentId}?api-version=2022-07-01-preview
Here's an example of what a request body might look like:
{
  "etag": "\"0300bf09-0000-0000-0000-5c37296e0000\"",
  "properties": {
    "lastActivityTimeUtc": "2019-01-01T13:05:30Z",
    "firstActivityTimeUtc": "2019-01-01T13:00:30Z",
    "description": "This is a demo incident",
    "title": "My incident",
    "owner": {
      "objectId": "aaaaaaaa-0000-1111-2222-bbbbbbbbbbbb"
    },
    "severity": "High",
    "classification": "FalsePositive",
    "classificationComment": "Not a malicious activity",
    "classificationReason": "IncorrectAlertLogic",
    "status": "Closed"
  }
}
Notes
Incidents created manually do not contain any entities or alerts. Therefore, the Alerts tab in the incident page will remain empty until you relate existing alerts to your incident.
The Entities tab will also remain empty, as adding entities directly to manually created incidents is not currently supported. (If you relate an alert to this incident, entities from the alert will appear in the incident.)
Manually created incidents will also not display any Product name in the queue.
The incidents queue is filtered by default to display only incidents with a status of "New" or "Active." If you create an incident with a status of "Closed," it will not appear in the queue until you change the status filter to show closed incidents as well.
Next steps
For more information, see:
