Note
Access to this page requires authorization. You can try signing in or changing directories.
Access to this page requires authorization. You can try changing directories.
Azure role-based access control (Azure RBAC) is the authorization system you use to manage access to Azure resources. To determine what resources users, groups, service principals, or managed identities have access to, you list their role assignments. This article describes how to list role assignments using the Azure portal.
Note
If your organization has outsourced management functions to a service provider who uses Azure Lighthouse, role assignments authorized by that service provider won't be shown here. Similarly, users in the service provider tenant won't see role assignments for users in a customer's tenant, regardless of the role they've been assigned.
Prerequisites
Microsoft.Authorization/roleAssignments/read permission, such as Reader
List role assignments for a user or group
A quick way to see the roles assigned to a user or group in a subscription is to use the Azure role assignments pane.
In the Azure portal, select All services from the Azure portal menu.
Select Microsoft Entra ID and then select Users or Groups.
Click the user or group you want list the role assignments for.
Click Azure role assignments.
You see a list of roles assigned to the selected user or group at various scopes such as management group, subscription, resource group, or resource. This list includes all role assignments you have permission to read.
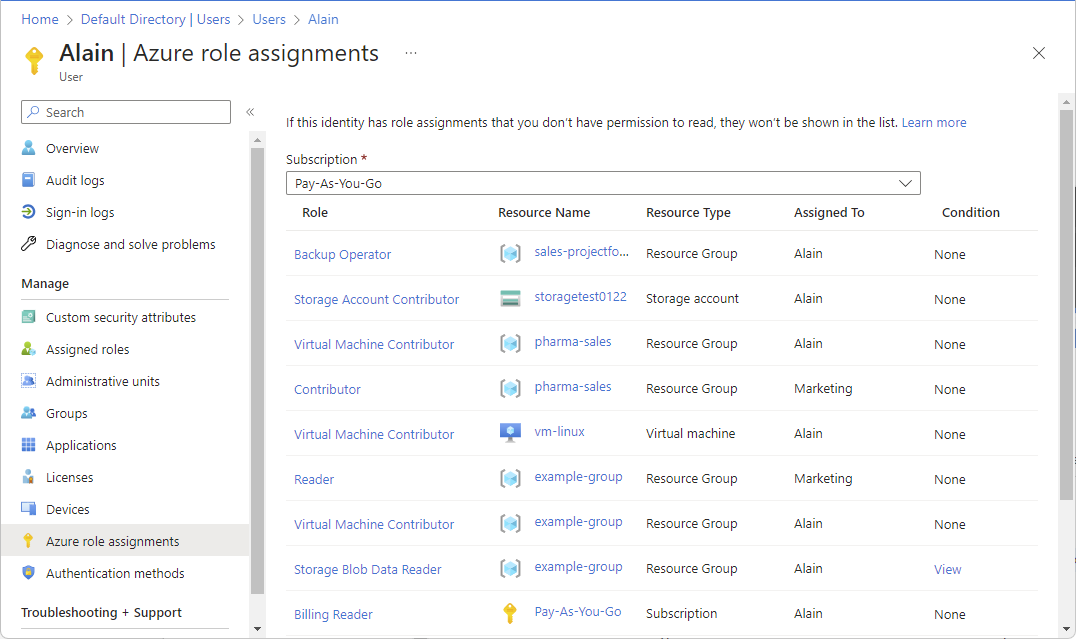
To change the subscription, click the Subscriptions list.
List owners of a subscription
Users that have been assigned the Owner role for a subscription can manage everything in the subscription. Follow these steps to list the owners of a subscription.
In the Azure portal, click All services and then Subscriptions.
Click the subscription you want to list the owners of.
Click Access control (IAM).
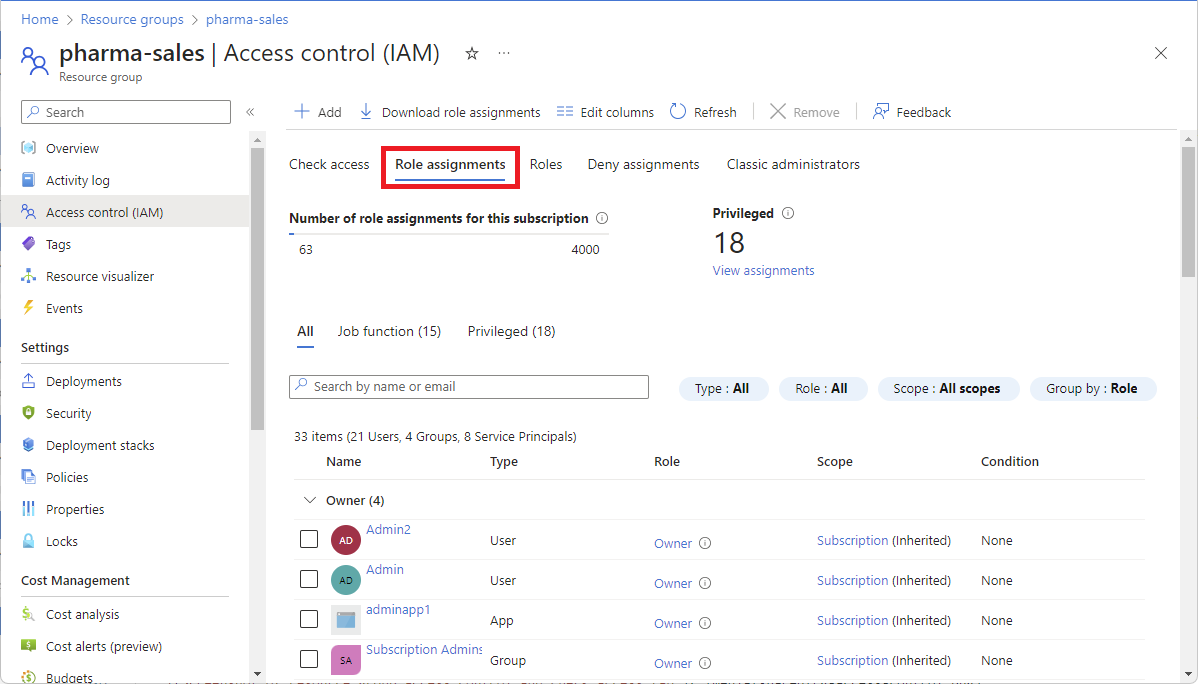
Click the Role assignments tab to view all the role assignments for this subscription.
Scroll to the Owners section to see all the users that have been assigned the Owner role for this subscription.
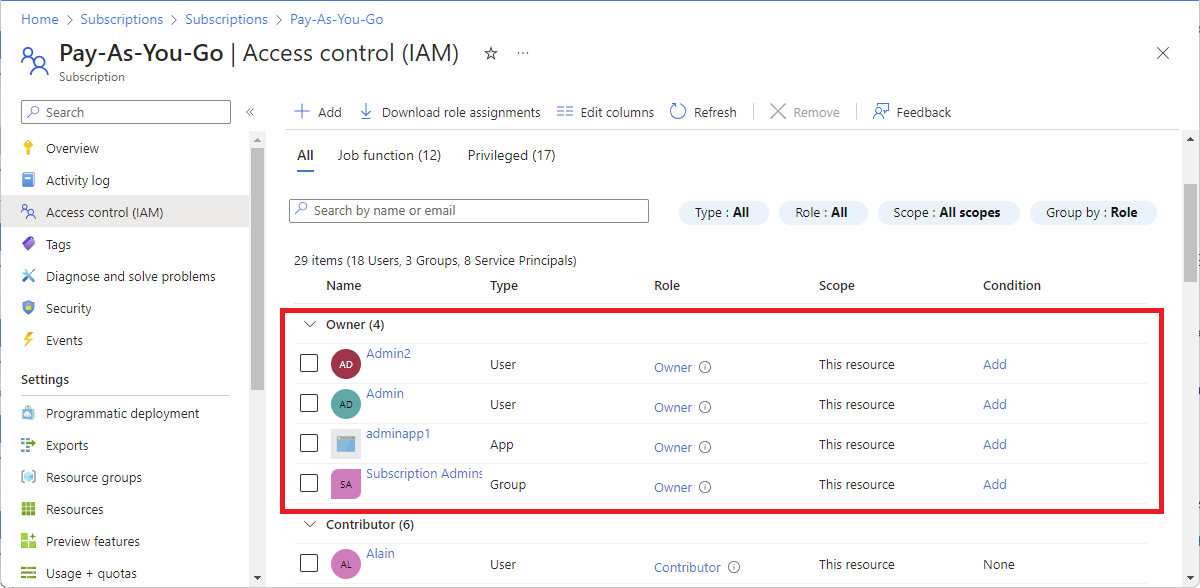
List or manage privileged administrator role assignments
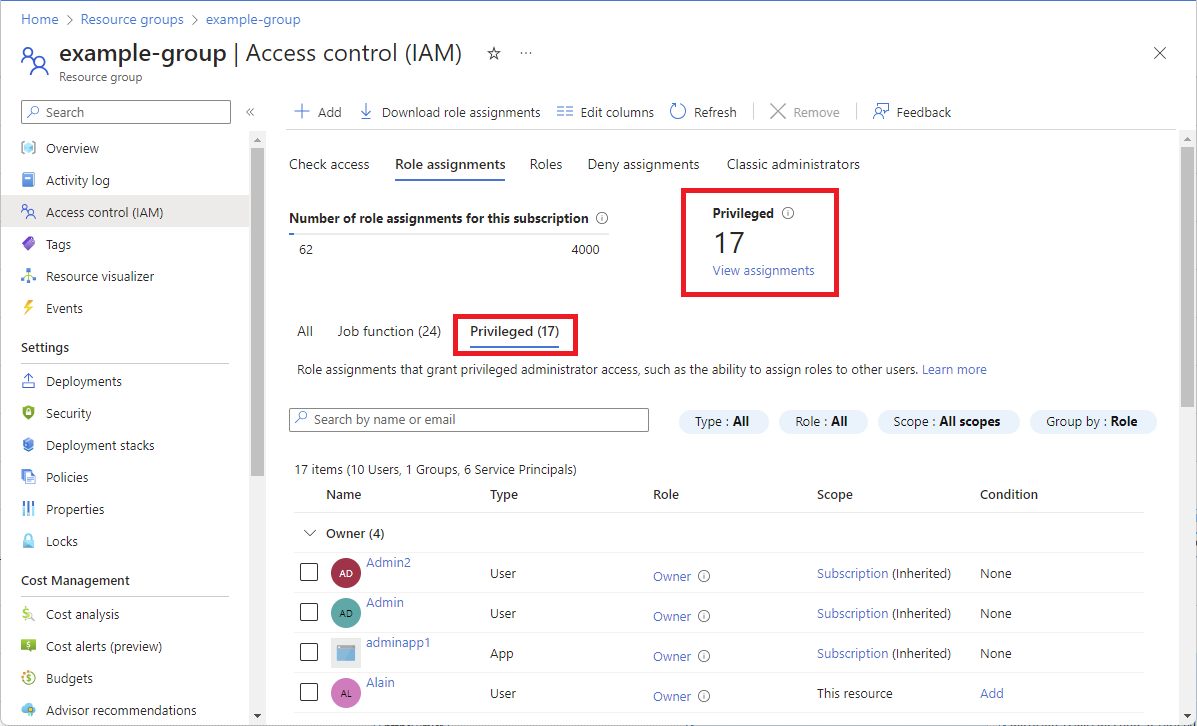
On the Role assignments tab, you can list and see the count of privileged administrator role assignments at the current scope. For more information, see Privileged administrator roles.
In the Azure portal, click All services and then select the scope. For example, you can select Management groups, Subscriptions, Resource groups, or a resource.
Click the specific resource.
Click Access control (IAM).
Click the Role assignments tab and then click the Privileged tab to list the privileged administrator role assignments at this scope.
To see the count of privileged administrator role assignments at this scope, see the Privileged card.
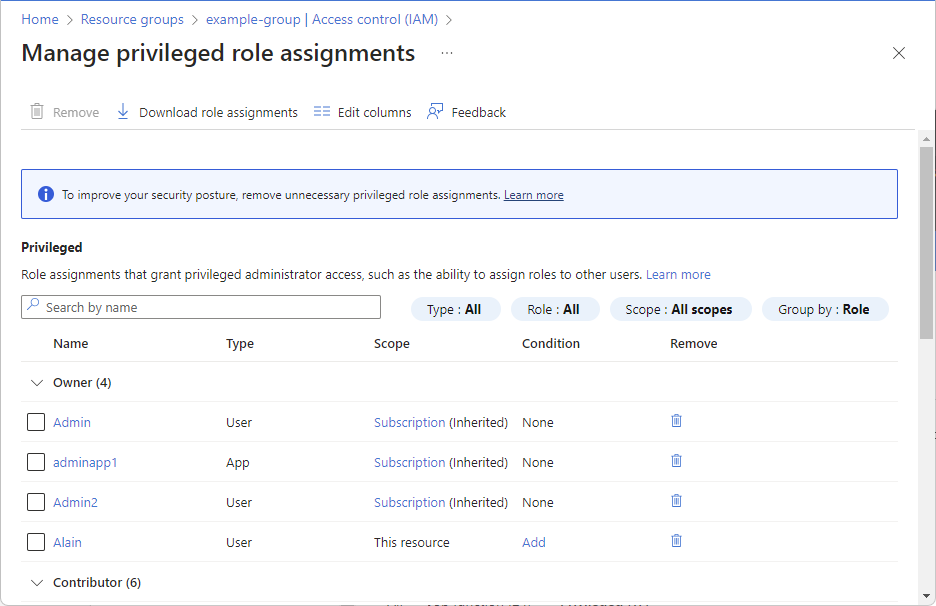
To manage privileged administrator role assignments, see the Privileged card and click View assignments.
On the Manage privileged role assignments page, you can add a condition to constrain the privileged role assignment or remove the role assignment.
List role assignments at a scope
Follow these steps:
In the Azure portal, click All services and then select the scope. For example, you can select Management groups, Subscriptions, Resource groups, or a resource.
Click the specific resource.
Click Access control (IAM).
Click the Role assignments tab to view the role assignments at this scope.
If you have a Microsoft Entra ID Free or Microsoft Entra ID P1 license, your Role assignments tab is similar to the following screenshot.
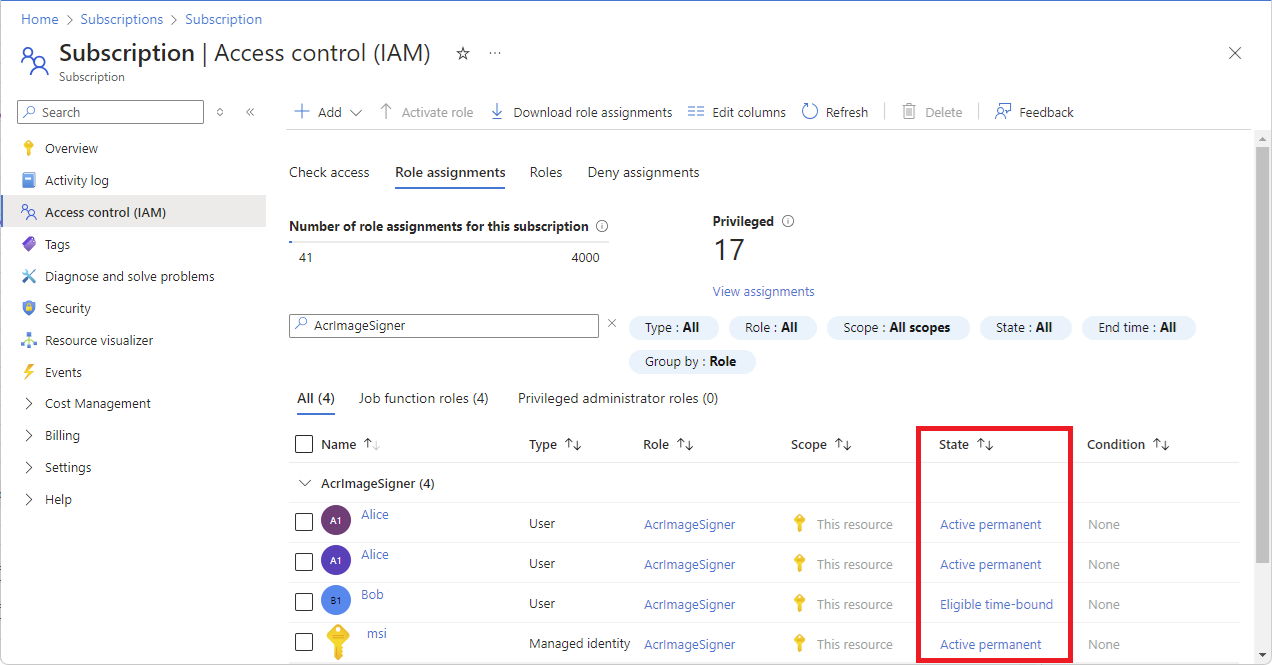
If you have a Microsoft Entra ID P2 or Microsoft Entra ID Governance license, your Role assignments tab is similar to the following screenshot for management group, subscription, and resource group scopes. This capability is being deployed in stages, so it might not be available yet in your tenant or your interface might look different.
You see a State column with one of the following states:
State Description Active permanent A role assignment where a user can always use the role without performing any actions. Active time-bound A role assignment where a user can use the role without performing any actions only within start and end dates. Eligible permanent A role assignment where a user is always eligible to activate the role. Eligible time-bound A role assignment where a user is eligible to activate the role only within start and end dates. It's possible to set the start date in the future.
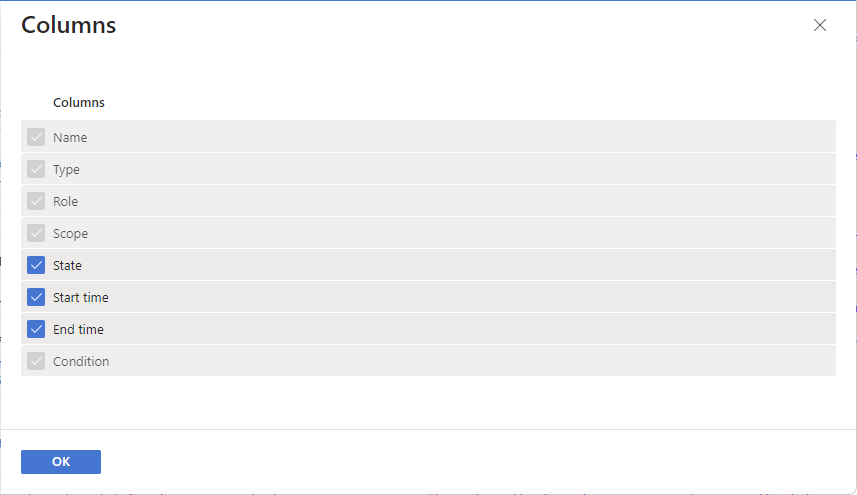
If you want to list the start time and end time for role assignments, click Edit columns and then select Start time and End time.
Notice that some roles are scoped to This resource while others are (Inherited) from another scope. Access is either assigned specifically to this resource or inherited from an assignment to the parent scope.
List role assignments for a user at a scope
To list access for a user, group, service principal, or managed identity, you list their role assignments. Follow these steps to list the role assignments for a single user, group, service principal, or managed identity at a particular scope.
In the Azure portal, click All services and then select the scope. For example, you can select Management groups, Subscriptions, Resource groups, or a resource.
Click the specific resource.
Click Access control (IAM).
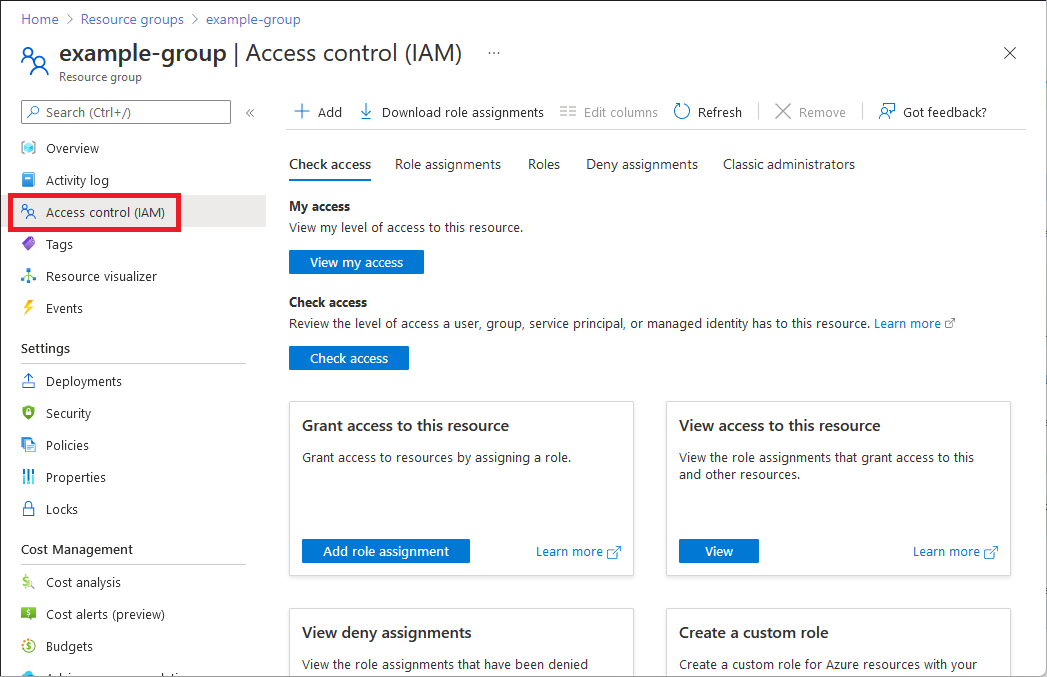
On the Check access tab, click the Check access button.
In the Check access pane, click User, group, or service principal or Managed identity.
In the search box, enter a string to search the directory for display names, email addresses, or object identifiers.
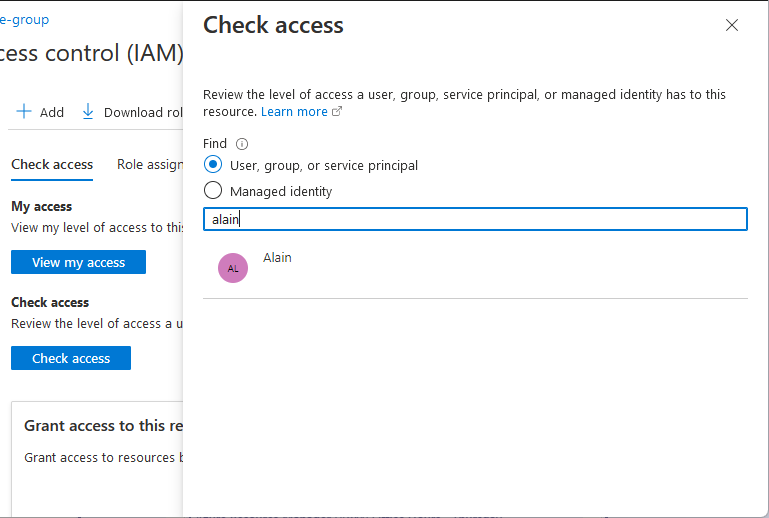
Click the security principal to open the assignments pane.
On this pane, you can see the access for the selected security principal at this scope and inherited to this scope. Assignments at child scopes are not listed. You see the following assignments:
- Role assignments added with Azure RBAC.
- Deny assignments added using Azure Blueprints or Azure managed apps.
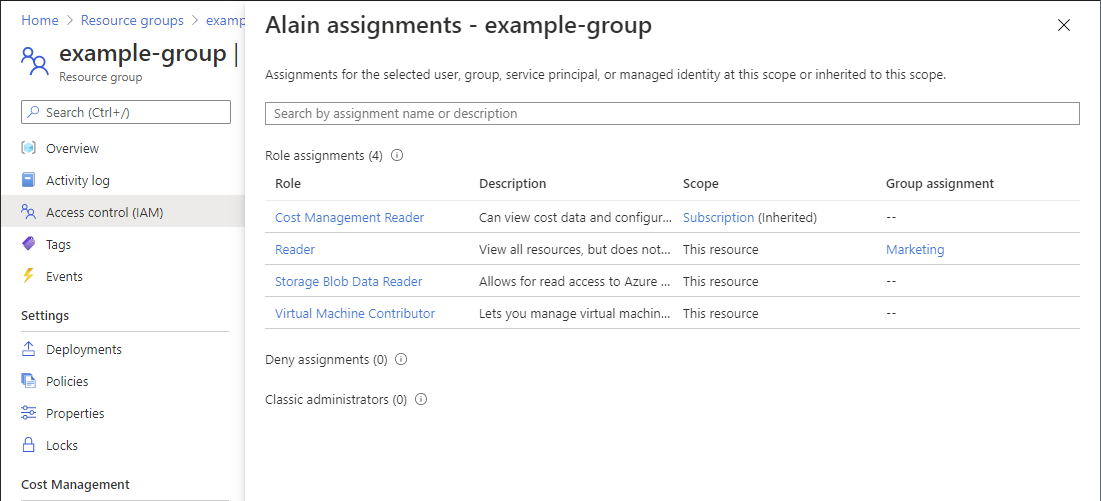
List role assignments for a managed identity
You can list role assignments for system-assigned and user-assigned managed identities at a particular scope by using the Access control (IAM) blade as described earlier. This section describes how to list role assignments for just the managed identity.
System-assigned managed identity
In the Azure portal, open a system-assigned managed identity.
In the left menu, click Identity.
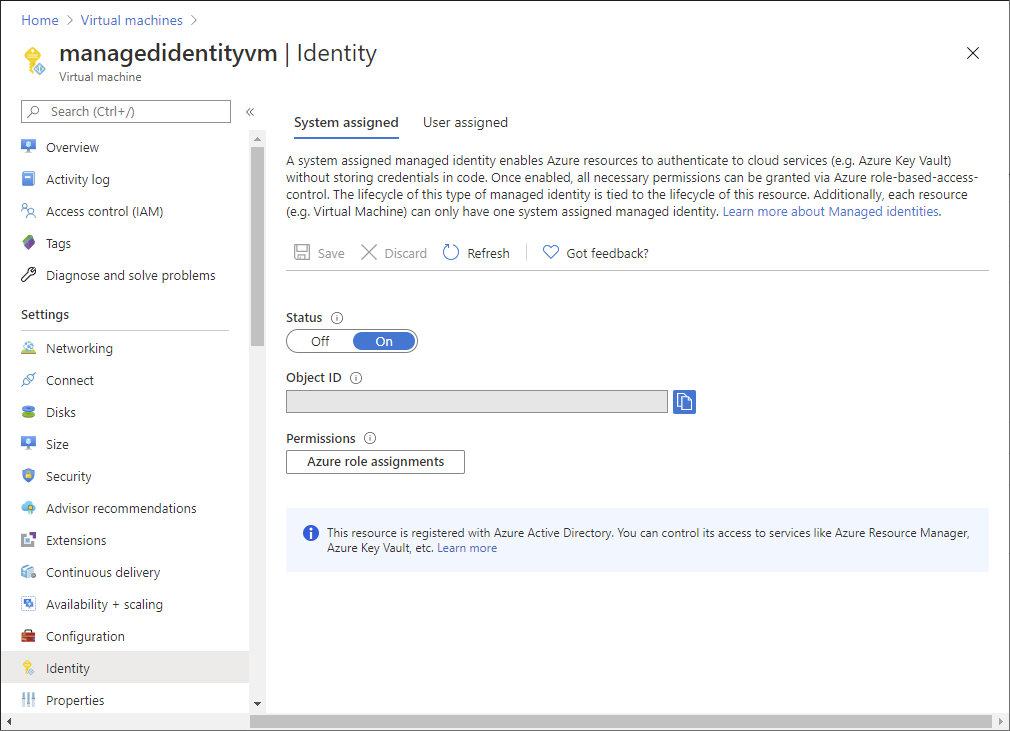
Under Permissions, click Azure role assignments.
You see a list of roles assigned to the selected system-assigned managed identity at various scopes such as management group, subscription, resource group, or resource. This list includes all role assignments you have permission to read.
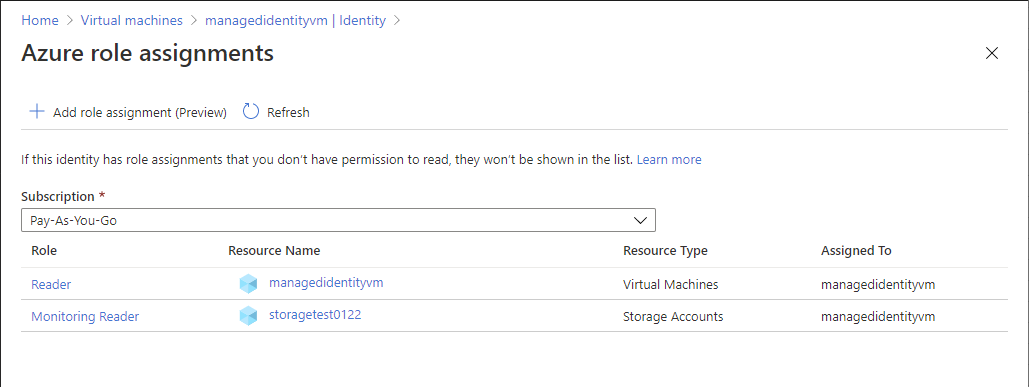
To change the subscription, click the Subscription list.
User-assigned managed identity
In the Azure portal, open a user-assigned managed identity.
Click Azure role assignments.
You see a list of roles assigned to the selected user-assigned managed identity at various scopes such as management group, subscription, resource group, or resource. This list includes all role assignments you have permission to read.
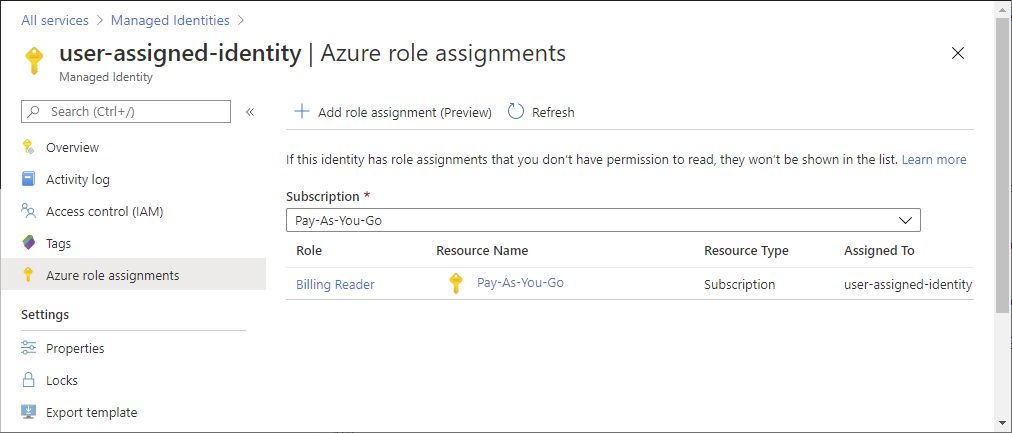
To change the subscription, click the Subscription list.
List number of role assignments
You can have up to 4000 role assignments in each subscription. This limit includes role assignments at the subscription, resource group, and resource scopes. Eligible role assignments and role assignments scheduled in the future do not count towards this limit. To help you keep track of this limit, the Role assignments tab includes a chart that lists the number of role assignments for the current subscription.
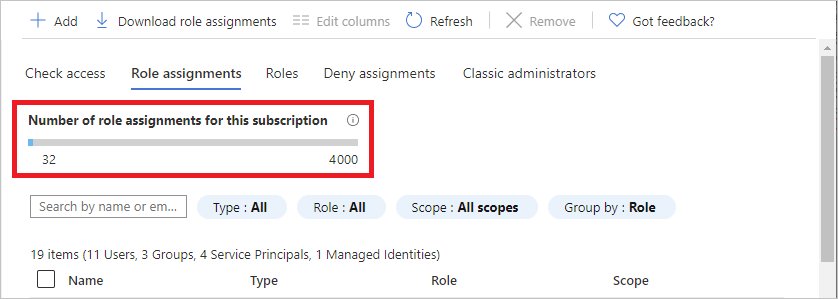
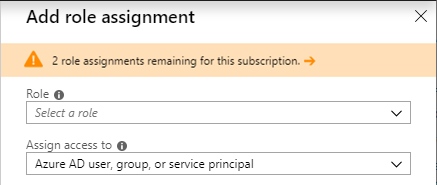
If you are getting close to the maximum number and you try to add more role assignments, you'll see a warning in the Add role assignment pane. For ways that you can reduce the number of role assignments, see Troubleshoot Azure RBAC limits.
Download role assignments
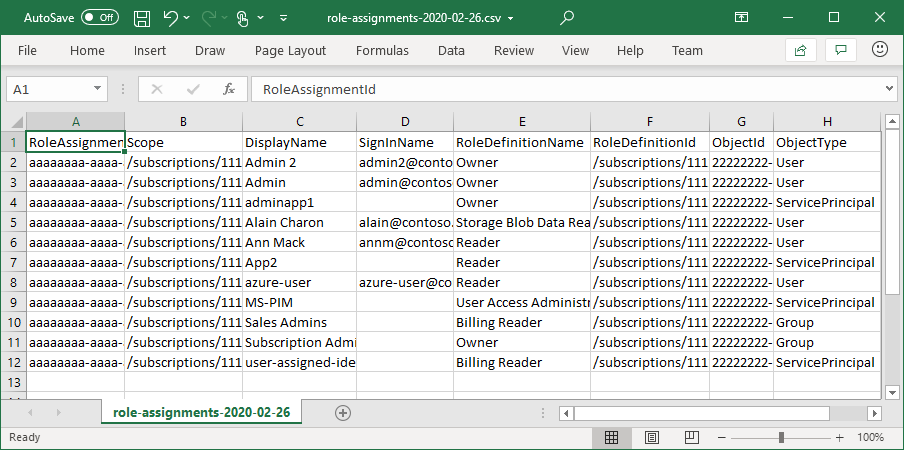
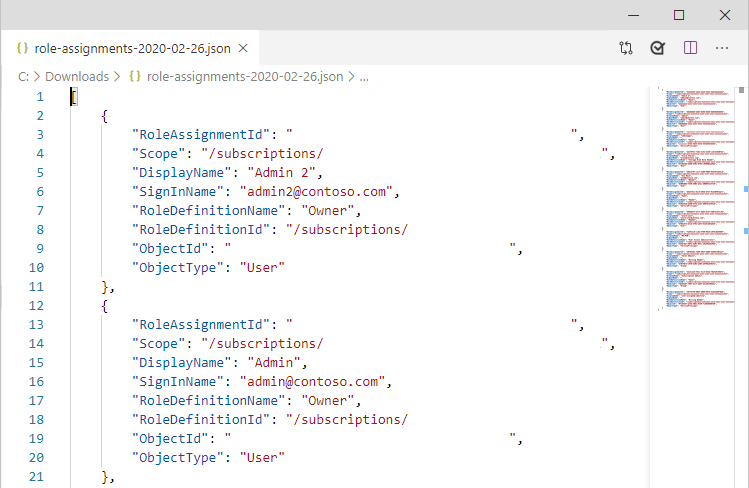
You can download role assignments at a scope in CSV or JSON formats. This can be helpful if you need to inspect the list in a spreadsheet or take an inventory when migrating a subscription.
When you download role assignments, you should keep in mind the following criteria:
- If you don't have permissions to read the directory, such as the Directory Readers role, the DisplayName, SignInName, and ObjectType columns will be blank.
- Role assignments whose security principal has been deleted are not included.
- Access granted to classic administrators are not included.
Follow these steps to download role assignments at a scope.
In the Azure portal, click All services and then select the scope where you want to download the role assignments. For example, you can select Management groups, Subscriptions, Resource groups, or a resource.
Click the specific resource.
Click Access control (IAM).
Click Download role assignments to open the Download role assignments pane.
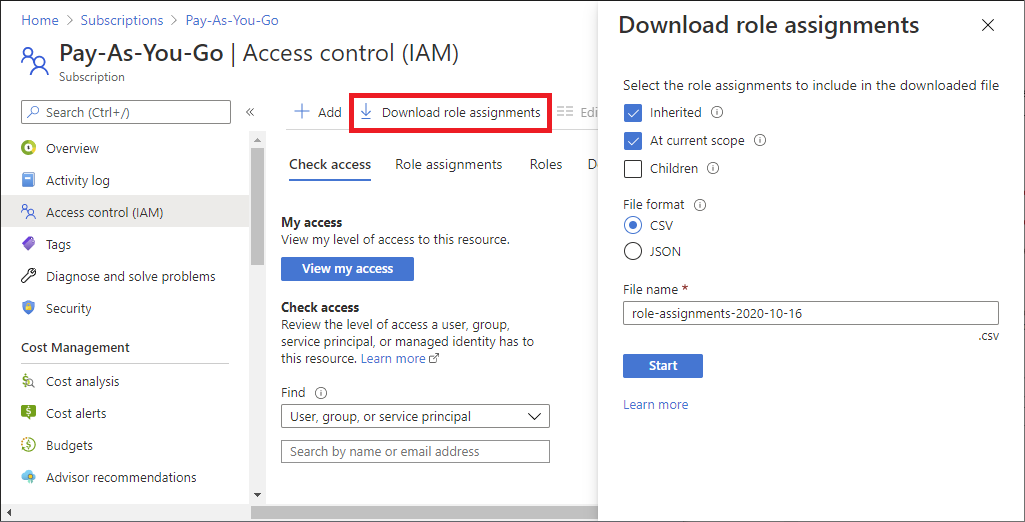
Use the check boxes to select the role assignments you want to include in the downloaded file.
- Inherited - Include inherited role assignments for the current scope.
- At current scope - Include role assignments for the current scope.
- Children - Include role assignments at levels below the current scope. This check box is disabled for management group scope.
Select the file format, which can be comma-separated values (CSV) or JavaScript Object Notation (JSON).
Specify the file name.
Click Start to start the download.
The following show examples of the output for each file format.
