Note
Access to this page requires authorization. You can try signing in or changing directories.
Access to this page requires authorization. You can try changing directories.
This article describes how to work with the business glossary in Microsoft Purview. It provides steps to create a business glossary term in the Microsoft Purview Data Catalog. It also shows you how to import and export glossary terms by using .CSV files, and how to delete terms that you no longer need.
Create a term
To create a glossary term, follow these steps:
Open the Microsoft Purview Data Catalog.
If you're using the classic Microsoft Purview portal, select Glossary. If you're using the new Microsoft Purview portal under Business glossary, select Glossaries.
Select the glossary you would like to create the new term for, then select + New term. A term can only be added to one glossary at a time.
Note
Each glossary supports a maximum of 100,000 terms. For more information about creating and managing glossaries see the manage glossaries page.
A pane opens with the System default template selected. Choose the template, or templates, that you want to use to create a glossary term, and then select Continue.
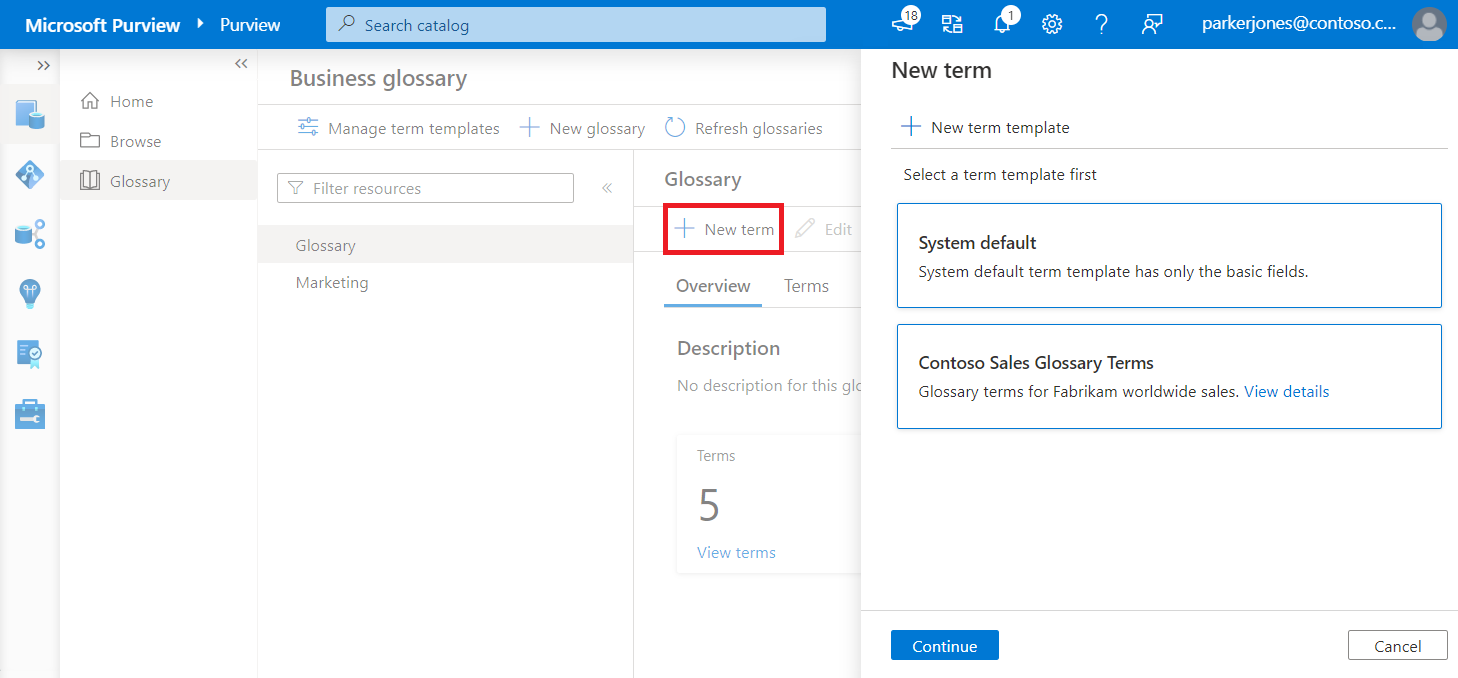
If you selected multiple templates, you can select and deselect templates from the Term template dropdown at the top of the page.
Give your new term a name, which must be unique in the catalog.
Note
Term names are case-sensitive. For example, Sample and sample could both exist in the same glossary.
For Definition, add a definition for the term.
Microsoft Purview enables you to add rich formatting to term definitions. For example, you can add bold, underline, or italic formatting to text. You can also create tables, bulleted lists, or hyperlinks to external resources.
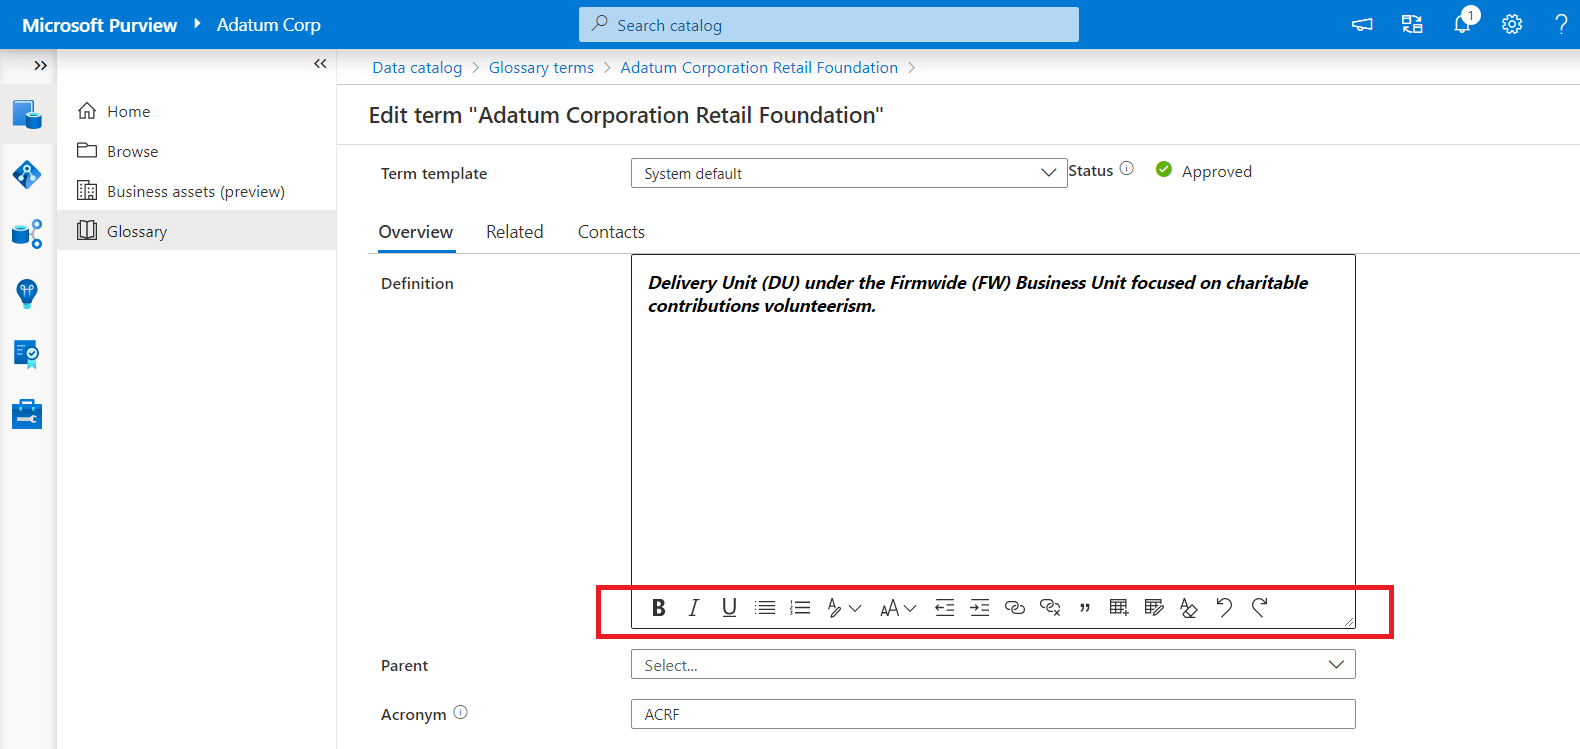
Here are the options for rich text formatting:
Name Description Keyboard shortcut Bold Make your text bold. Adding the asterisk (*) character around text will also make it bold. Ctrl+B Italic Make your text italic. Adding the underscore (_) character around text will also make it italic. Ctrl+I Underline Underline your text. Ctrl+U Bullets Create a bulleted list. Adding the hyphen (-) character before text will also create a bulleted list. Numbering Create a numbered list. Adding the 1 character before text will also create a numbered list. Heading Add a formatted heading. Font size Change the size of your text. The default size is 12. Decrease indent Move your paragraph closer to the margin. Increase indent Move your paragraph farther away from the margin. Add hyperlink Create a link for quick access to webpages and files. Remove hyperlink Change a link to plain text. Quote Add quote text. Add table Add a table to your content. Edit table Insert or delete a column or row from a table. Clear formatting Remove all formatting from a selection of text. Undo Undo changes that you made to the content. Ctrl+Z Redo Redo changes that you made to the content. Ctrl+Y Note
Updating a definition with the rich text editor adds the attribute
"microsoft_isDescriptionRichText": "true"in the term payload. This attribute is not visible on the user experience and is automatically populated when you take any rich text action. The right text definition is populated in the following snippet of a term's JSON message:{ "additionalAttributes": { "microsoft_isDescriptionRichText": "true" } }For Status, select the status for the term. New terms default to Draft.
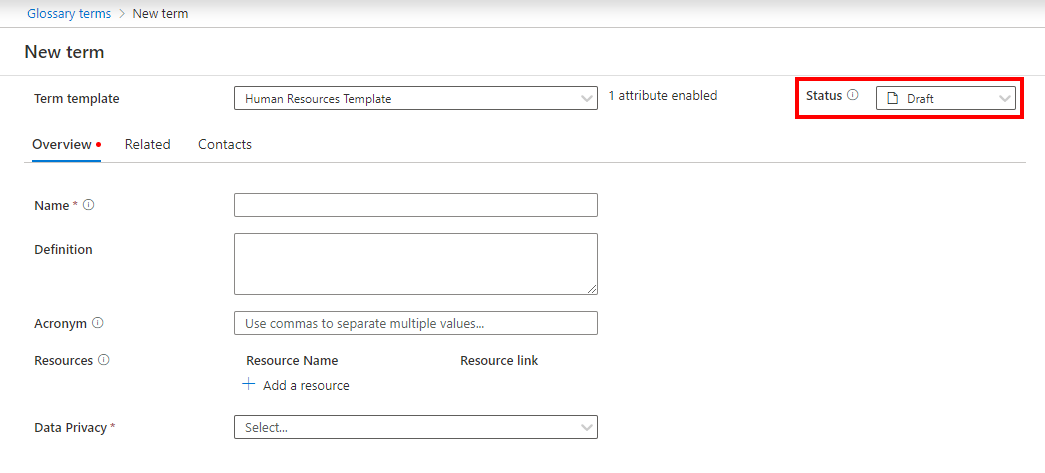
Status markers are metadata associated with the term. Currently, you can set the following status on each term:
- Draft: This term isn't yet officially implemented.
- Approved: This term is officially approved.
- Expired: This term should no longer be used.
- Alert: This term needs attention.
Important
If an approval workflow is enabled on the term hierarchy, a new term will go through the approval process when it's created. The term is stored in the catalog only when it's approved.
Add Resources and Acronym information. If the term is part of a hierarchy, you can add parent terms at Parent on the Overview tab.
To establish relationships with other terms, add Synonyms and Related terms information on the Related tab, and then select Apply.
Optionally, select the Contacts tab to add experts and stewards to your term.
Select Create to create your term.
Important
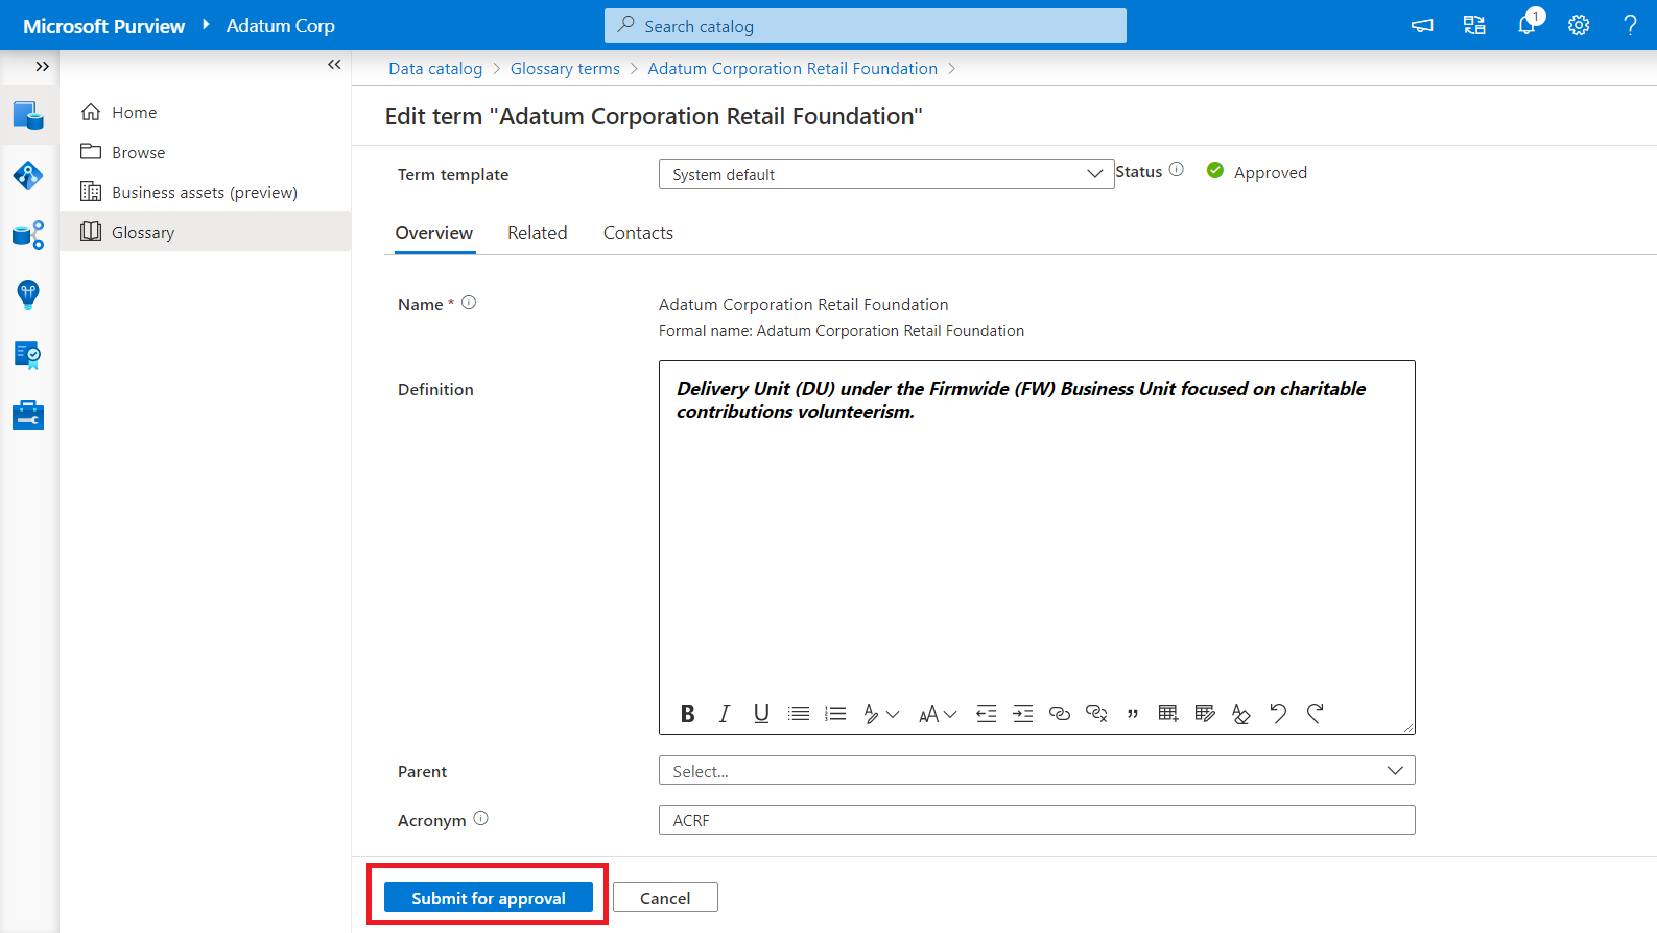
If an approval workflow is enabled on the term's hierarchy path, you'll see Submit for approval instead of the Create button. Selecting Submit for approval will trigger the approval workflow for this term.
Delete terms
Open the Data catalog.
If you're using the classic Microsoft Purview portal, select Glossary. If you're using the new Microsoft Purview portal under Business glossary, select Glossaries.
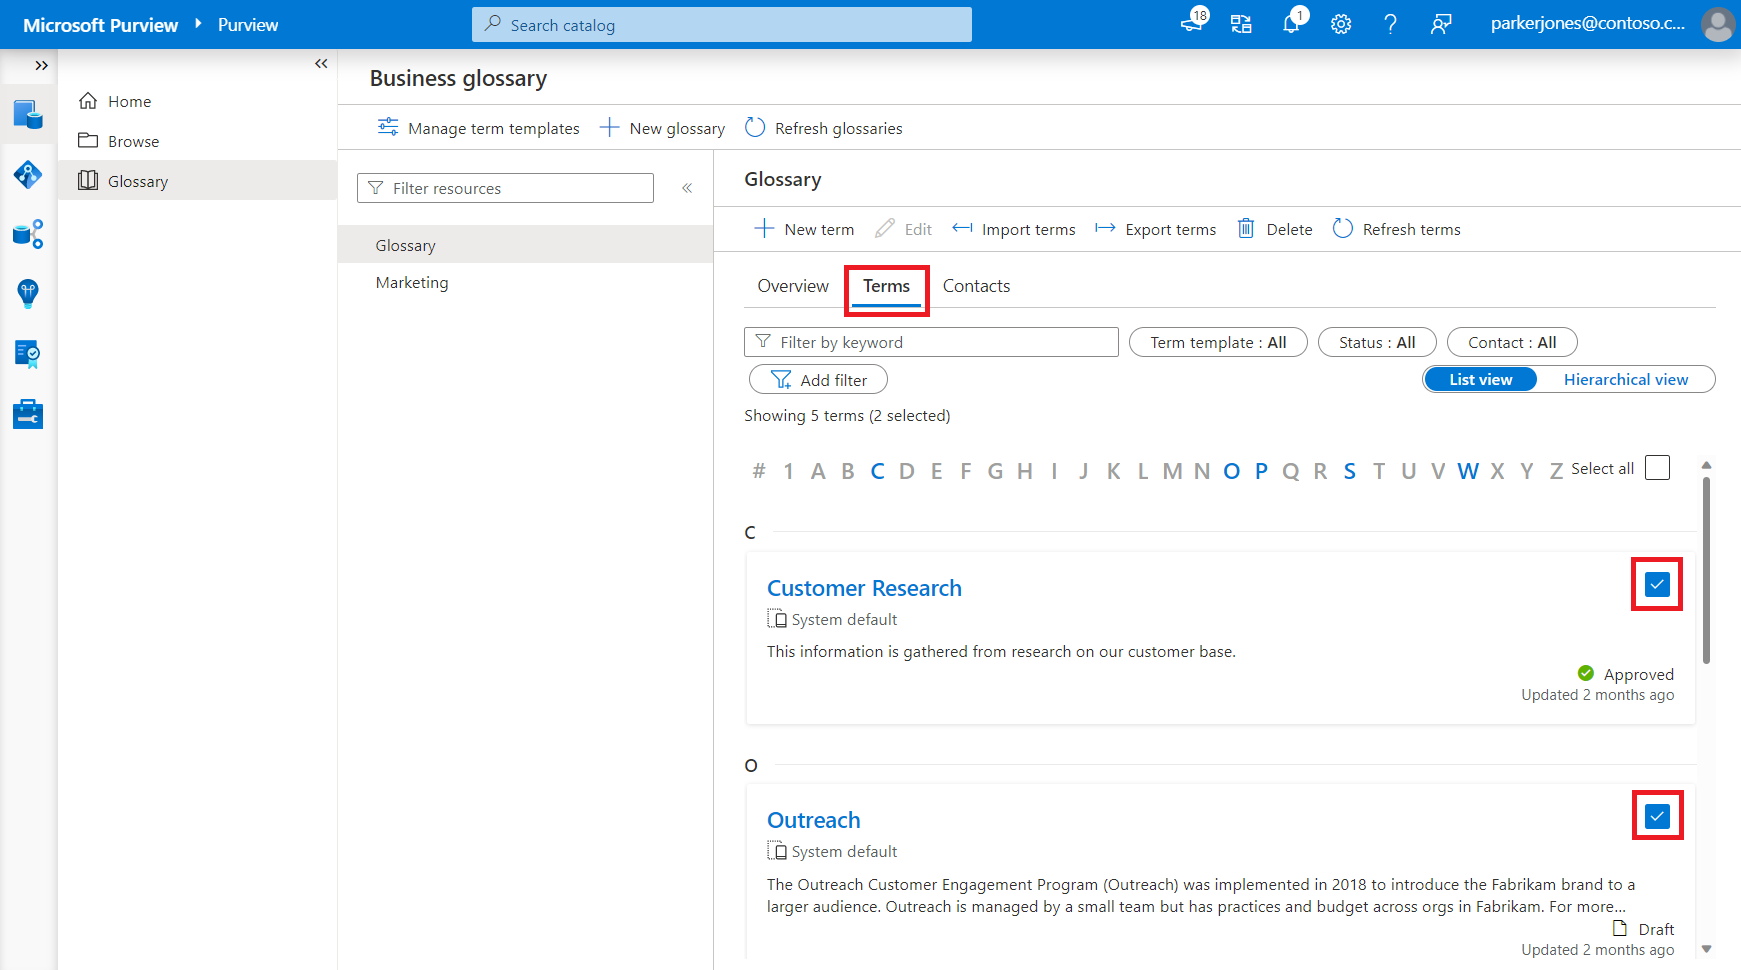
Select the glossary that has the terms you want to delete, and select the Terms tab.
Select checkboxes for the terms that you want to delete. You can select a single term or multiple terms for deletion.
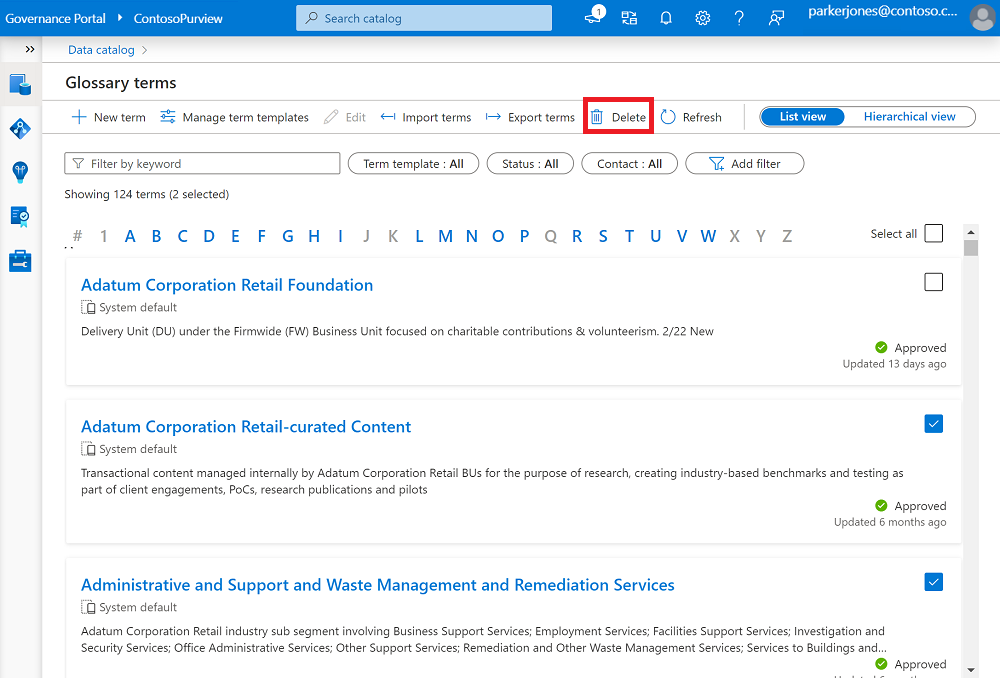
Select the Delete button on the top menu.
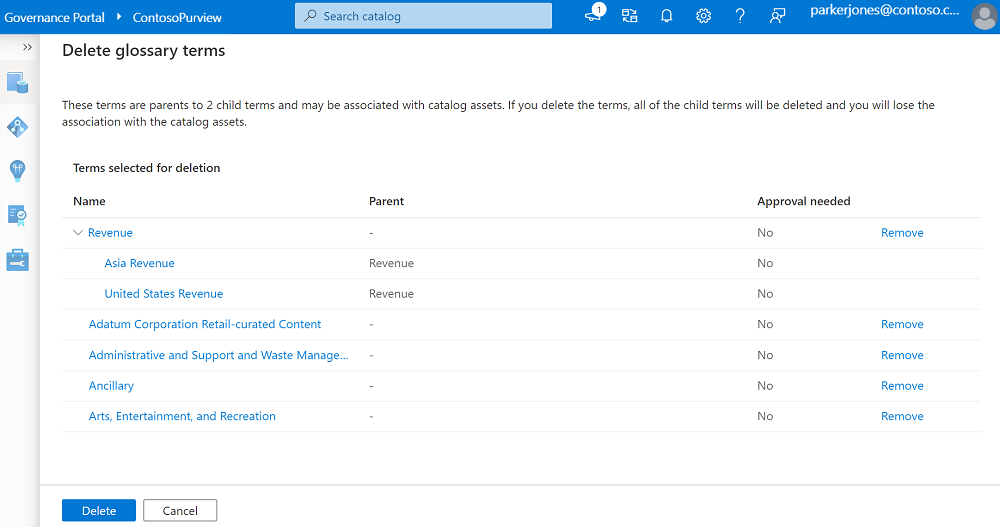
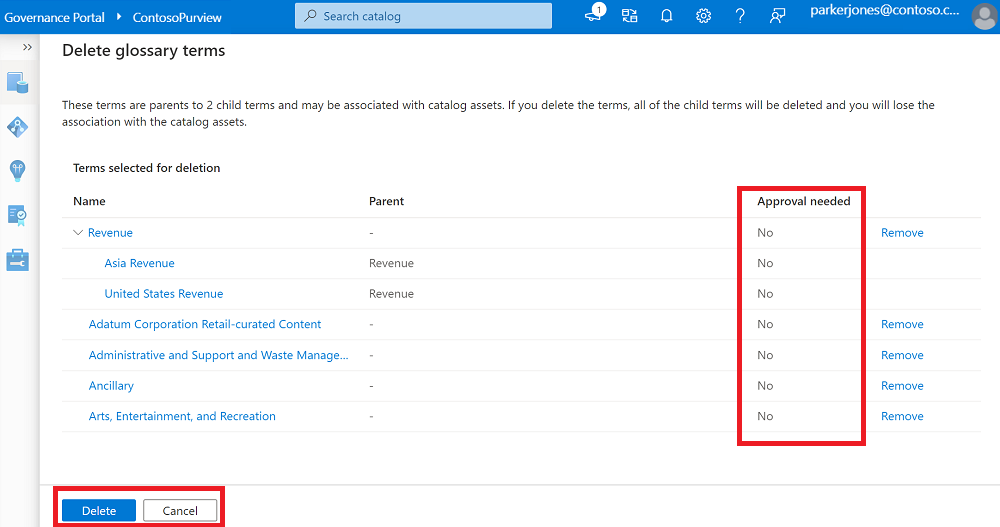
A new window shows all the terms selected for deletion. In the following example, the list of terms to be deleted are the parent term Revenue and its two child terms.
Note
If a parent is selected for deletion, all the children for that parent are automatically selected for deletion.
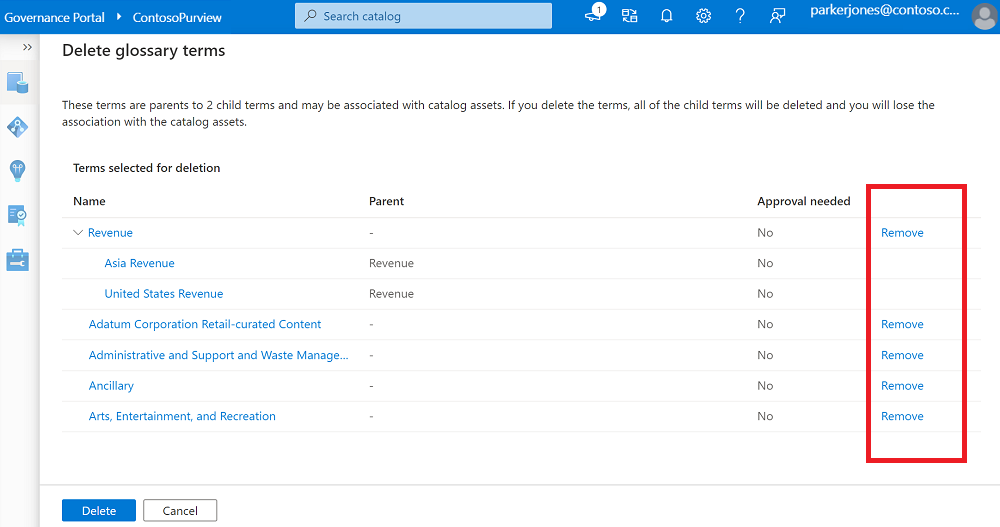
Review the list. You can remove the terms that you don't want to delete by selecting Remove.
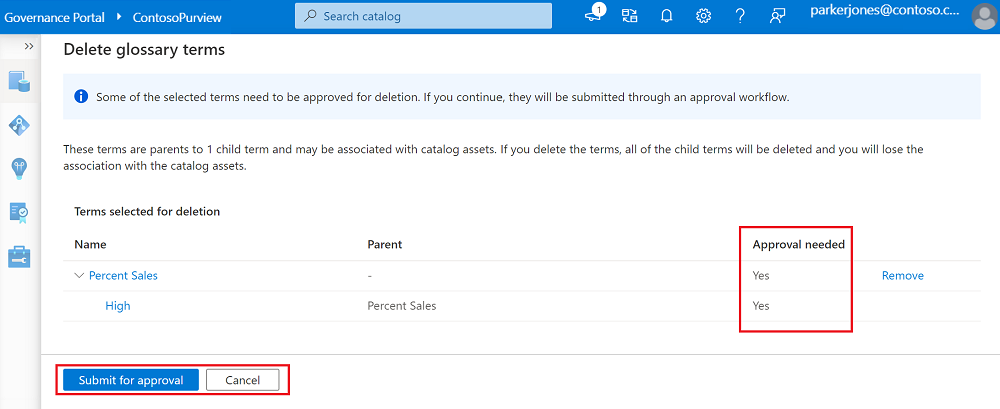
The Approval needed column shows which terms require an approval process. If the value is Yes, the term will go through an approval workflow before deletion. If the value is No, the term will be deleted without any approvals.
Note
If a parent has an associated approval process but its child doesn't, the workflow for deleting the parent term will be triggered. This is because the selection is done on the parent, and you're acknowledging the deletion of child terms along with parent.
If at least one term needs to be approved, Submit for approval and Cancel buttons appear. Selecting Submit for approval will delete all the terms where approval isn't needed and will trigger approval workflows for terms that require it.
If no terms need to be approved, Delete and Cancel buttons appear. Selecting Delete will delete all the selected terms.
Next steps
- For more information about glossary terms, see the glossary reference.