Note
Access to this page requires authorization. You can try signing in or changing directories.
Access to this page requires authorization. You can try changing directories.
Azure Database for MySQL - Flexible Server includes a feature called accelerated logs, which is now generally available for servers that use the Azure Database for MySQL - Flexible Server service tiers. The feature boosts server performance by optimizing operations related to transactional logs. When you enable this feature, the server can automatically store transactional logs on faster storage to enhance server throughput without incurring any extra cost.
This article describes the benefits and limitations of accelerated logs. It also outlines the steps to enable and disable the feature.
Key benefits
Database servers with mission-critical workloads demand robust performance, high throughput, and substantial input/output operations per second (IOPS). These servers can also be sensitive to latency fluctuations in commit times for database transactions.
The accelerated logs feature is designed to address these challenges by optimizing the placement of transactional logs on high-performance storage. Separating transaction log operations from database queries and data updates significantly improves commit latency in database transactions.
Benefits of accelerated logs include:
- Enhanced throughput: Query throughput can increase up to twofold in high-concurrency scenarios, resulting in faster query execution. This improvement also reduces latency by up to 50%.
- Cost efficiency: Accelerated logs offer a cost-effective solution for mission-critical workloads by providing enhanced performance at no extra expense.
- Enhanced scalability: Accelerated logs can accommodate growing workloads for applications that need to scale easily while maintaining high performance. Applications and services on the Business Critical service tier benefit from more responsive interactions and reduced query wait times.
Note
If zone-redundant high availability is enabled for your server, expect additional latency due to the cross-zonal copy of data. We recommend that you conduct your own benchmark tests for an accurate performance assessment.
Limitations
Once the accelerated logs feature is enabled, the
binlog_expire_logs_secondsserver parameter is disregarded entirely, and any configured value will no longer have any effect. However, if the accelerated logs feature is disabled, the server will once again adhere to the configured value ofbinlog_expire_logs_secondsfor binary log retention.Storage autogrow is enabled by default for a accelerated logs enabled server and can not be disabled.
Availability of accelerated logs by region
The accelerated logs feature is currently available only in the following region:
- China North 3
Enable accelerated logs
You can enable the feature during creation of a flexible server or on an existing flexible server.
Enable accelerated logs during server creation
In the Azure portal, select Flexible Server, and then select Create.
Fill in values for Subscription, Resource group, Server name, Region, and other fields. For details, see the quickstart for server creation.
Select the Configure server option to change the default compute and storage.
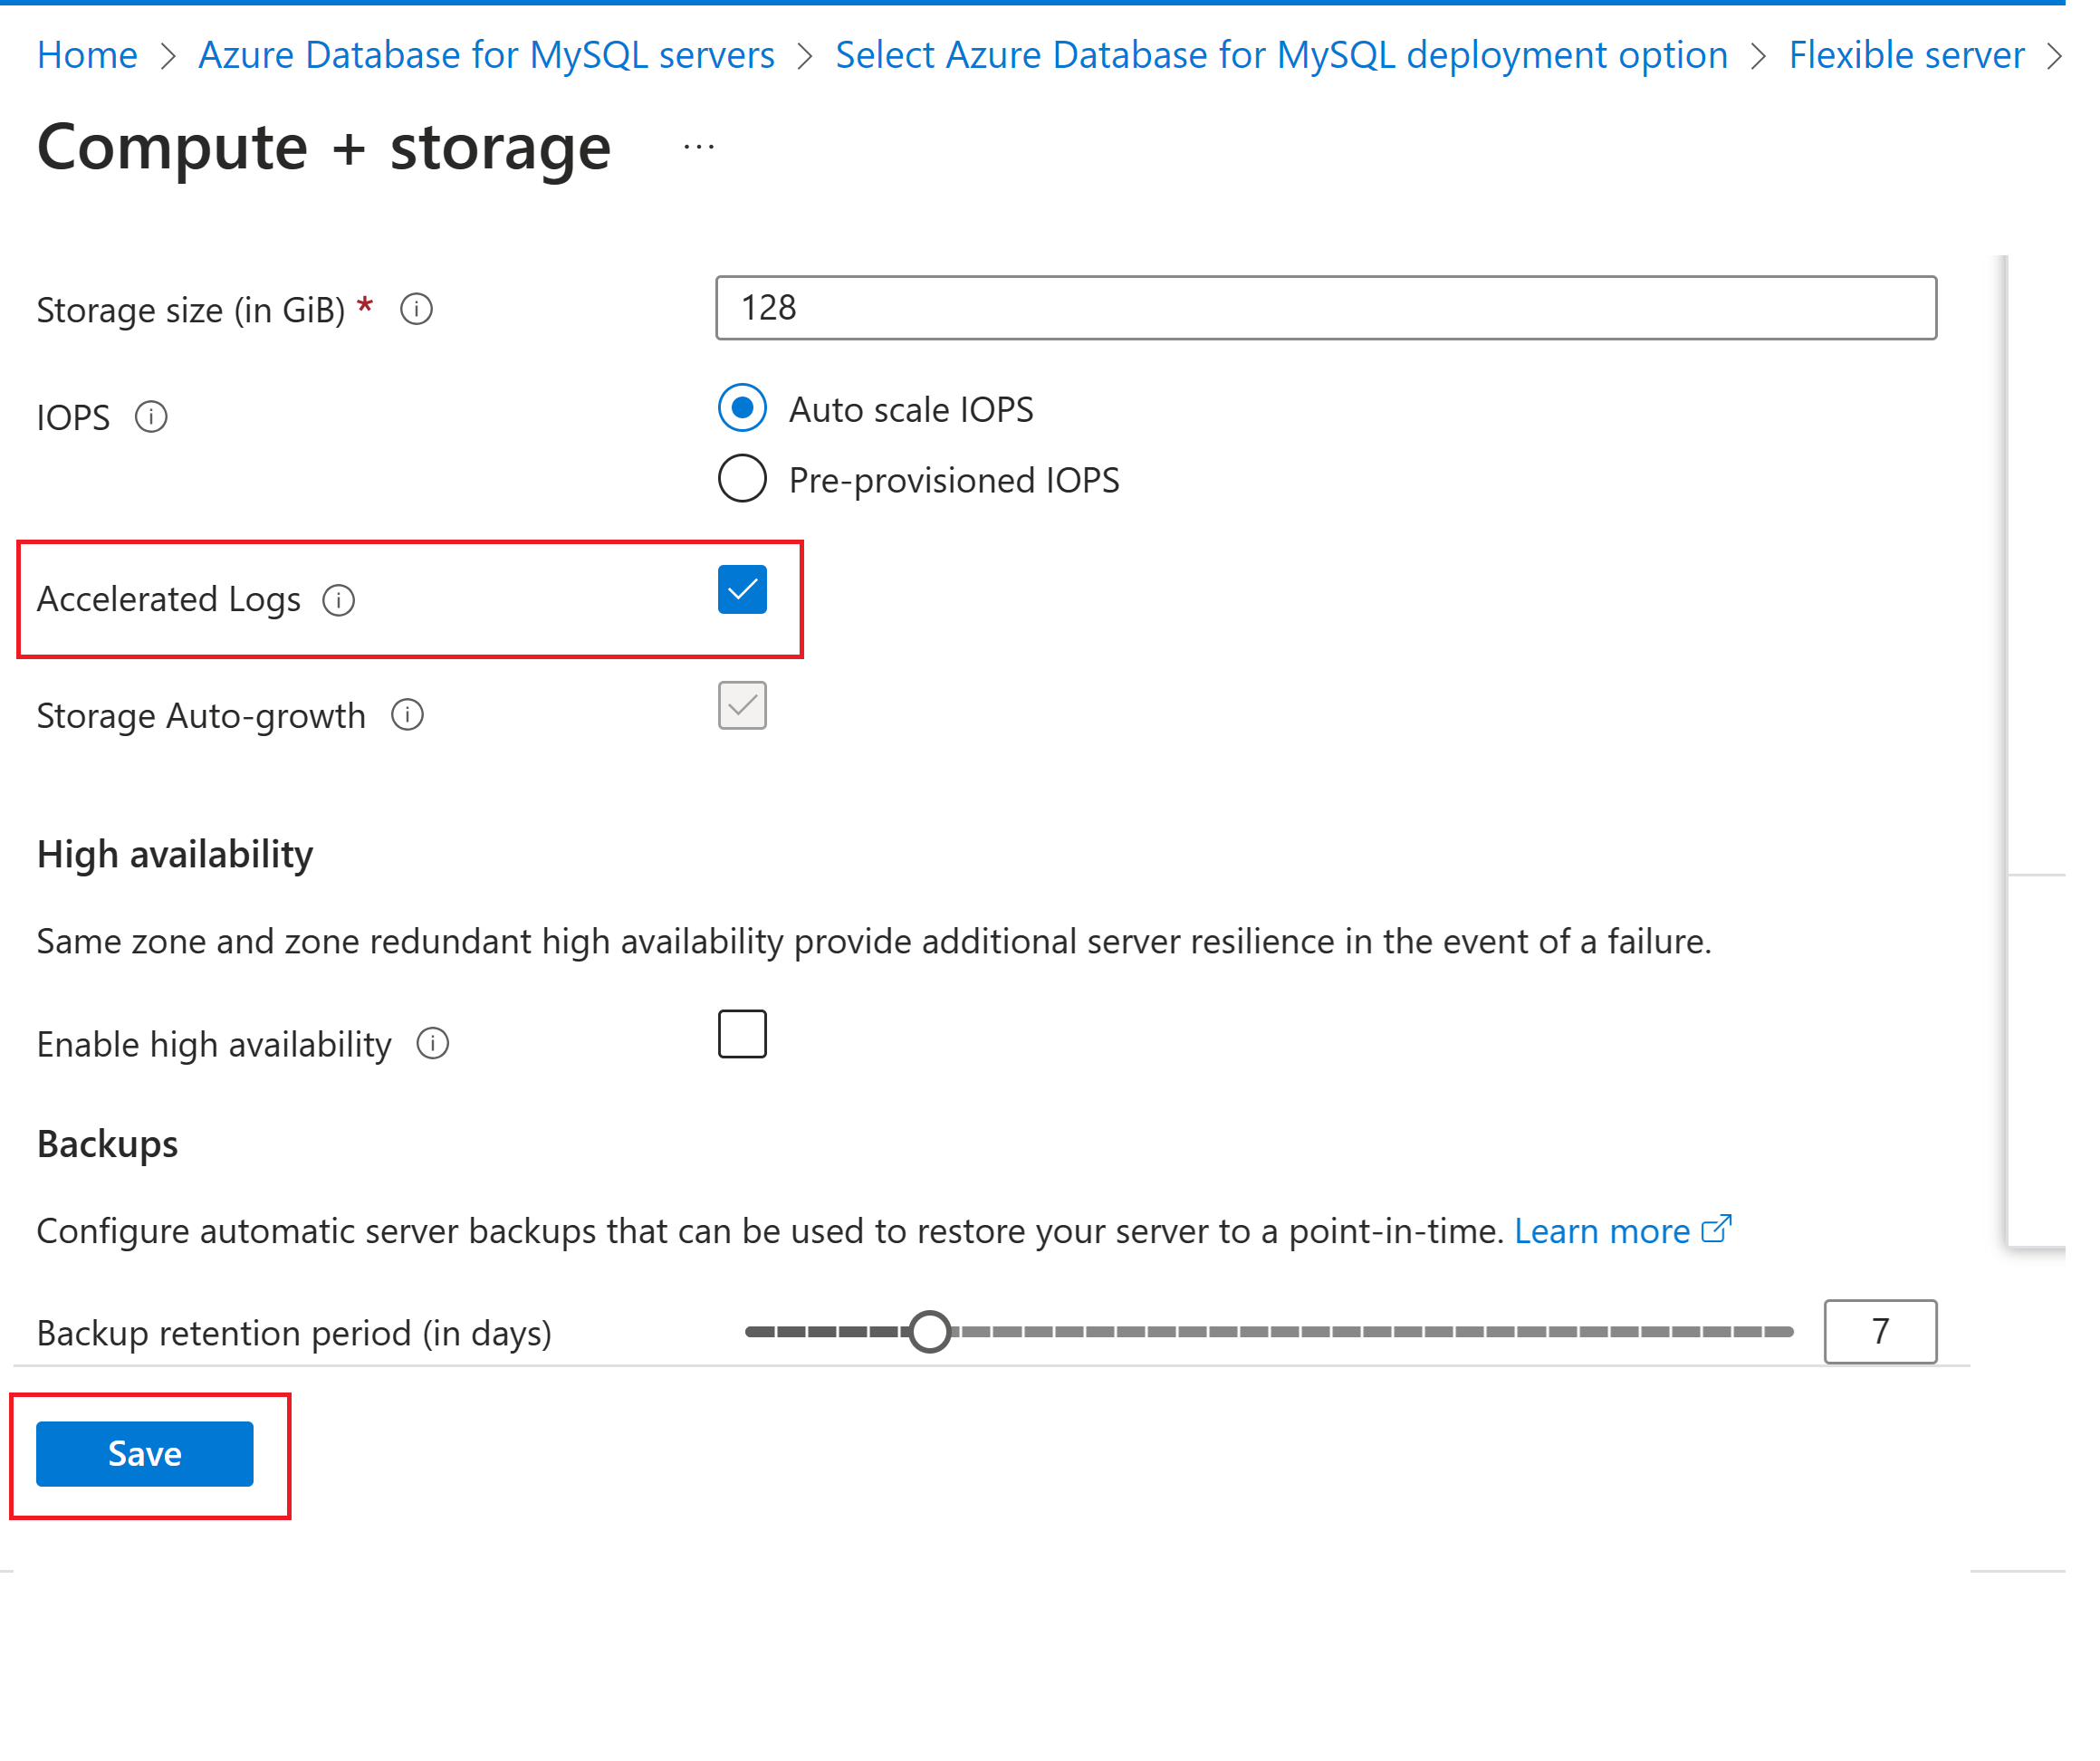
In the Storage section, select the Accelerated logs checkbox to enable the feature. The checkbox is visible only after you select the server from the Business Critical compute tier.
Select the Compute size value from the dropdown list. Then select Save and proceed to deploy your Azure Database for MySQL - Flexible Server instance by following instructions in the quickstart for server creation.
Enable accelerated logs on your existing server
Note
Your server will restart during the deployment process, so ensure that you either pause your workload or schedule it for a time that aligns with your application maintenance or that's off-hours.
Go to the Azure portal.
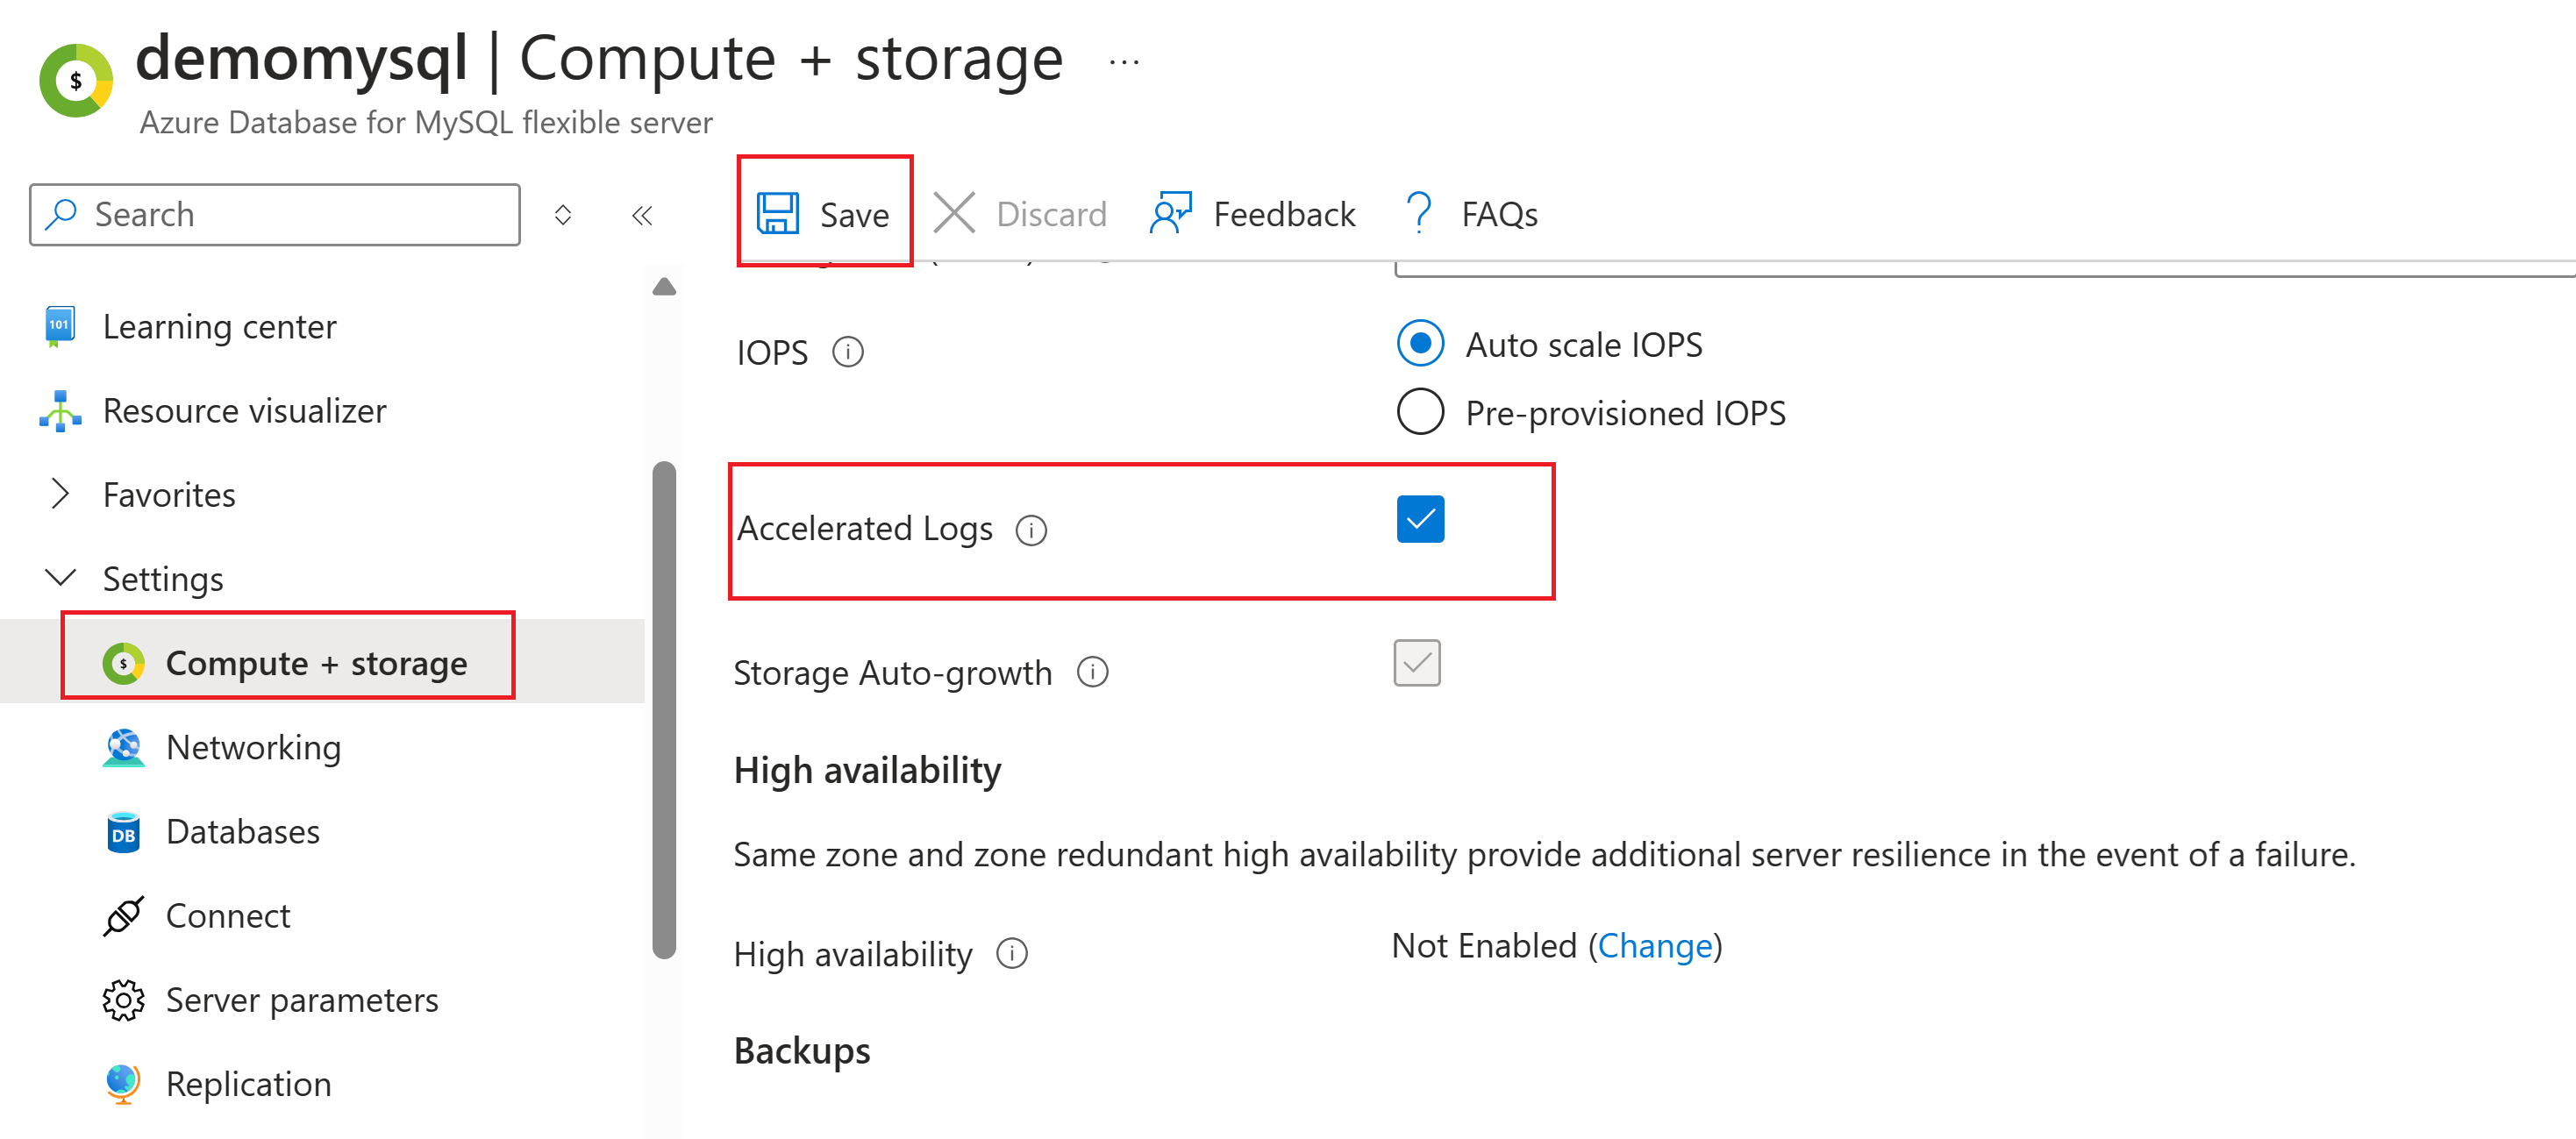
Go to Settings > Compute + storage. In the Storage section, select the Accelerated Logs checkbox.
Select Save and wait for the deployment process to finish. After you receive a successful deployment message, the feature is ready for use.
Disable accelerated logs
Note
Your server will restart during the deployment process, so ensure that you either pause your workload or schedule it for a time that aligns with your application maintenance or that's off-hours.
Go to the Azure portal.
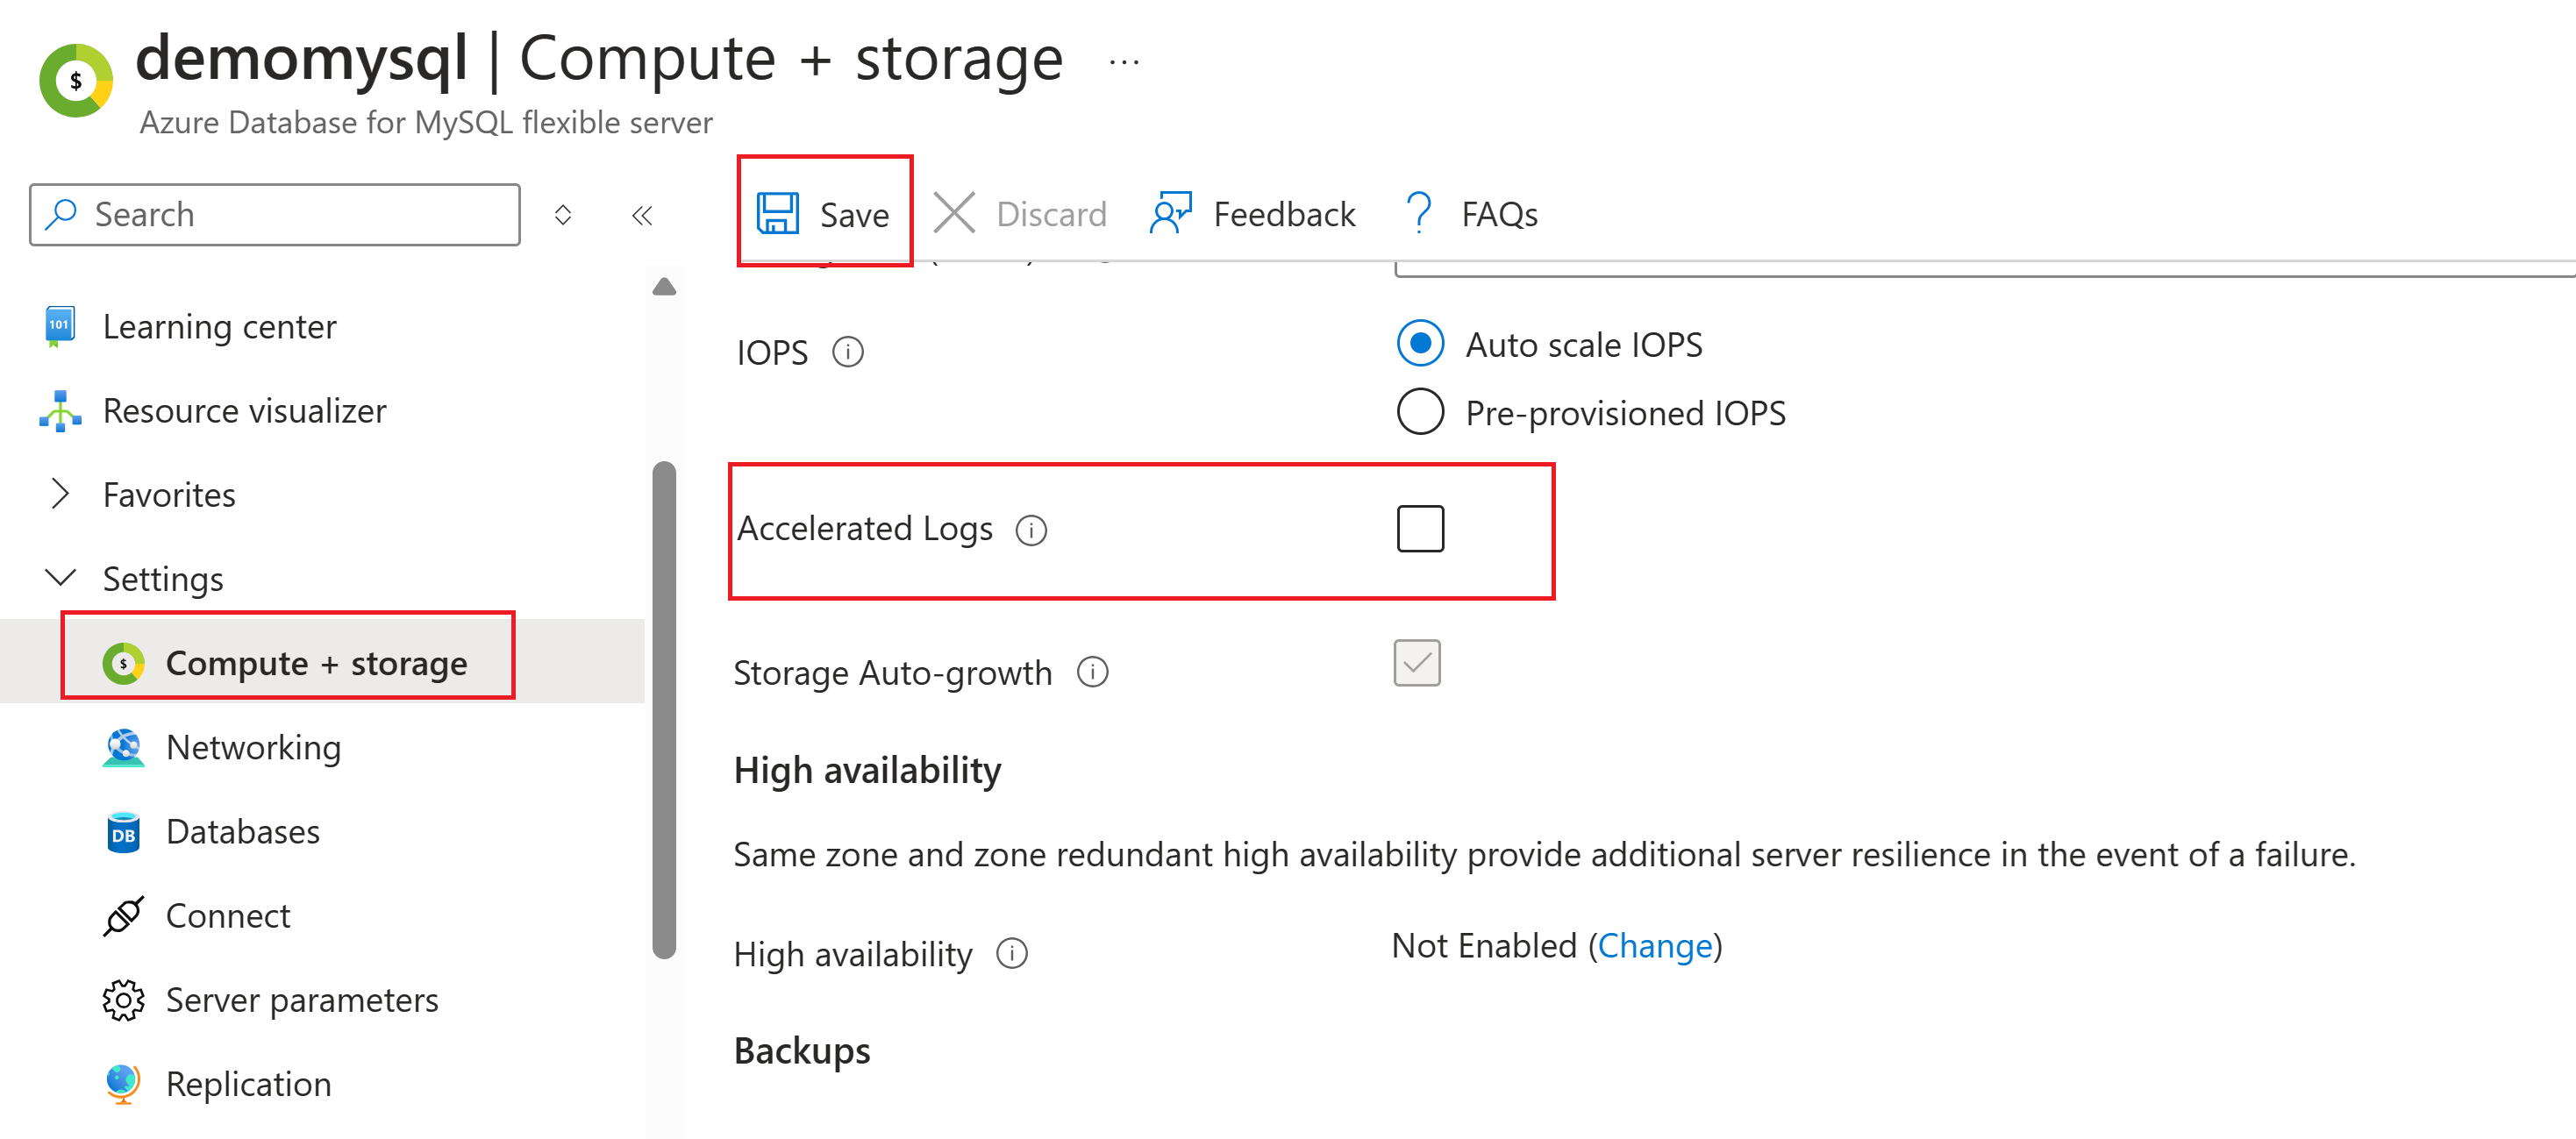
Go to Settings > Compute + storage. In the Storage section, clear the Accelerated Logs checkbox.
Select Save and wait for the deployment process to finish. After you receive a successful deployment message, the feature is disabled.


