Exchange B2B messages between partners using workflows in Azure Logic Apps
Applies to: Azure Logic Apps (Consumption + Standard)
When you have an integration account that defines trading partners and agreements, you can create an automated business-to-business (B2B) workflow that exchanges messages between trading partners by using Azure Logic Apps. Your workflow can use connectors that support industry-standard protocols, such as AS2, X12, EDIFACT, and RosettaNet. You can also include operations provided by other connectors in Azure Logic Apps, such as Office 365 Outlook, SQL Server, and Salesforce.
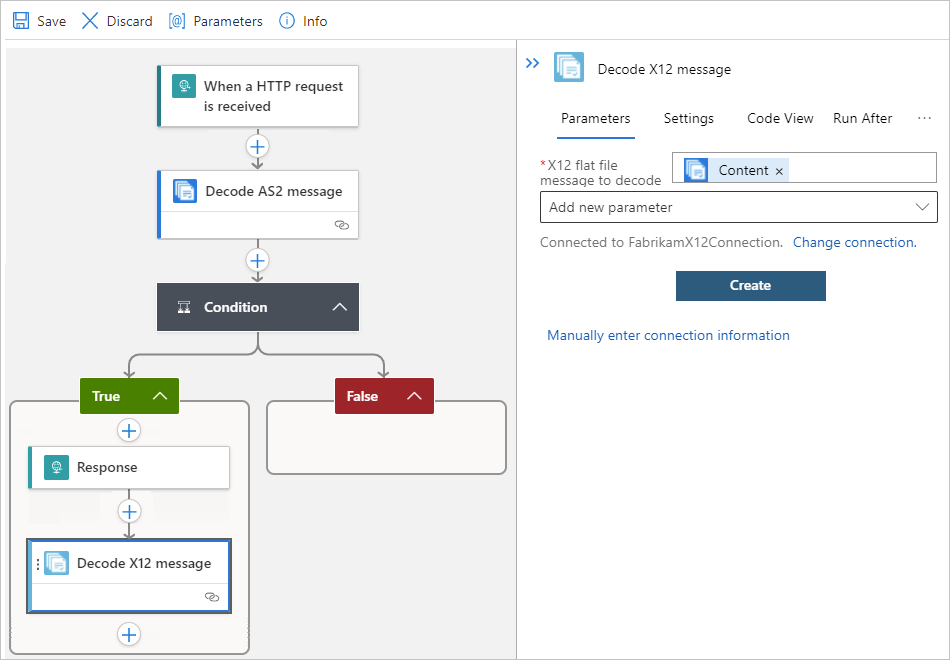
This article shows how to create an example logic app workflow that can receive HTTP requests by using a Request trigger, decode message content by using the AS2 Decode and Decode X12 actions, and return a response by using the Response action. The example uses the workflow designer in the Azure portal, but you can follow similar steps for the workflow designer in Visual Studio Code.
If you're new to logic apps, review What is Azure Logic Apps? For more information about B2B enterprise integration, review B2B enterprise integration workflows with Azure Logic Apps.
Prerequisites
An Azure account and subscription. If you don't have a subscription yet, sign up for a trial Azure subscription.
An integration account resource where you define and store artifacts, such as trading partners, agreements, certificates, and so on, for use in your enterprise integration and B2B workflows. This resource has to meet the following requirements:
Is associated with the same Azure subscription as your logic app resource.
Exists in the same location or Azure region as your logic app resource.
If you're using the Logic App (Consumption) resource type, your integration account requires a link to your logic app resource before you can use artifacts in your workflow.
If you're using the Logic App (Standard) resource type, your integration account doesn't need a link to your logic app resource but is still required to store other artifacts, such as partners, agreements, and certificates, along with using the AS2, X12, or EDIFACT operations. Your integration account still has to meet other requirements, such as using the same Azure subscription and existing in the same location as your logic app resource.
Note
Currently, only the Logic App (Consumption) resource type supports RosettaNet operations. The Logic App (Standard) resource type doesn't include RosettaNet operations.
At least two trading partners in your integration account. The definitions for both partners must use the same business identity qualifier, which is AS2, X12, EDIFACT, or RosettaNet.
An AS2 agreement and X12 agreement for the partners that you're using in this workflow. Each agreement requires a host partner and a guest partner.
A logic app resource with a blank workflow where you can add the Request trigger and then the following actions:
Add the Request trigger
To start the workflow in this example, add the Request trigger.
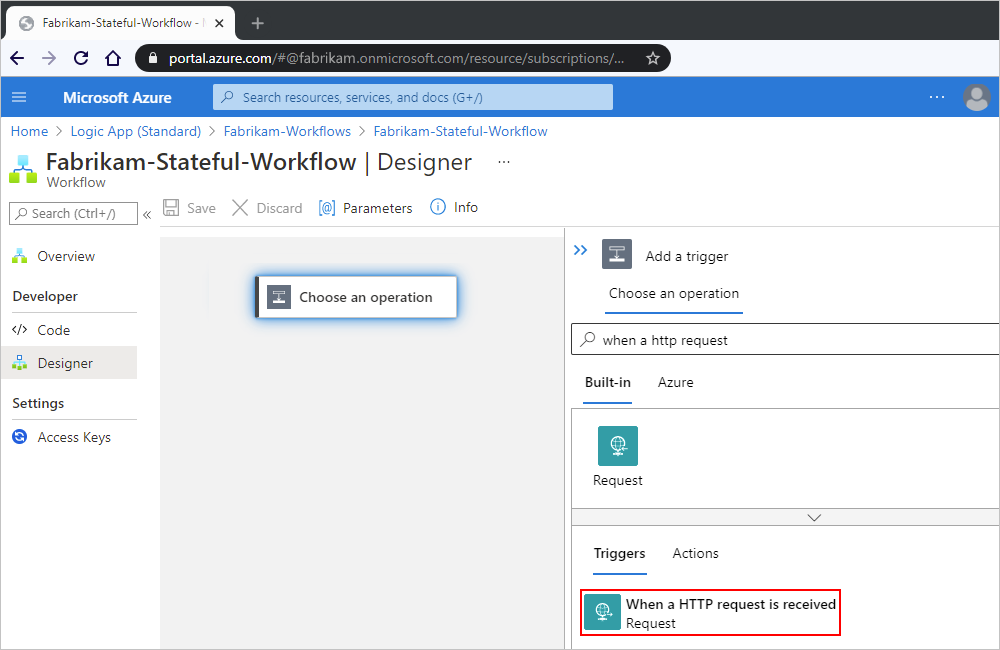
In the Azure portal, open your logic app resource and blank workflow in the workflow designer.
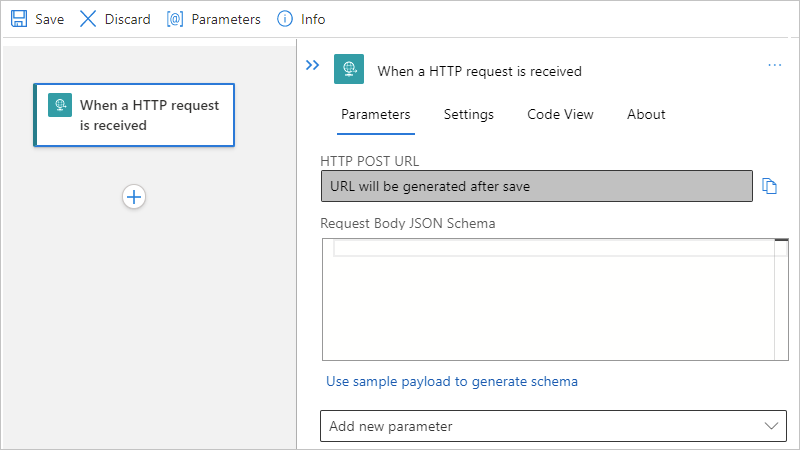
Under the designer search box, select All, if not selected. In the search box, enter
when a http request. Select the Request trigger named When an HTTP request is received.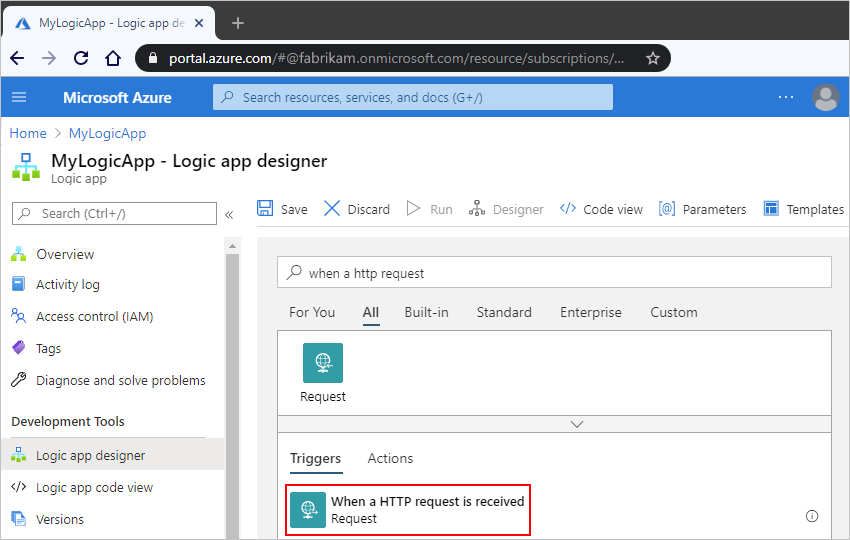
In the trigger, leave the Request body JSON Schema box empty.
The reason is that the trigger will receive an X12 message in flat file format.
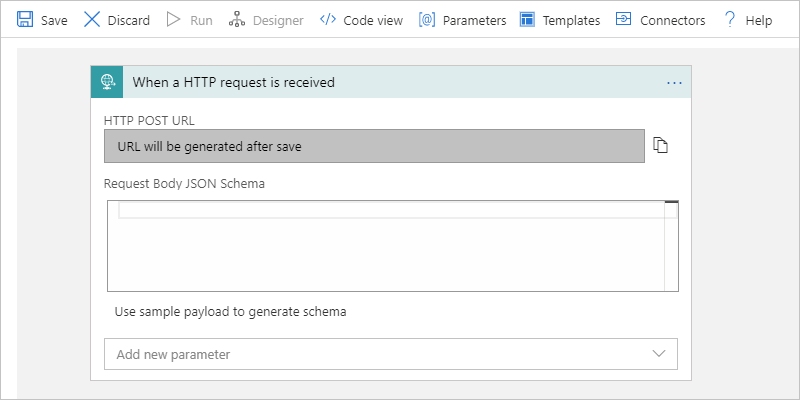
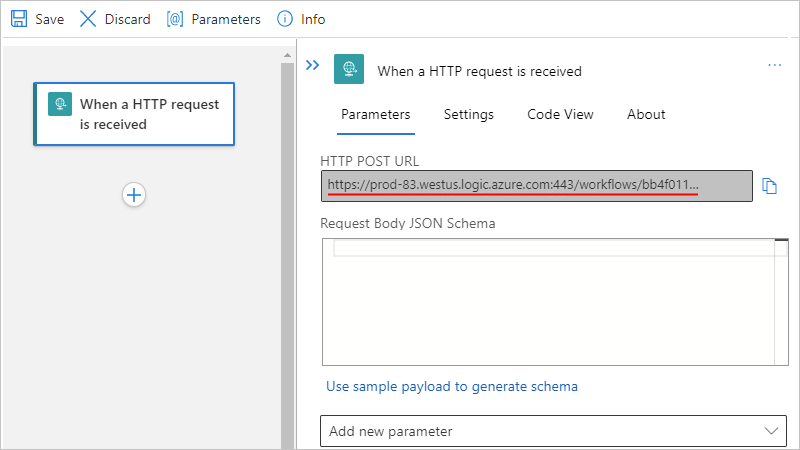
When you're done, on the designer toolbar, select Save.
This step generates the HTTP POST URL that you later use to send a request that triggers logic app workflow.
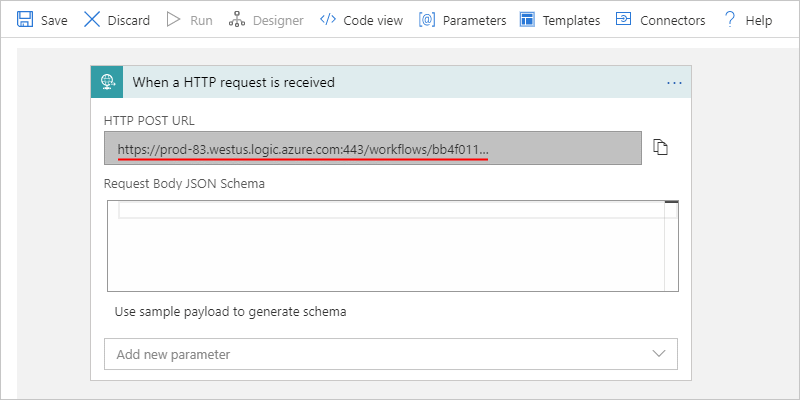
Copy and save the URL to use later.
Add the decode AS2 action
Now add the B2B actions for this example, which uses the AS2 and X12 actions.
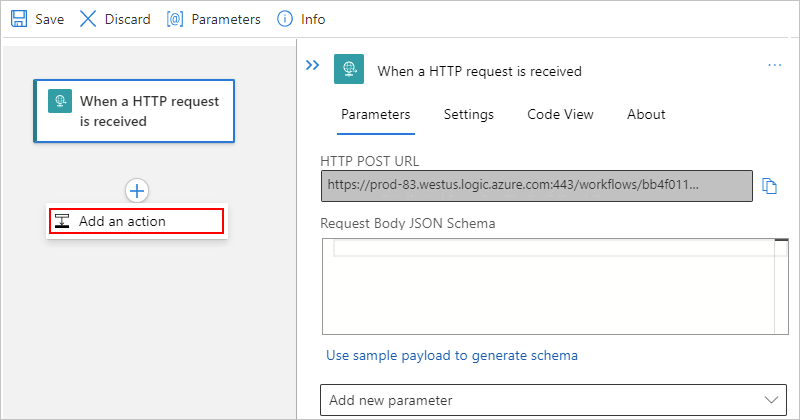
Under the trigger, select New step.
Tip
To hide the Request trigger details, select the trigger's title bar.

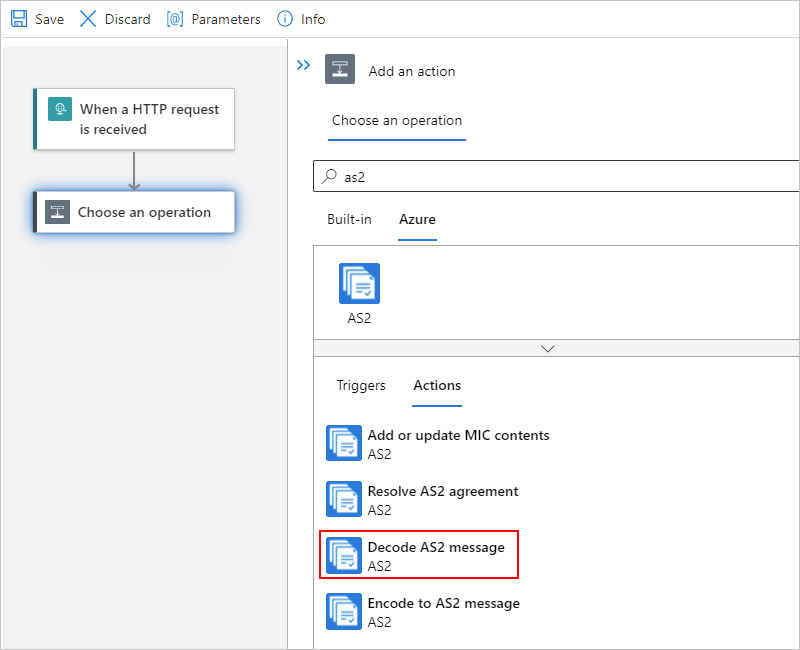
Under the Choose an operation search box, select All, if not selected. In the search box, enter
as2, and select AS2 Decode.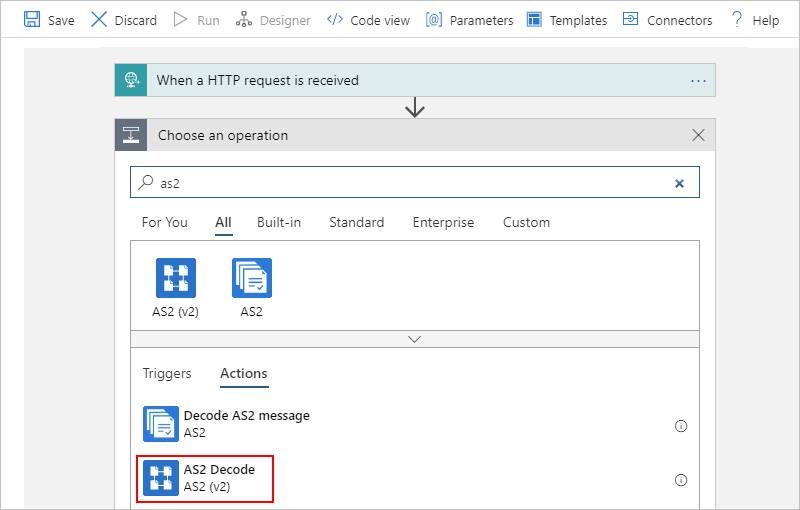
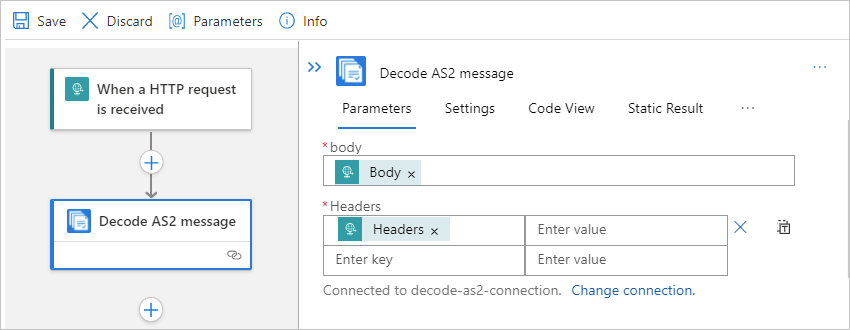
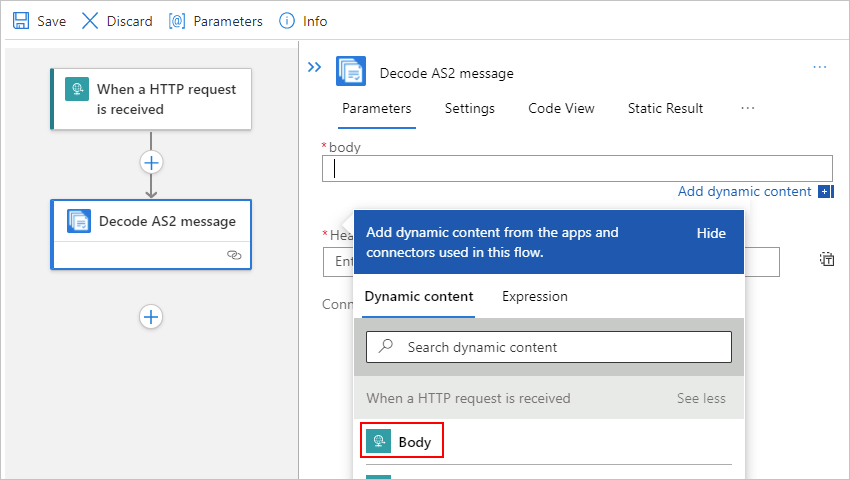
In the action's Message to decode property, enter the input that you want the AS2 action to decode, which is the
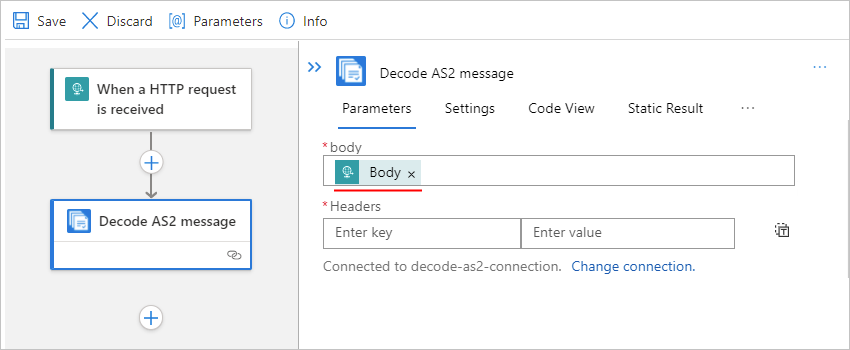
bodyoutput from the Request trigger. You have multiple ways to specify this content as the action's input, either by selecting from the dynamic content list or as an expression:To select from a list that shows the available trigger outputs, click inside the Message to decode box. After the dynamic content list appears, under When a HTTP request is received, select Body property value, for example:
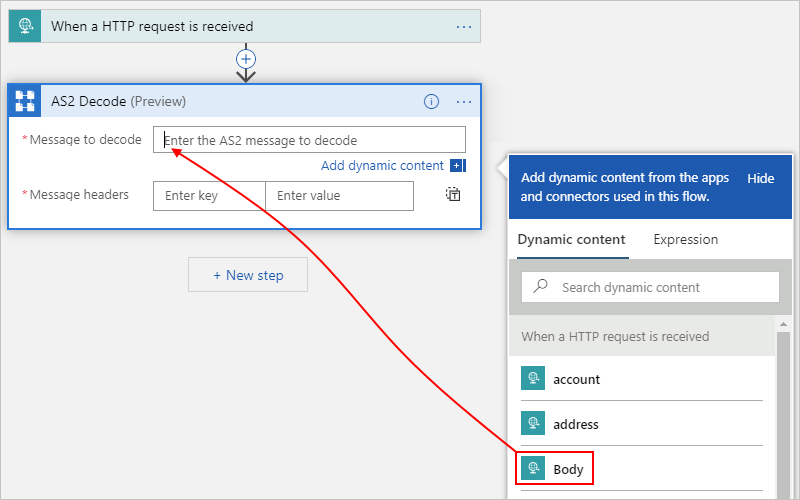
Tip
If no trigger outputs appear, in the dynamic property list, under When a HTTP request is received, select See more.
To enter an expression that references the trigger's
bodyoutput, click inside the Message to decode box. After the dynamic content list appears, select Expression. In the expression editor, enter the following expression, and select OK:triggerOutputs()['body']Or, in the Message to decode box, directly enter the following expression:
@triggerBody()The expression resolves to the Body token.

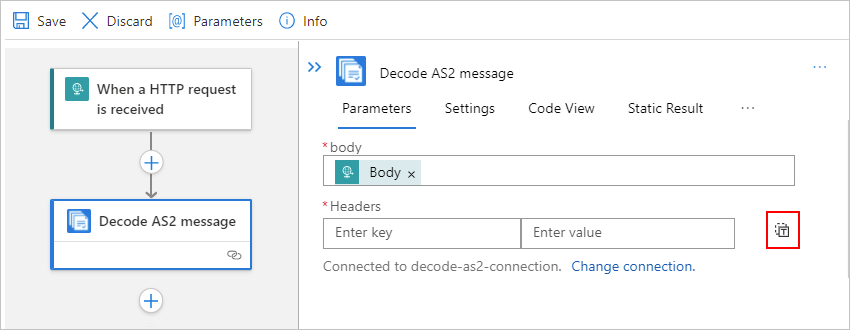
In the action's Message headers property, enter any headers required for the AS2 action, which are in the
headersoutput from the Request trigger.To enter an expression that references the trigger's
headersoutput, select Switch Message headers to text mode.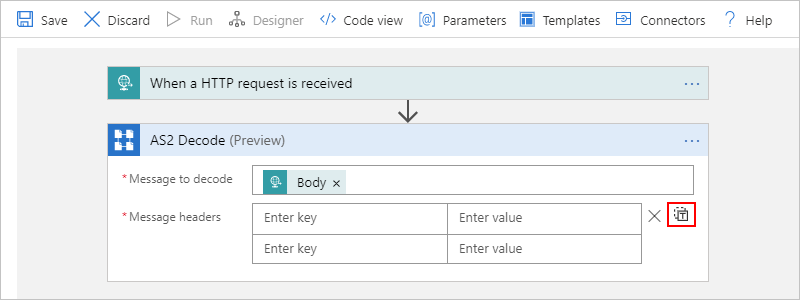
Click inside the Message headers box. After the dynamic content list appears, select Expression. In the expression editor, enter the following expression, and select OK:
triggerOutputs()['Headers']In the AS2 Decode action, the expression now appears as a token:
![Screenshot showing multi-tenant designer and the "Message headers" box with the "@triggerOutputs()['Headers']" token.](media/logic-apps-enterprise-integration-b2b/as2-header-expression-consumption.png)
To get the expression token to resolve into the Headers token, switch between the designer and code view. After this step, the AS2 Decode action looks like this example:

Add the Response action as a message receipt
To notify the trading partner that the message was received, you can return a response that contains an AS2 Message Disposition Notification (MDN) by using the Condition and Response actions. By adding these actions immediately after the AS2 action, the logic app workflow can continue processing if the AS2 action succeeds. Otherwise, if the AS2 action fails, the logic app workflow stops processing.
Under the AS2 Decode action, select New step.
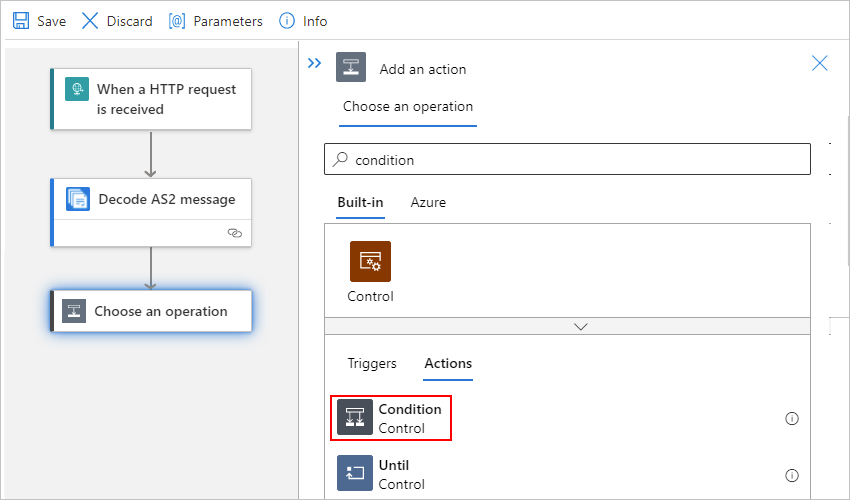
Under the Choose an operation search box, select Built-in, if not already selected. In the search box, enter
condition. Select the Condition action.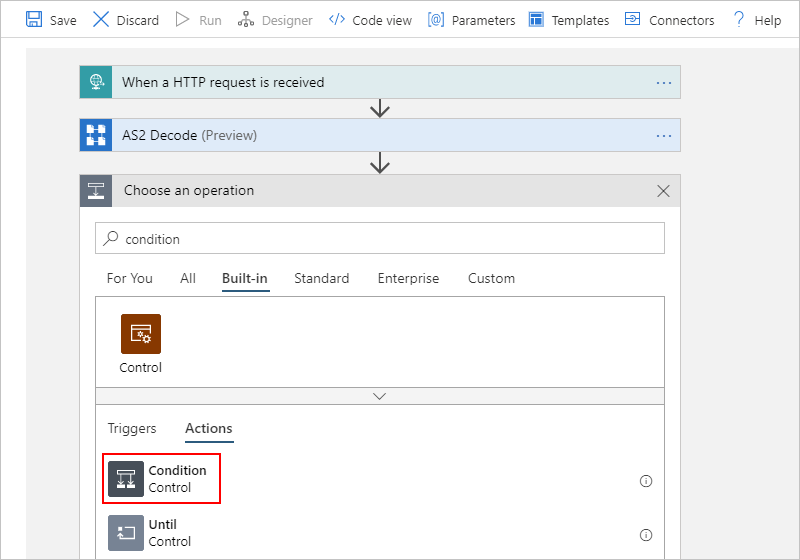
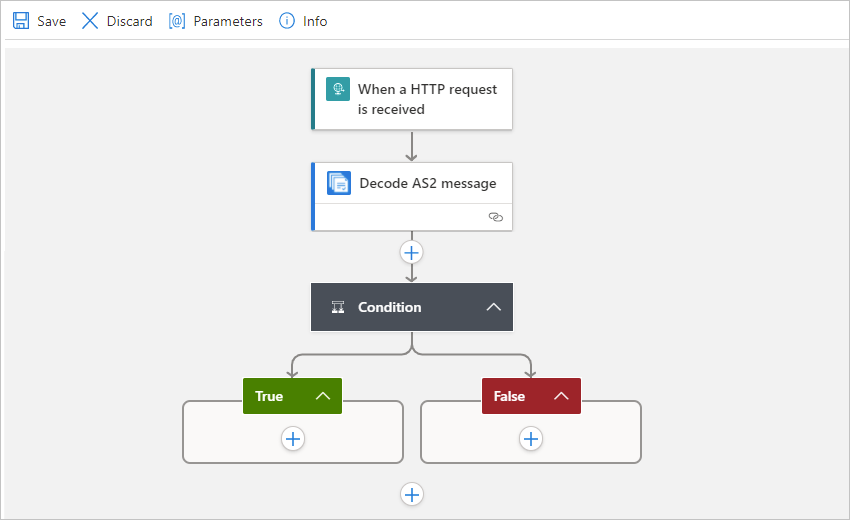
Now the condition shape appears, including the paths that determine whether the condition is met.
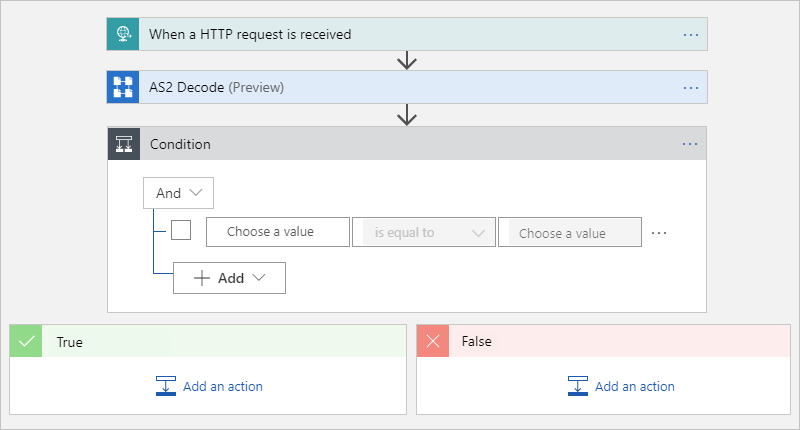
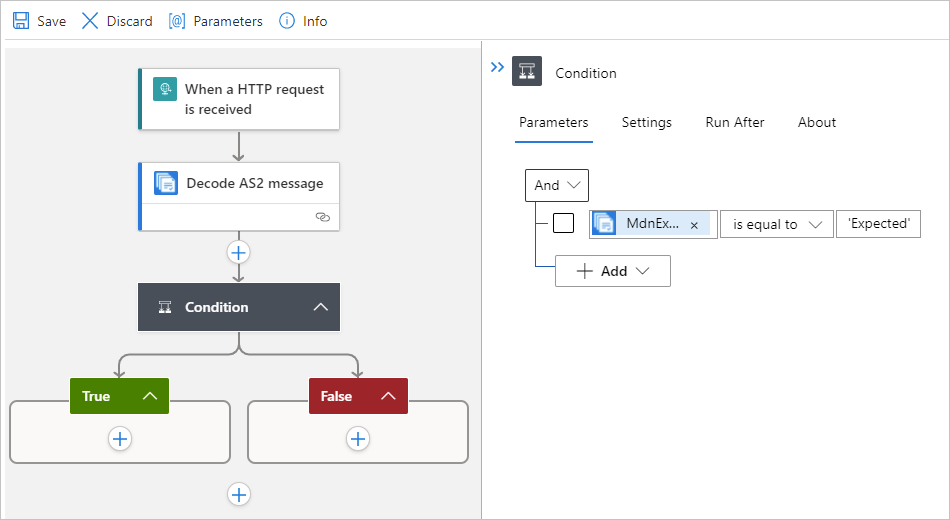
Now specify the condition to evaluate. In the Choose a value box, enter the following expression:
@body('AS2_Decode')?['AS2Message']?['MdnExpected']In the middle box, make sure the comparison operation is set to
is equal to. In the right-side box, enter the valueExpected.Save your logic app workflow. To get the expression to resolve as this token, switch between the designer and code view.
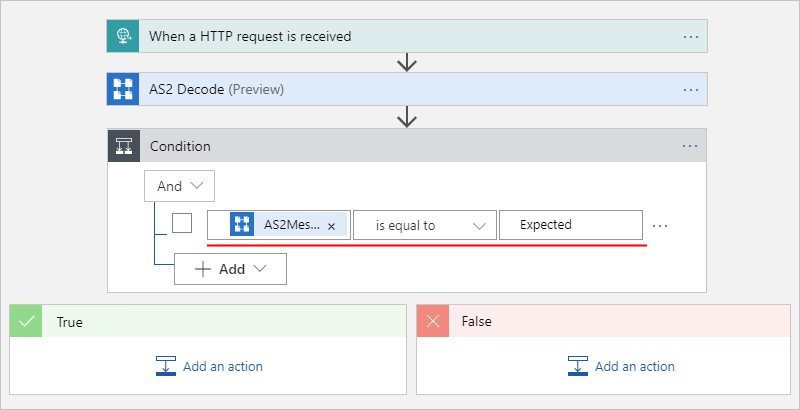
Now specify the responses to return based on whether the AS2 Decode action succeeds or not.
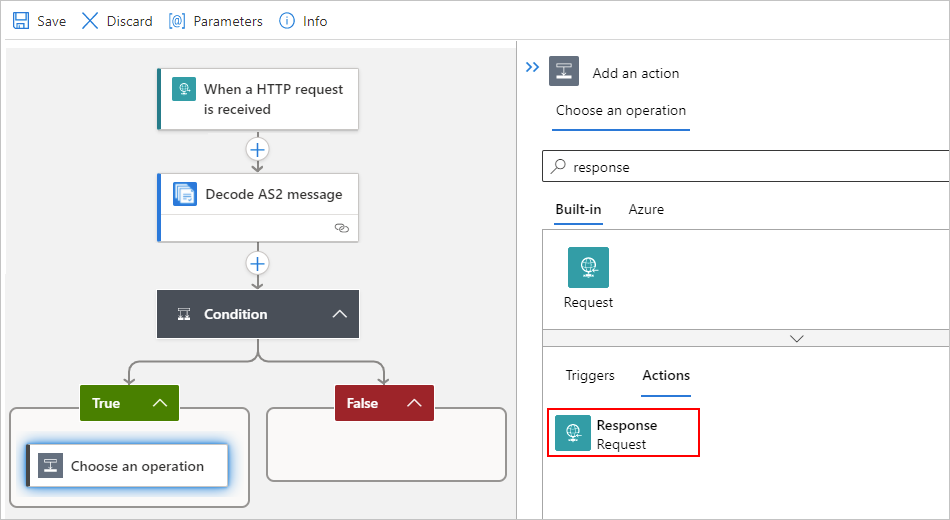
For the case when the AS2 Decode action succeeds, in the True shape, select Add an action. Under the Choose an operation search box, enter
response, and select Response.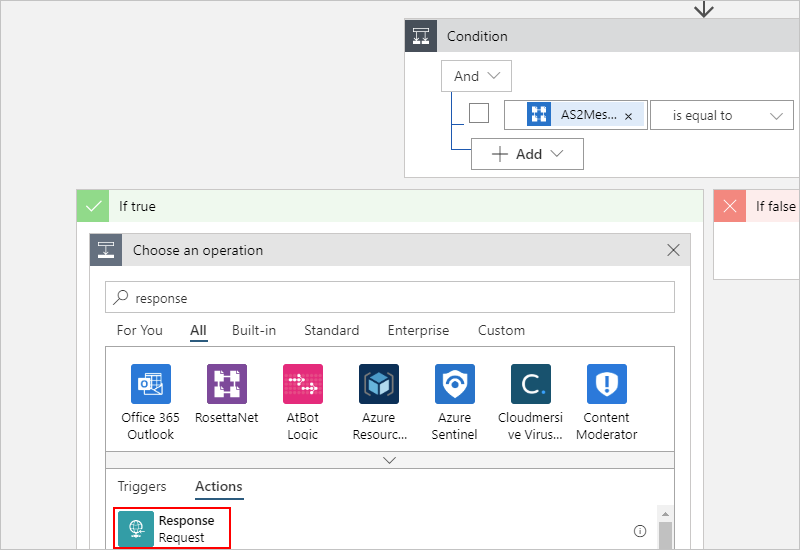
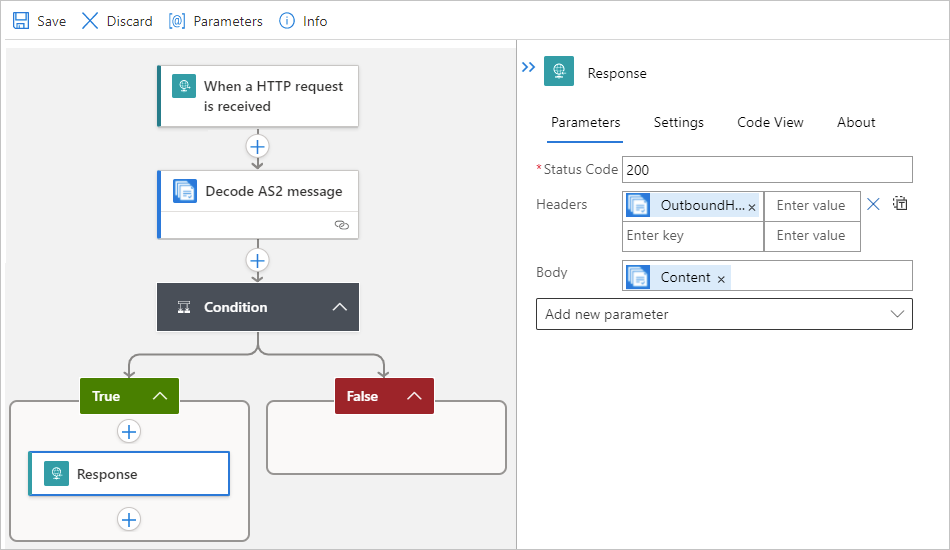
To access the AS2 MDN from the AS2 Decode action's output, specify the following expressions:
In the Response action's Headers property, enter the following expression:
@body('AS2_Decode')?['OutgoingMdn']?['OutboundHeaders']In the Response action's Body property, enter the following expression:
@body('AS2_Decode')?['OutgoingMdn']?['Content']
To get the expressions to resolve as tokens, switch between the designer and code view:
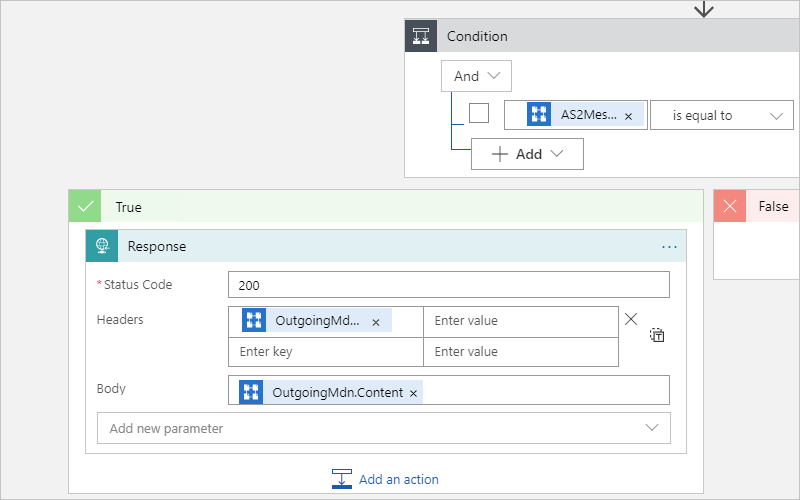
For the case when the AS2 Decode action fails, in the False shape, select Add an action. Under the Choose an operation search box, enter
response, and select Response. Set up the Response action to return the status and error that you want.
Save your logic app workflow.
Add the decode X12 message action
Now add the Decode X12 message action.
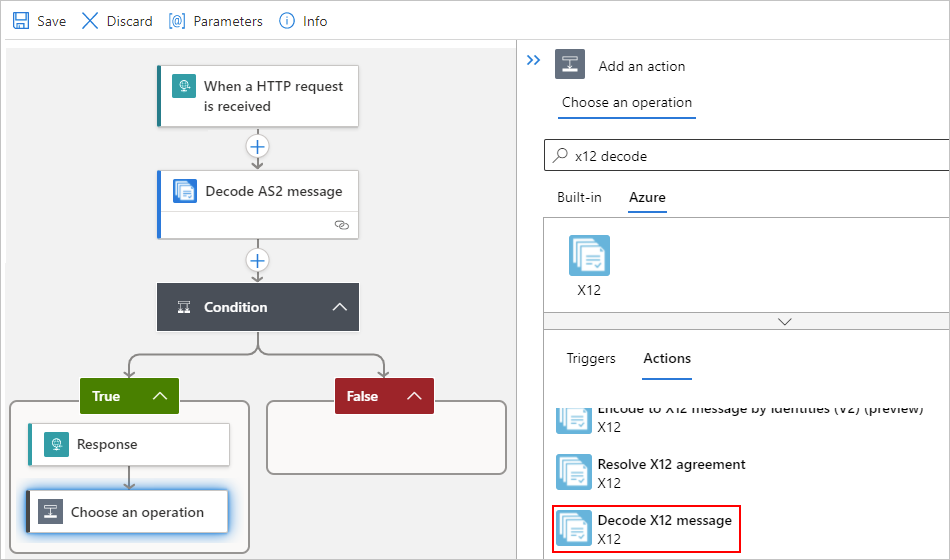
Under the Response action, select Add an action.
Under Choose an operation, in the search box, enter
x12 decode, and select Decode X12 message.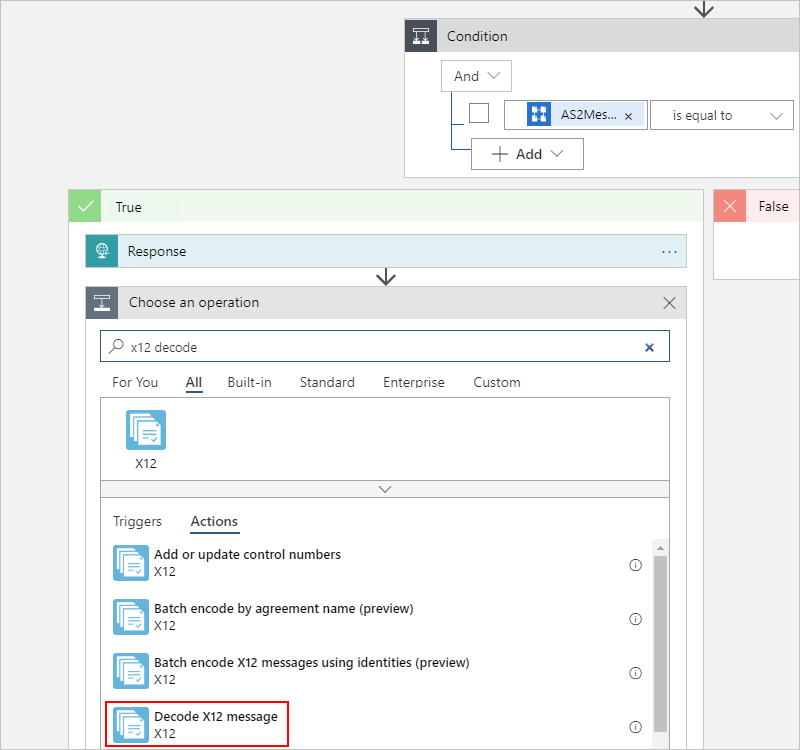
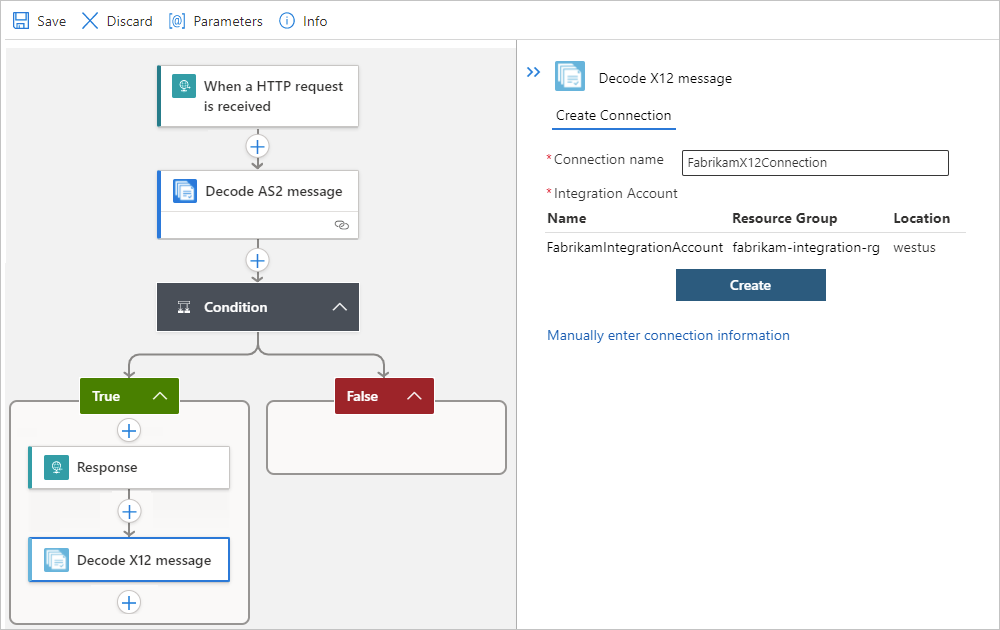
If the X12 action prompts you for connection information, provide the name for the connection, select the integration account you want to use, and then select Create.
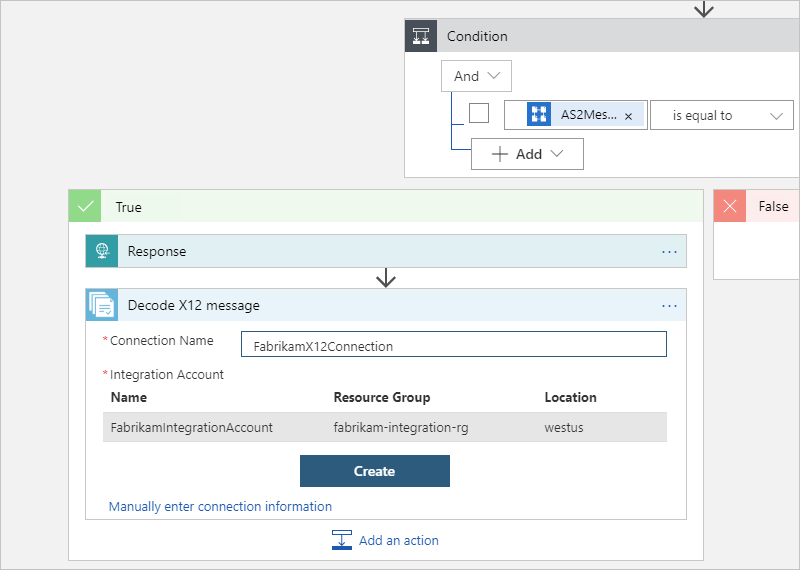
Now specify the input for the X12 action. This example uses the output from the AS2 action, which is the message content but note that this content is in JSON object format and is base64 encoded. So, you have to convert this content to a string.
In the X12 Flat file message to decode box, enter the following expression to convert the AS2 output:
@base64ToString(body('AS2_Decode')?['AS2Message']?['Content'])Save your logic app workflow. To get the expression to resolve as this token, switch between the designer and code view.
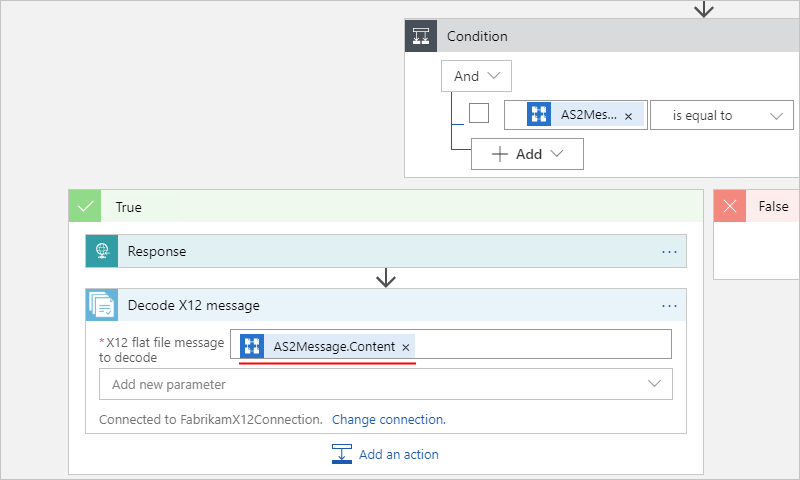
Save your logic app workflow.
If you need additional steps for this logic app workflow, for example, to decode the message content and output that content in JSON object format, continue adding the necessary actions to your logic app workflow.
You're now done setting up your B2B logic app workflow. In a real world app, you might want to store the decoded X12 data in a line-of-business (LOB) app or data store. For example, review the following documentation:
To connect your own LOB apps and use these APIs in your logic app, you can add more actions or write custom APIs.
![Screenshot showing single-tenant designer and the "Headers" property with the "@triggerOutputs()['Headers']" token.](media/logic-apps-enterprise-integration-b2b/as2-header-expression-standard.png)
