Note
Access to this page requires authorization. You can try signing in or changing directories.
Access to this page requires authorization. You can try changing directories.
This article describes how to create a custom role in Microsoft Entra ID using the Microsoft Entra admin center, Microsoft Graph PowerShell, or Microsoft Graph API.
For the basics of custom roles, see the custom roles overview. The role can be assigned either at the directory-level scope or an app registration resource scope only. For information about the maximum number of custom roles that can be created in a Microsoft Entra organization, see Microsoft Entra service limits and restrictions.
Prerequisites
- Microsoft Entra ID P1 or P2 license
- Privileged Role Administrator
- Microsoft Graph PowerShell module when using PowerShell
For more information, see Prerequisites to use PowerShell.
Create a custom role
These steps describe how to create a custom role in the Microsoft Entra admin center to manage app registrations.
Tip
Steps in this article might vary slightly based on the portal you start from.
Sign in to the Microsoft Entra admin center as at least a Privileged Role Administrator.
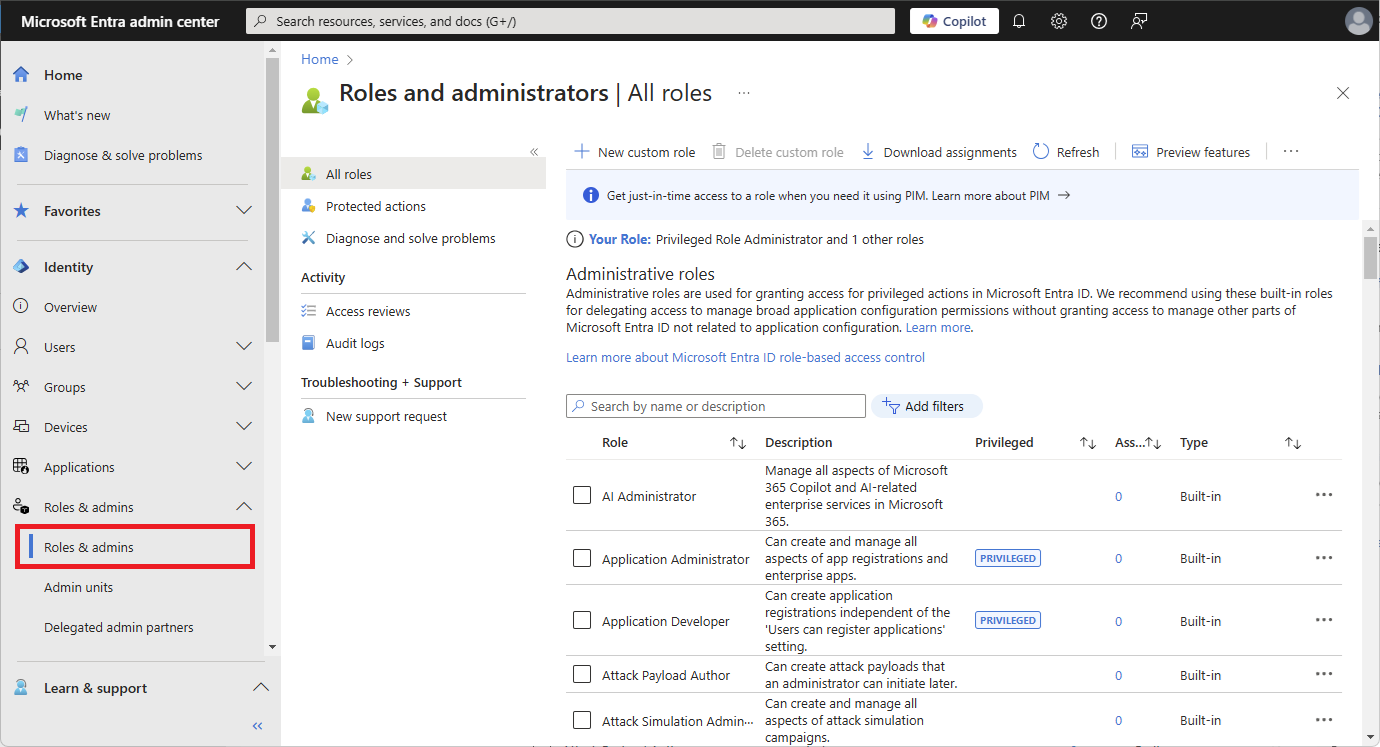
Browse to Identity > Roles & admins > Roles & admins.
Select New custom role.
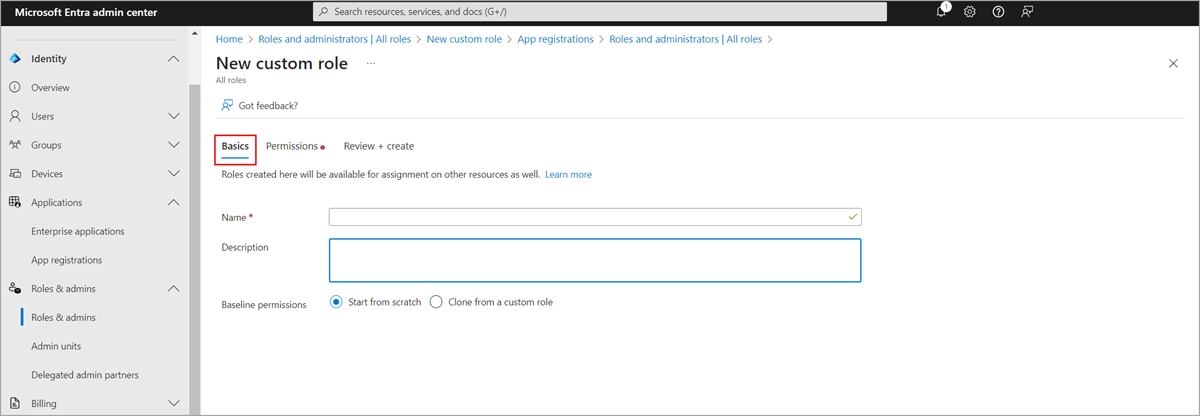
On the Basics tab, provide a name and description for the role.
You can clone the baseline permissions from a custom role but you can't clone a built-in role.
On the Permissions tab, select the permissions necessary to manage basic properties and credential properties of app registrations. For a detailed description of each permission, see Application registration subtypes and permissions in Microsoft Entra ID.
First, enter "credentials" in the search bar and select the
microsoft.directory/applications/credentials/updatepermission.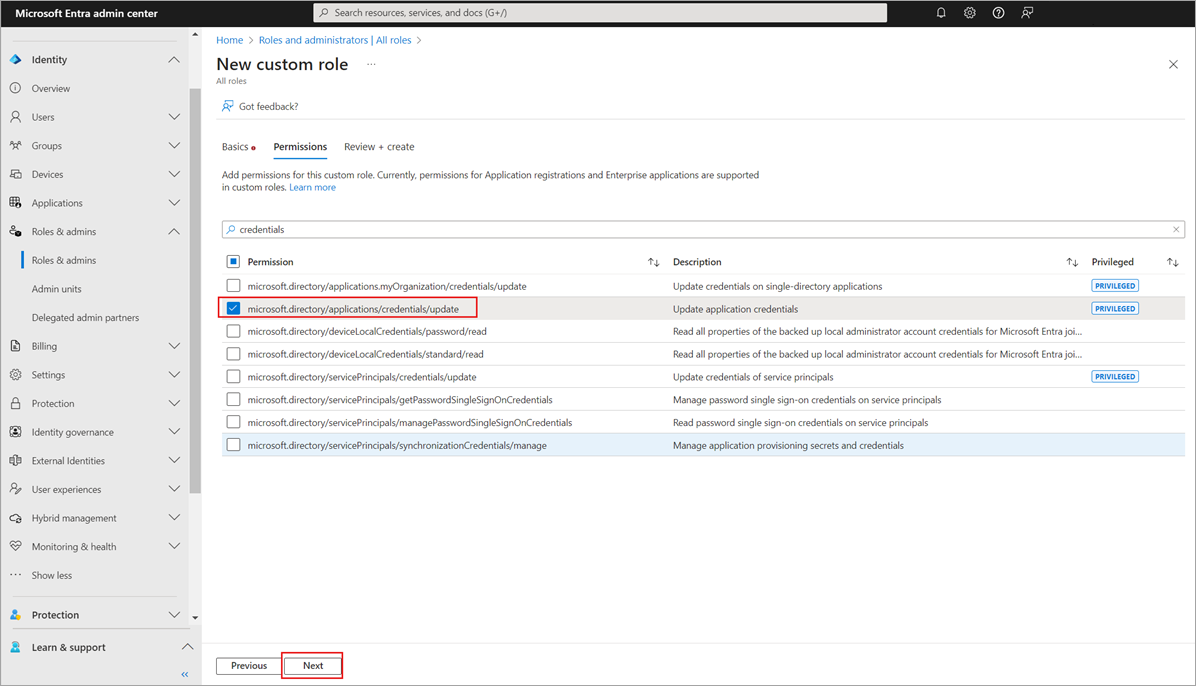
Next, enter "basic" in the search bar, select the
microsoft.directory/applications/basic/updatepermission, and then click Next.
On the Review + create tab, review the permissions and select Create.
Your custom role will show up in the list of available roles to assign.


