Tutorial: Call an API from an Angular single-page app
This tutorial is part 4 of a series that demonstrates building an Angular single-page app (SPA), which uses the Microsoft identity platform for authentication. In this tutorial, you call Microsoft Graph API from your Angular SPA.
In this tutorial:
- Create the API call to Microsoft Graph
- Test the application
Prerequisites
Create the API call to Microsoft Graph
To configure your Angular application to interact with the Microsoft Graph API, complete the following steps:
Open the
src/app/app.module.tsfile and add the following code snippet:// MSAL Interceptor is required to request access tokens in order to access the protected resource (Graph) export function MSALInterceptorConfigFactory(): MsalInterceptorConfiguration { const protectedResourceMap = new Map<string, Array<string>>(); protectedResourceMap.set('https://microsoftgraph.chinacloudapi.cn/v1.0/me', ['user.read']); return { interactionType: InteractionType.Redirect, protectedResourceMap }; }The
MSALInterceptorConfigFactoryfunction configures the MSAL Interceptor to request access tokens for protected resources. It creates aprotectedResourceMap, linking the Microsoft Graph API endpointhttps://microsoftgraph.chinacloudapi.cn/v1.0/mewith theuser.readpermission. The function then returns anMsalInterceptorConfigurationthat specifiesRedirectforinteractionTypeand includes theprotectedResourceMap, allowing the interceptor to add access tokens to API requests automatically.Open the
src/app/profile/profile.component.tsfile and replace the contents with the following code snippet:// Required for Angular import { Component, OnInit } from '@angular/core'; // Required for the HTTP GET request to Graph import { HttpClient } from '@angular/common/http'; type ProfileType = { businessPhones?: string, displayName?: string, givenName?: string, jobTitle?: string, mail?: string, mobilePhone?: string, officeLocation?: string, preferredLanguage?: string, surname?: string, userPrincipalName?: string, id?: string } @Component({ selector: 'app-profile', templateUrl: './profile.component.html' }) export class ProfileComponent implements OnInit { profile!: ProfileType; tokenExpiration!: string; constructor( private http: HttpClient ) { } // When the page loads, perform an HTTP GET request from the Graph /me endpoint ngOnInit() { this.http.get('https://microsoftgraph.chinacloudapi.cn/v1.0/me') .subscribe(profile => { this.profile = profile; }); this.tokenExpiration = localStorage.getItem('tokenExpiration')!; } }The
ProfileComponentin Angular fetches user profile data from Microsoft Graph's/meendpoint. It definesProfileTypeto structure properties likedisplayNameandmail. InngOnInit, it usesHttpClientto send a GET request, assigning the response toprofile. It also retrieves and stores the token expiration time fromlocalStorageintokenExpiration.Open the
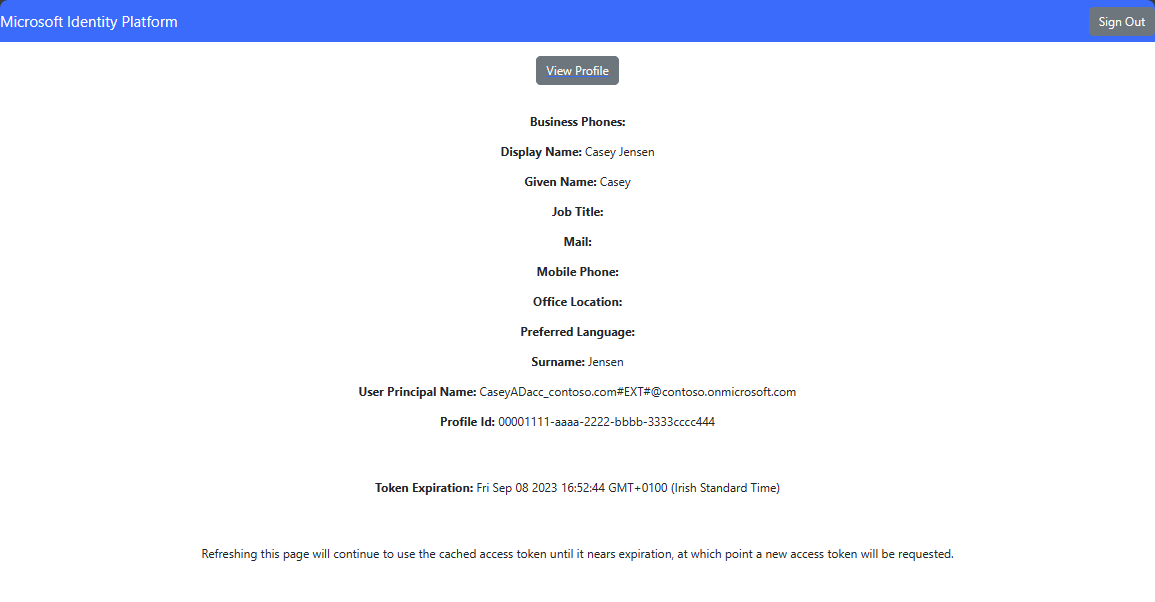
src/app/profile/profile.component.htmlfile and replace the contents with the following code snippet:<div class="profile"> <p><strong>Business Phones:</strong> {{profile?.businessPhones}}</p> <p><strong>Display Name:</strong> {{profile?.displayName}}</p> <p><strong>Given Name:</strong> {{profile?.givenName}}</p> <p><strong>Job Title:</strong> {{profile?.jobTitle}}</p> <p><strong>Mail:</strong> {{profile?.mail}}</p> <p><strong>Mobile Phone:</strong> {{profile?.mobilePhone}}</p> <p><strong>Office Location:</strong> {{profile?.officeLocation}}</p> <p><strong>Preferred Language:</strong> {{profile?.preferredLanguage}}</p> <p><strong>Surname:</strong> {{profile?.surname}}</p> <p><strong>User Principal Name:</strong> {{profile?.userPrincipalName}}</p> <p><strong>Profile Id:</strong> {{profile?.id}}</p> <br><br> <p><strong>Token Expiration:</strong> {{tokenExpiration}}</p> <br><br> <p>Refreshing this page will continue to use the cached access token until it nears expiration, at which point a new access token will be requested.</p> </div>This code defines an HTML template that displays user profile information, using Angular's interpolation syntax to bind properties from the
profileobject (For example.,businessPhones,displayName,jobTitle). It also shows thetokenExpirationvalue and includes a note stating that refreshing the page will use the cached access token until it nears expiration, after which a new token will be requested.
Test the application
To test the application, complete the following steps:
Run the Angular application by executing the following command in the terminal:
ng serve --openSelect the Sign in button to authenticate with your Microsoft Entra tenant.
After signing in, select the View Profile link to navigate to the Profile page. Verify that the user profile information is displayed, including the user's name, email, job title, and other details.

Select the Sign out button to sign out of the application.
Next steps
Learn how to use the Microsoft identity platform by trying out the following tutorial series on how to build a web API.