Note
Access to this page requires authorization. You can try signing in or changing directories.
Access to this page requires authorization. You can try changing directories.
Note
Starting June 1, 2024, newly created App Service apps can generate a unique default hostname that uses the naming convention <app-name>-<random-hash>.<region>.chinacloudsites.cn. Existing app names remain unchanged. For example:
myapp-ds27dh7271aah175.chinanorth3-01.chinacloudsites.cn
An Azure App Service plan provides the resources that an App Service app needs to run. This guide shows how to manage an App Service plan.
Create an App Service plan
Tip
If you want to create a plan in an App Service Environment, you can select it in the Region and follow the rest of the steps as described below.
You can create an empty App Service plan, or you can create a plan as part of app creation.
To start creating an App Service plan, go to Create App Service Plan on the Azure portal.

Configure the Project Details section before configuring the App Service plan.
In the App Service Plan details section, name the App Service plan, and then select the Operating System and Region. The region specifies where your App Service plan is created.
When creating a plan, you can select the pricing tier of the new plan. In Pricing Tier, select a Pricing plan or select Explore pricing plans to view additional details.
In the Zone redundancy section, select whether the App Service plan zone redundancy should be enabled or disabled.
Select Review + create to create the App Service plan.
Important
When you create an new App Service plan in an existing resource group, certain conditions with existing apps can trigger these errors:
The pricing tier is not allowed in this resource group<SKU_NAME> workers are not available in resource group <RESOURCE_GROUP_NAME>
This can happen due to incompatibilities with pricing tiers, regions, operating systems, availability zones, existing function apps, or existing web apps. If one of these errors occurs, create your App Service plan in a new resource group.
Move an app to another App Service plan
You can move an app to another App Service plan, as long as the source plan and the target plan are in the same resource group and geographical region and of the same OS type. Any change in type, such as Windows to Linux or any type that's different from the originating type, isn't supported.
Any VNET integration configured on the app must be disabled prior to changing App Service plans.
Note
Azure deploys each new App Service plan into a deployment unit, internally called a webspace. Each region can have many webspaces, but your app can only move between plans that are created in the same webspace. An App Service Environment can have multiple webspaces, but your app can only move between plans that are created in the same webspace.
You can’t specify the webspace you want when creating a plan, but it’s possible to ensure that a plan is created in the same webspace as an existing plan. In brief, all plans created with the same resource group, region combination, and operating system are deployed into the same webspace. For example, if you created a plan in resource group A and region B, then any plan you subsequently create in resource group A and region B is deployed into the same webspace. Note that plans can’t move webspaces after they’re created, so you can’t move a plan into “the same webspace” as another plan by moving it to another resource group.
In the Azure portal, search for and select App services and select the app that you want to move.
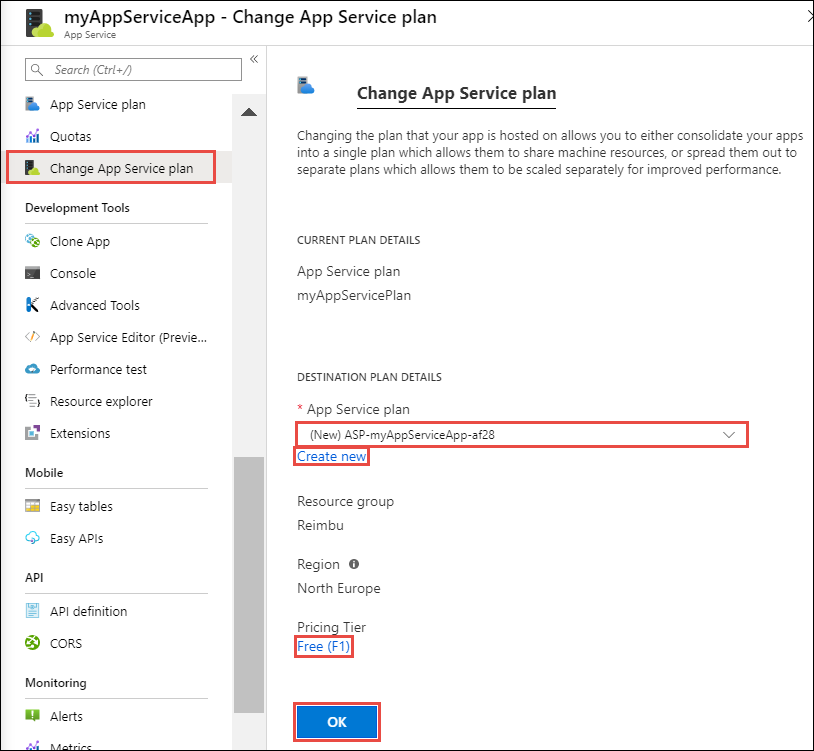
From the left menu, under App Service Plan, select Change App Service plan.

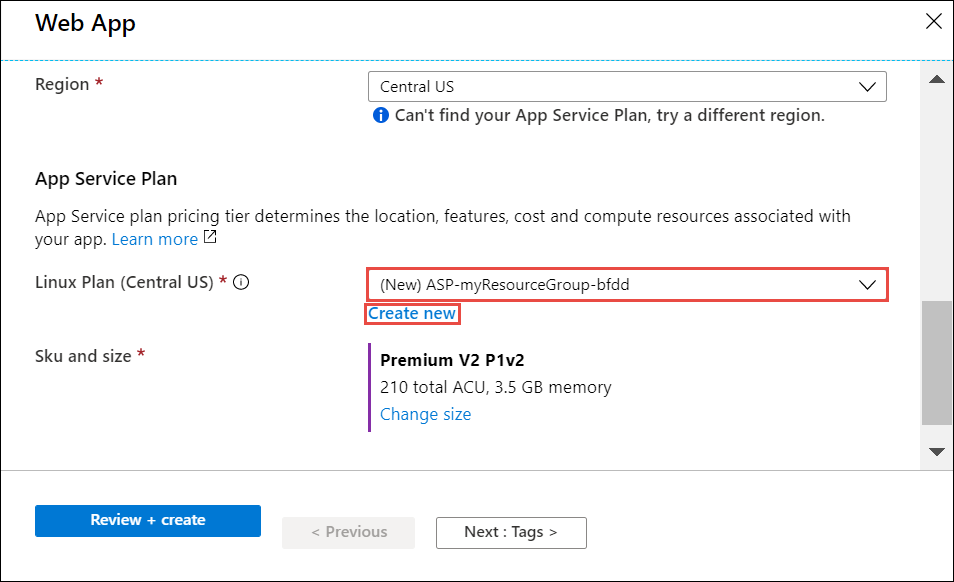
In the App Service plan dropdown, select an existing plan to move the app to. The dropdown shows only plans that are in the same resource group and geographical region as the current App Service plan. If no such plan exists, it lets you create a plan by default. You can also create a new plan manually by selecting Create new.
If you create a plan, you can select the pricing tier of the new plan. In Pricing Tier, select the existing tier to change it.
Important
If you're moving an app from a higher-tiered plan to a lower-tiered plan, such as from D1 to F1, the app might lose certain capabilities in the target plan. For example, if your app uses TLS/SSL certificates, you might see this error message:
Cannot update the site with hostname '<app_name>' because its current TLS/SSL configuration 'SNI based SSL enabled' is not allowed in the target compute mode. Allowed TLS/SSL configuration is 'Disabled'.When finished, select OK.
Move an app to a different region
The region in which your app runs is the region of the App Service plan it's in. However, you can't change an App Service plan's region. If you want to run your app in a different region, one alternative is app cloning. Cloning makes a copy of your app in a new or existing App Service plan in any region.
You can find Clone App in the Development Tools section of the menu.
Important
Cloning has some limitations. You can read about them in Azure App Service App cloning.
Scale an App Service plan
To scale up an App Service plan's pricing tier, see Scale up an app in Azure.
To scale out an app's instance count, see Scale instance count manually or automatically.
Delete an App Service plan
To avoid unexpected charges, when you delete the last app in an App Service plan, App Service also deletes the plan by default. If you choose to keep the plan instead, you should change the plan to the Free tier so you're not charged.
Important
App Service plans that have no apps associated with them still incur charges because they continue to reserve the configured VM instances.