Orchestration workflow allows you to create projects that connect your applications to:
- Custom Language Understanding
- Question Answering
- LUIS
Prerequisites
Before you start using orchestration workflow, you will need several things:
Create a Language resource
Before you start using orchestration workflow, you will need an Azure AI Language resource.
Note
- You need to have an owner role assigned on the resource group to create a Language resource.
- If you are planning to use question answering, you have to enable question answering in resource creation
Create a new resource from the Azure portal
Go to the Azure portal to create a new Azure AI Language resource.
Select Continue to create your resource
Create a Language resource with following details.
Create a new Language resource from Language Studio
If it's your first time logging in, you'll see a window in Language Studio that will let you choose an existing Language resource or create a new one. You can also create a resource by clicking the settings icon in the top-right corner, selecting Resources, then clicking Create a new resource.
Create a Language resource with following details.
| Instance detail |
Required value |
| Azure subscription |
Your Azure subscription |
| Azure resource group |
Your Azure resource group |
| Azure resource name |
Your Azure resource name |
| Location |
Learn more about supported regions. |
| Pricing tier |
Learn more about supported pricing tiers. |
Important
- Make sure to enable Managed Identity when you create a Language resource.
- Read and confirm Responsible AI notice
Sign in to Language Studio
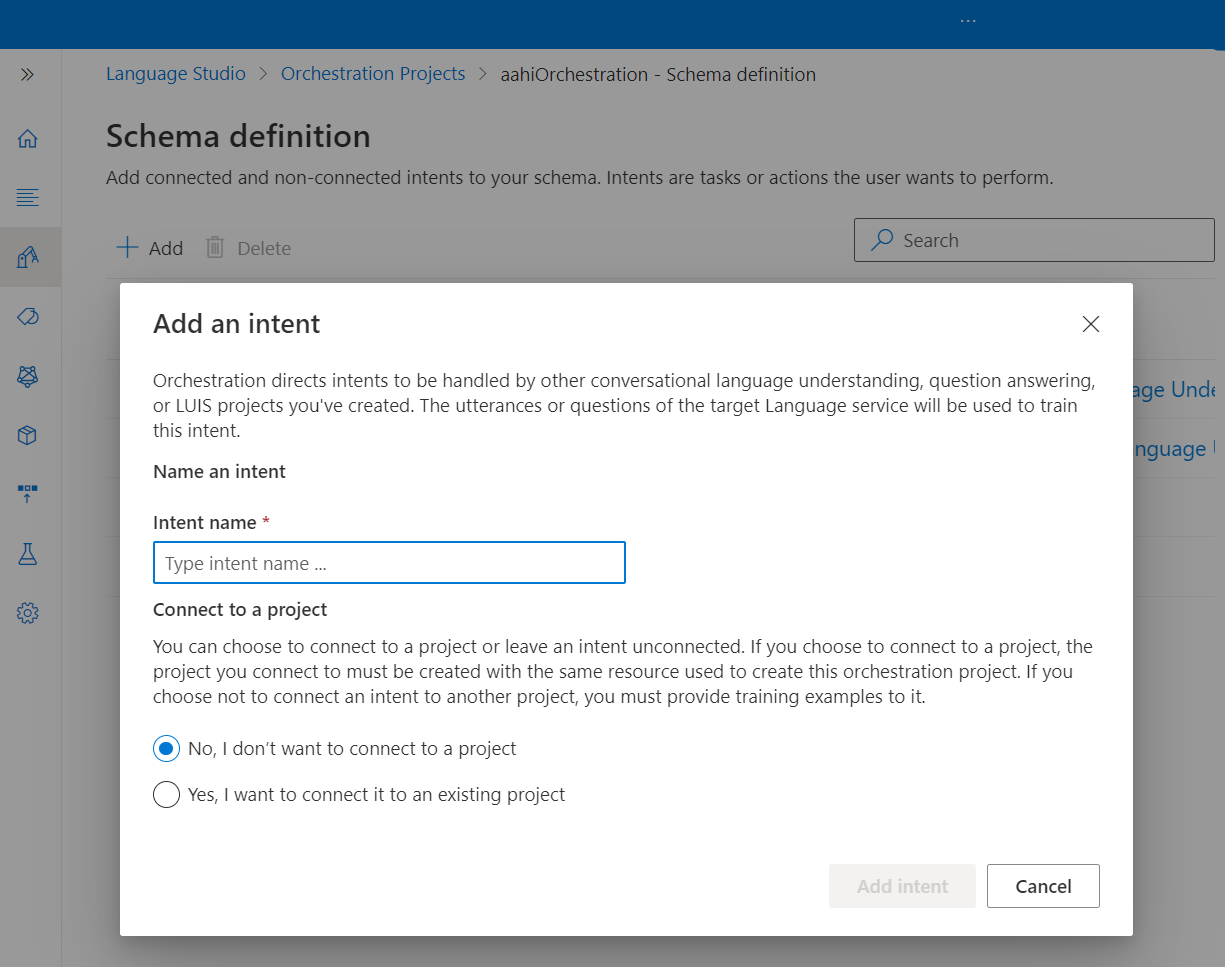
To create a new intent, select +Add button and start by giving your intent a name. You will see two options, to connect to a project or not. You can connect to (LUIS, question answering, or Conversational Language Understanding) projects, or choose the no option.
Create an orchestration workflow project
Once you have a Language resource created, create an orchestration workflow project.
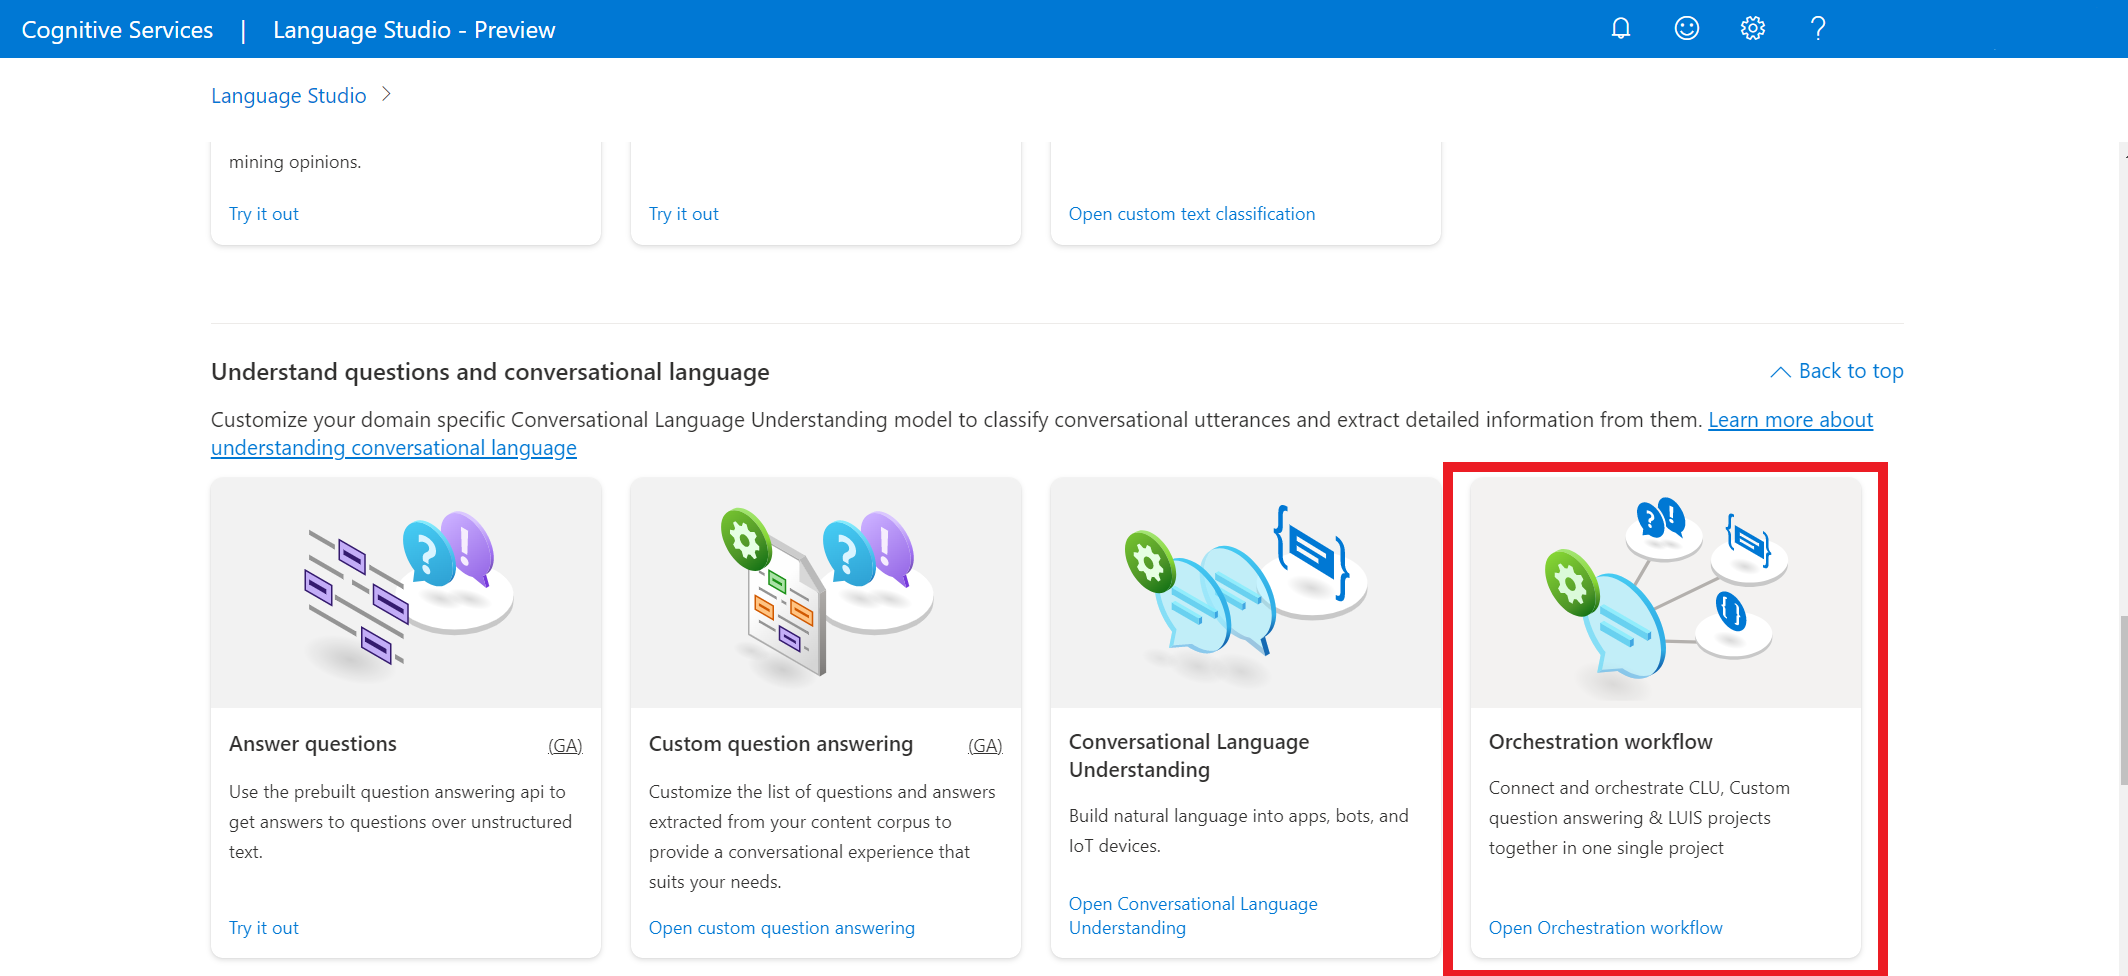
In Language Studio, find the section labeled Understand questions and conversational language and select Orchestration Workflow.
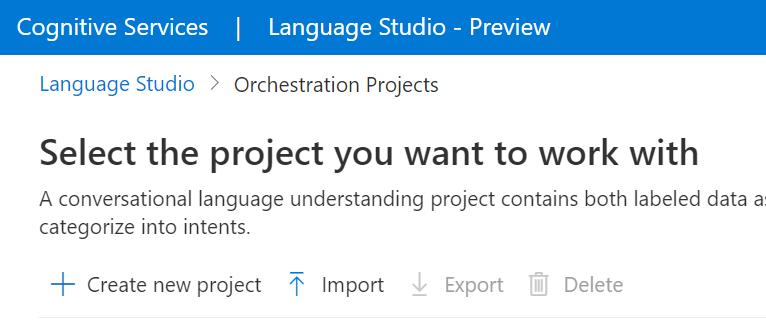
This will bring you to the Orchestration workflow project page. Select Create new project. To create a project, you will need to provide the following details:
| Value |
Description |
| Name |
A name for your project. |
| Description |
Optional project description. |
| Utterances primary language |
The primary language of your project. Your training data should primarily be in this language. |
Once you're done, select Next and review the details. Select create project to complete the process. You should now see the Build Schema screen in your project.
Submit a PATCH request using the following URL, headers, and JSON body to create a new project.
Request URL
Use the following URL when creating your API request. Replace the placeholder values below with your own values.
{ENDPOINT}/language/authoring/analyze-conversations/projects/{PROJECT-NAME}?api-version={API-VERSION}
| Placeholder |
Value |
Example |
{ENDPOINT} |
The endpoint for authenticating your API request. |
https://<your-custom-subdomain>.cognitiveservices.azure.cn |
{PROJECT-NAME} |
The name for your project. This value is case-sensitive. |
myProject |
{API-VERSION} |
The version of the API you are calling. |
2023-04-01 |
Use the following header to authenticate your request.
| Key |
Value |
Ocp-Apim-Subscription-Key |
The key to your resource. Used for authenticating your API requests. |
Body
Use the following sample JSON as your body.
{
  "projectName": "{PROJECT-NAME}",
  "language": "{LANGUAGE-CODE}",
  "projectKind": "Orchestration",
  "description": "Project description"
 }
| Key |
Placeholder |
Value |
Example |
projectName |
{PROJECT-NAME} |
The name of your project. This value is case-sensitive. |
EmailApp |
language |
{LANGUAGE-CODE} |
A string specifying the language code for the utterances used in your project. If your project is a multilingual project, choose the language code of the majority of the utterances. |
en-us |
Import an orchestration workflow project
You can export an orchestration workflow project as a JSON file at any time by going to the orchestration workflow projects page, selecting a project, and from the top menu, clicking on Export.
That project can be reimported as a new project. If you import a project with the exact same name, it replaces the project's data with the newly imported project's data.
To import a project, select the arrow button next to Create a new project and select Import, then select the JSON file.
You can import an orchestration workflow JSON into the service
Submit a POST request using the following URL, headers, and JSON body to import your project.
Request URL
Use the following URL when creating your API request. Replace the placeholder values below with your own values.
{ENDPOINT}/language/authoring/analyze-conversations/projects/{PROJECT-NAME}/:import?api-version={API-VERSION}
| Placeholder |
Value |
Example |
{ENDPOINT} |
The endpoint for authenticating your API request. |
https://<your-custom-subdomain>.cognitiveservices.azure.cn |
{PROJECT-NAME} |
The name for your project. This value is case-sensitive. |
myProject |
{API-VERSION} |
The version of the API you are calling. |
2023-04-01 |
Use the following header to authenticate your request.
| Key |
Value |
Ocp-Apim-Subscription-Key |
The key to your resource. Used for authenticating your API requests. |
Body
Note
Each intent should only be of one type only from (CLU,LUIS and qna)
Use the following sample JSON as your body.
{
  "projectFileVersion": "{API-VERSION}",
  "stringIndexType": "Utf16CodeUnit",
  "metadata": {
    "projectKind": "Orchestration",
    "settings": {
      "confidenceThreshold": 0
    },
    "projectName": "{PROJECT-NAME}",
    "description": "Project description",
    "language": "{LANGUAGE-CODE}"
  },
  "assets": {
    "projectKind": "Orchestration",
    "intents": [
      {
        "category": "string",
        "orchestration": {
          "kind": "luis",
          "luisOrchestration": {
            "appId": "00001111-aaaa-2222-bbbb-3333cccc4444",
            "appVersion": "string",
            "slotName": "string"
          },
          "cluOrchestration": {
            "projectName": "string",
            "deploymentName": "string"
          },
          "qnaOrchestration": {
            "projectName": "string"
          }
        }
      }
    ],
    "utterances": [
      {
        "text": "Trying orchestration",
        "language": "{LANGUAGE-CODE}",
        "intent": "string"
      }
    ]
  }
}
| Key |
Placeholder |
Value |
Example |
api-version |
{API-VERSION} |
The version of the API you are calling. The version used here must be the same API version in the URL. |
2022-03-01-preview |
projectName |
{PROJECT-NAME} |
The name of your project. This value is case-sensitive. |
EmailApp |
language |
{LANGUAGE-CODE} |
A string specifying the language code for the utterances used in your project. If your project is a multilingual project, choose the language code of the majority of the utterances. |
en-us |
Export project
You can export an orchestration workflow project as a JSON file at any time by going to the orchestration workflow projects page, selecting a project, and pressing Export.
You can export an orchestration workflow project as a JSON file at any time.
Create a POST request using the following URL, headers, and JSON body to export your project.
Request URL
Use the following URL when creating your API request. Replace the placeholder values below with your own values.
{ENDPOINT}/language/authoring/analyze-conversations/projects/{PROJECT-NAME}/:export?stringIndexType=Utf16CodeUnit&api-version={API-VERSION}
| Placeholder |
Value |
Example |
{ENDPOINT} |
The endpoint for authenticating your API request. |
https://<your-custom-subdomain>.cognitiveservices.azure.cn |
{PROJECT-NAME} |
The name for your project. This value is case-sensitive. |
EmailApp |
{API-VERSION} |
The version of the API you are calling. |
2023-04-01 |
Use the following header to authenticate your request.
| Key |
Value |
Ocp-Apim-Subscription-Key |
The key to your resource. Used for authenticating your API requests. |
Once you send your API request, you will receive a 202 response indicating success. In the response headers, extract the operation-location value. It will be formatted like this:
{ENDPOINT}/language/authoring/analyze-conversations/projects/{PROJECT-NAME}/jobs/{JOB-ID}?api-version={API-VERSION}
JOB-ID is used to identify your request, since this operation is asynchronous. Use this URL to get the exported project JSON, using the same authentication method.
Get orchestration project details
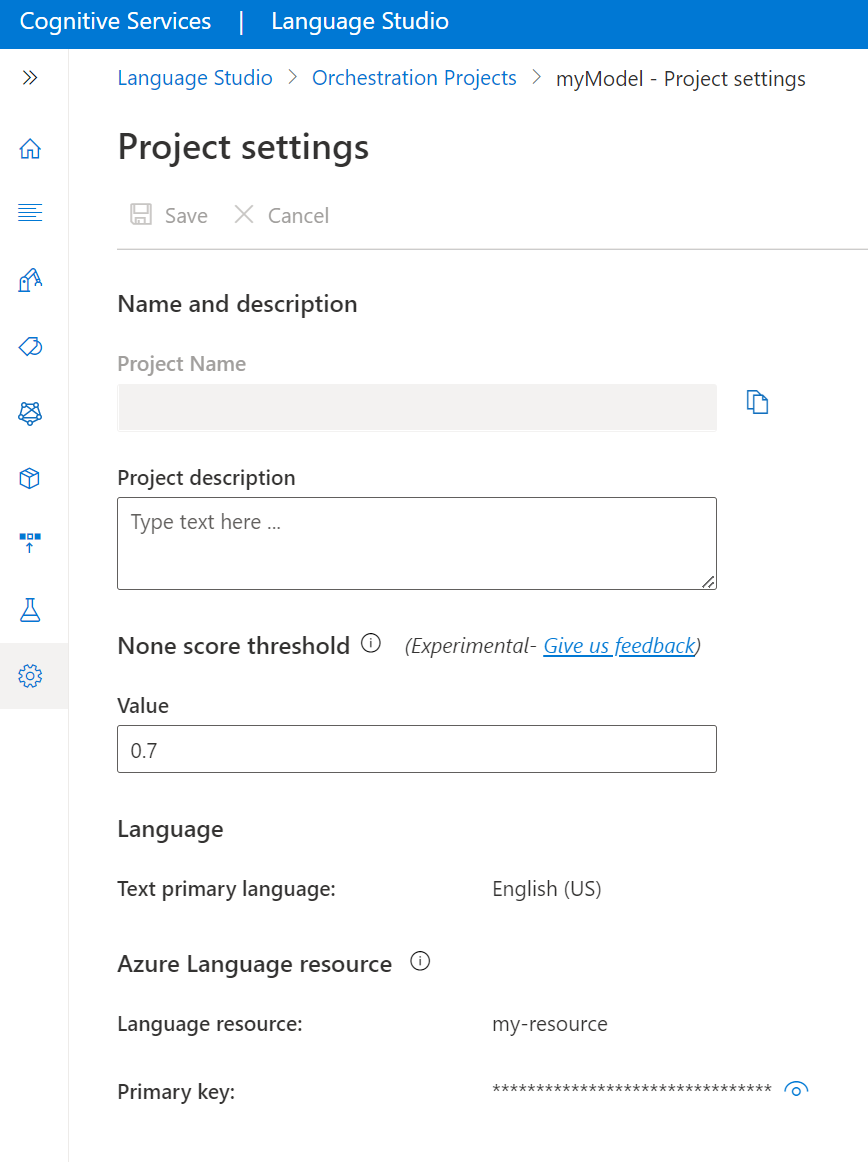
Go to your project settings page in Language Studio.
You can see project details.
In this page you can update project description.
You can also retrieve your resource primary key from this page.
To get an orchestration workflow project's details, submit a GET request using the following URL and headers. Replace the placeholder values with your own values.
{ENDPOINT}/language/authoring/analyze-conversations/projects/{PROJECT-NAME}?api-version={API-VERSION}
| Placeholder |
Value |
Example |
{ENDPOINT} |
The endpoint for authenticating your API request. |
https://<your-custom-subdomain>.cognitiveservices.azure.cn |
{PROJECT-NAME} |
The name for your project. This value is case-sensitive. |
myProject |
{API-VERSION} |
The version of the API you are calling. |
2023-04-01 |
Use the following header to authenticate your request.
| Key |
Value |
Ocp-Apim-Subscription-Key |
The key to your resource. Used for authenticating your API requests. |
Response Body
Once you send the request, you will get the following response.
{
  "createdDateTime": "2022-04-18T13:53:03Z",
  "lastModifiedDateTime": "2022-04-18T13:53:03Z",
  "lastTrainedDateTime": "2022-04-18T14:14:28Z",
  "lastDeployedDateTime": "2022-04-18T14:49:01Z",
  "projectKind": "Orchestration",
  "projectName": "{PROJECT-NAME}",
  "description": "This is a sample orchestration project.",
  "language": "{LANGUAGE-CODE}"
}
Once you send your API request, you will receive a 200 response indicating success and JSON response body with your project details.
Delete project
When you don't need your project anymore, you can delete your project using Language Studio. Select Projects from the left navigation menu, select the project you want to delete, and then select Delete from the top menu.
When you don't need your project anymore, you can delete your project using the APIs.
Create a DELETE request using the following URL, headers, and JSON body to delete a conversational language understanding project.
Request URL
{ENDPOINT}/language/authoring/analyze-conversations/projects/{PROJECT-NAME}?api-version={API-VERSION}
| Placeholder |
Value |
Example |
{ENDPOINT} |
The endpoint for authenticating your API request. |
https://<your-custom-subdomain>.cognitiveservices.azure.cn |
{PROJECT-NAME} |
The name for your project. This value is case-sensitive. |
myProject |
{API-VERSION} |
The version of the API you are calling. |
2023-04-01 |
Use the following header to authenticate your request.
| Key |
Value |
Ocp-Apim-Subscription-Key |
The key to your resource. Used for authenticating your API requests. |
Once you send your API request, you will receive a 202 response indicating success, which means your project has been deleted.
Next Steps
Build schema


